Showing posts with label Momento. Show all posts

Friday, April 18, 2014

Get Well Soon Inspired by the Lawn Fawn Blog

I had a headache (darn weather change) and yet I needed a card for a co-worker who just had surgery.  So, I scoped out the Lawn Fawn blog where I fell in love with this cute turtle card.  It was the perfect opportunity to break out my On the Mend set (with a few extra stamps from Critters in the 'Burbs, Sunny Skies and Bon Voyage) plus my new Grassy Border die.  After stamping out my selections with the Momento Tuxedo Black ink and coloring with my Copics (love them), I cut out my grass with some green paper and the sky from some blue paper in my stash.  I added some clouds with Hero Arts Unicorn white ink and the cloud from the Bon Voyage set.  I added some Hemptique baker's twine and a button from my stash, but it still seemed to need something.  So I cut out a black mat to bring it all together and adhered it to my card base.  Simple, easy and quick to let me crawl off to bed and see if I can sleep off this headache.

Thursday, April 17, 2014

Soy Happy for You Card

I needed a card to congratulate a friend on his new job.  I was flipped through my stamps and decided I had to use the Let's Roll set from Lawn Fawn.  I have loved this set since I first saw it in the preview pictures from CHA.  It's so cute and punny.  I broke out my Momento ink and new Copics (thanks again Mom) and colored up a storm.  Then it was just a matter of using the dies and finding some cute paper.  I had some paper left in the 6x6 Print Shop paper pad from Studio Calico that I received as part of a Citrus Twist project life kit.  I thought it would work well for the background and yet leave the card suitably masculine.  I decided that the puffy star stackables from Lawn Fawn would add a nice highlight, especially after I edged them in Wink of Stella, too bad it doesn't really show in the cards.

Thursday, January 23, 2014

Inspired by Simon Says Stamp and Freshly Made Sketches #120...

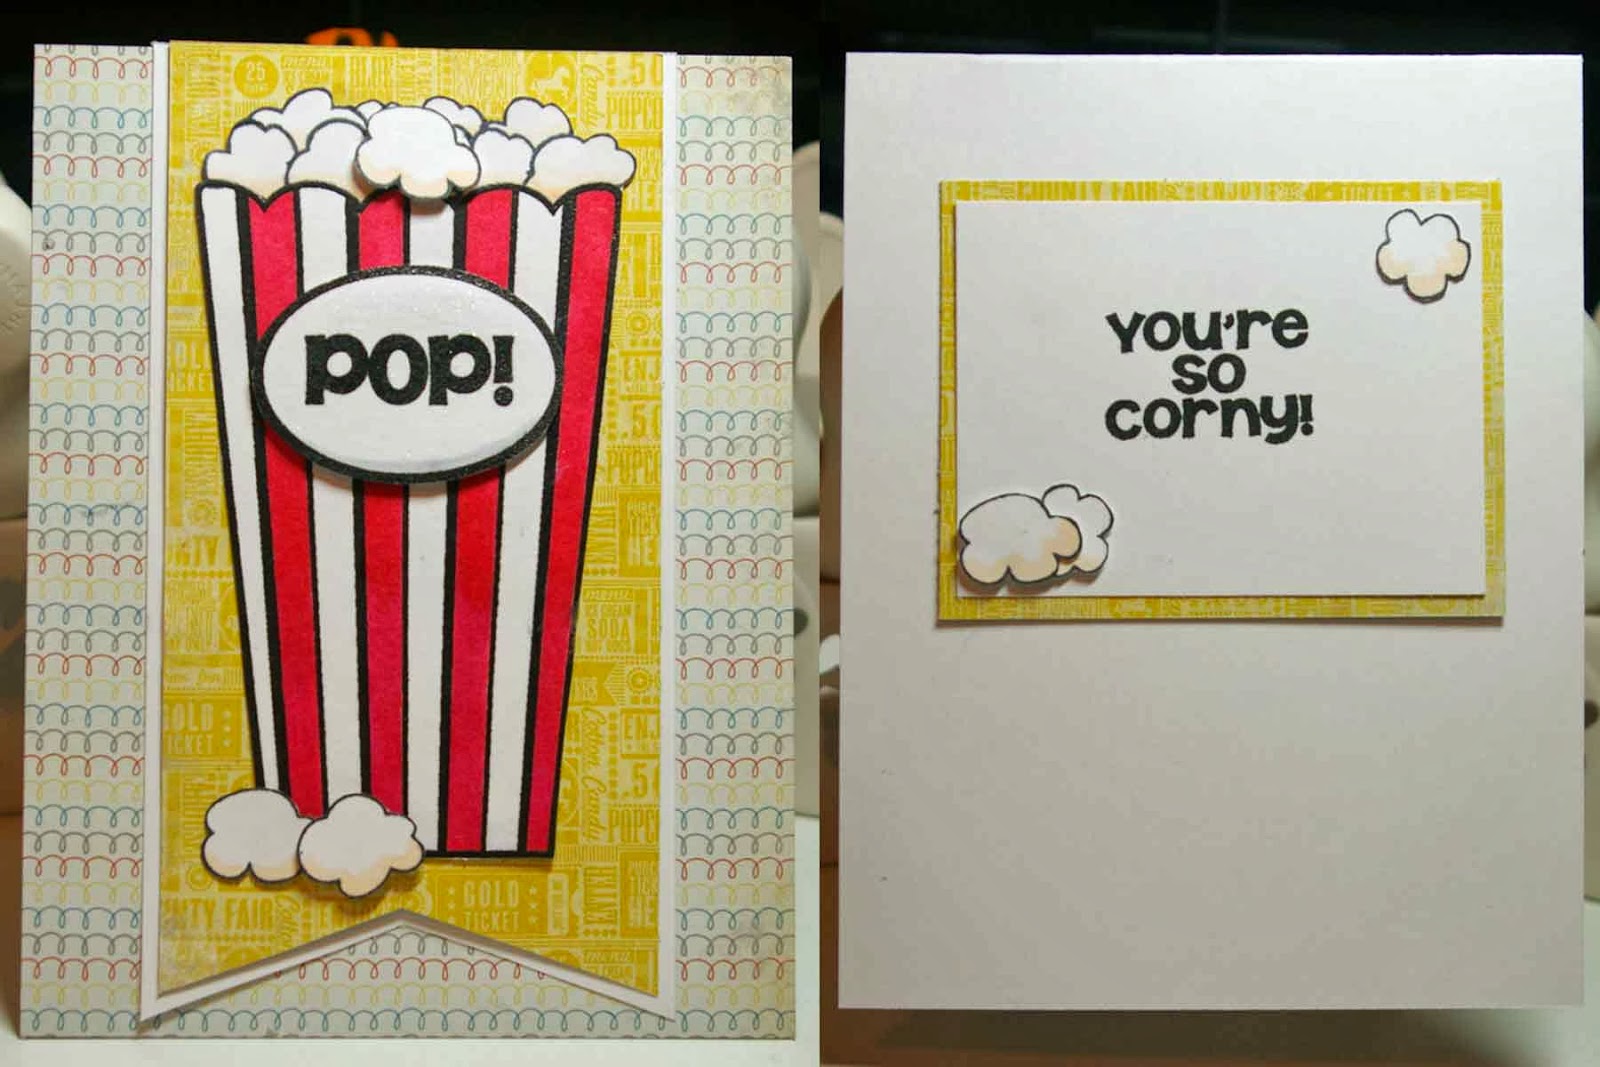
I was trolling through my blogs looking for inspiration that would encourage me to overcome this lingering headache (at times migraine) of the last couple of days and do something in my craft room when I came across the new Simon Says Stamp challenge on their blog to make something funny.  Well, I have a lot of punny stamps including this month's Stamps of Life set, popcorn2stamp, which has been sitting on my craft desk waiting to be stamped on something.

So I set about stamping the popcorn container with Momento ink on some white card stock and colored it with my Spectrum Noir pens.  I masked the container off and stamped some popcorn on the top (after cutting a bunch of popcorn masks too).  Then I wasn't quite sure what to do with it.  I didn't really have any creative mojo so I pulled up the sketch for Freshly Made Sketches to see if it gave me any ideas and decided I could make it work. 

So I flipped through my 6x6 paper pads until I found some paper I liked in the Dilly Dally pad by My Mind's Eye.  Then it was just a matter of trimming my banner, gluing the background paper to my card stock, adding my banner and layering my popcorn box and some individual popcorn.  I used a few pop dots for some dimension and then decided the label needed a bit of sparkle with some Wink of Stella. 

For the inside, I stamped my sentiment in VersaFine Black Onyx and then matted it on a scrap of the paper from the banner and added a few more pops of corn. 


Sunday, January 19, 2014

Good Fortune Card

I needed a quick card of encouragement for a co-worker and, quite frankly, I was a little too tired to work on one.  I started looking at some inspiration on Google Images thinking I might do something with Lawn Fawn's Summertime Charm set.   But the Good Fortune set popped into my mind and I found myself pulling out before I really had even given it any conscious thought.  I knew I had previously cut and colored some extra pieces and they were perfect for my need for a quick card tonight.  I only had to cut the "fortunes" for the cookie because I already had all the other pieces ready.  Then it was just a matter of layering the pieces on some plain white paper and finding the right colored paper to give the card some cheer. I was very drawn to this pattern from the Amy Tangerine 6x6 paper pad for Ready Set Go.  It was the perfect amount of color.  I added some to the inside and put my sentiment as if it's coming from the side of the card for a little visual interest.  This was a super simple card as I had so much pre-made, but I'm quite pleased with how it turned out. 

Sunday, January 5, 2014

I'm Back With a Birthday Card Inspired by Julie Davidson...

Life has been crazy and hectic and really I just haven't been myself lately.  But today I had some time in my craft room and I wasn't busy putting together December Daily or Christmas cards or tags for gifts or one of a million things lately that has taken over my life.  But I do have a couple of people with birthdays coming up that I needed cards for my stash is woefully depleted.  So today I made a new card, well actually two of the same card to get me through this card drought.

For this card, I took my inspiration from this card on Julie Davidson's blog.  I used the Lunar Lights set from Lawn Fawn along with the tag die from Winter Gifts (not just for winter at all) to stamp and cut out the focal tag of the card.  I used Versafine Ink in Onyx Black then set it with some clear embossing powder (I am so grateful to finally have a working heat gun again.  Mine died right before Christmas and with my shopping embargo, I was not allowed to buy a new one.  I got one for Christmas but it died the first day.  I'm beginning to think I wasn't supposed to have a heat gun anymore).  I colored the lanterns with Distress Ink and then sprayed them with some water to wash out the color a bit to more closely match the paper I had selected from the Party Day 6x6 pad from Crate Paper.  I fussy cut the lanterns then layered them on my tag and finished off the tag with some Hemptique baker's twine. 

I finished off the card by putting the patterned paper on a mat of solid blue that I had distressed with a little Black Soot Distress Ink and wrapped in the same Hemptique baker's twine.  I added the tag with some pop dots.

I inserted a panel on the inside with a sentiment from Inkadinkado's All Occasions stamp set, also heat embossed to match the front and set on a blue mat inked with a little Black Soot Distress Ink.  I then finished off the entire card with a bit of Wink of Stella on the lanterns and topped with some Glossy Accents. 

Tuesday, September 10, 2013

Shine Brightly Card

A co-worker has been tempted away from the fold and I wanted to give her a card to wish her well in her new job.  I didn't have any idea what I wanted to do, but I pulled out my Lawn Fawn stamps since they are in fact my current favorite.  I saw the Lunar Lights set and realized I hadn't used it yet.  So I did a Google Image search and found an adorable card on the My Paper Journey blog that used both the Lunar Lights and the Good Fortune set (a two-fer).  I knew it immediately it was the perfect choice for this situation.  It was a pretty simple card to make even though it was a bit time consuming.  I stamped and colored the little lanterns, the bird from Home Sweet Home that I decided to for a little something more and then fortune cookies using a mask to stack the stamping.  I had a little bleeding even though I used paper specially designed for alcohol markers and Momento ink.  I'm thinking that maybe I didn't let the ink dry quite enough.  Then I hand cut them all out.  I had stamped a fourth cookie as a stand alone one, colored it with my Spectrum Noir markers and was able to run that one through the die to cut it out super fast and easy. I also die cut the fortune papers and stamped them with Versafine ink.  Then I stamped the sentiment with Versamark and heat-embossed it with white Zing embossing powder.   Then it was just a matter of putting it all together.  I cut this cute starry red paper from the Homemade 6 Bean Soup 6x6 paper pad from Jillibean Soup down to fit on a card base from the Neutrals set from DCWV.  I then stamped my string for the lanterns and stamped the outline of the lanterns and the bird on the string.  Then I glued my cut out colored ones on top.  I added a touch of glitter with my Wink of Stella pen.  I then adhered my sentiment and the cookies.

For the inside, I added a small strip of the printed paper from the front and then layered my cookie with the full fortune.  It was so fun to make.

Thursday, July 18, 2013

Get Well Soon Card Featuring Blue Skies by Lawn Fawn

The second card I made for the hubster was a get well soon card for the employee involved in the accident last weekend.  (Sadly enough, the corner where the accident occurred is a pretty bad one.  A long time ago when I used to work down in that area, there was a colleague in my industry that was killed in an accident at that same corner).  I flipped through my card board on Pinterest and found a card using the Blue Skies stamp set by Lawn Fawn.  Lawn Fawn has quickly become my favorite brand of stamps because they are so stinking cute!  The card that inspired me was made by fifi100479 and featured on the Friday Flickr post on the Lawn Fawn blog.  It was so cute the way it was, I didn't make any changes at all.  I stamped the large balloon and cut it out, then colored it with my Spectrum Noir pens.  I had previously cut and stamped the banner.  I had stored it in the bag with the stamps when I didn't use in my previous playing with paper.  I cut a couple of the balloons and found some red glittery paper (I think from DCWV) in my stash to make the banner.  For the paper in the background, I found this perfect balloon paper in the A Perfect Summer 6x6 paper pad from Echo Park Paper.  Then all that was left was stamp my sentiment from that same set in some Versafine ink and round the corners using my new Fiskars corner rounder. 

Wednesday, July 17, 2013

Swallowtail Thank You Card

The hubster had to work on Saturday because they had a busy day of caterings.  He then went on to explain that it was even busier than expected because one of the employees was in a car accident while making a delivery.  He asked me to make a thank you card for a woman who witnessed the accident and stayed to get the employee some help.  I knew just the card I wanted to try.  I saw it on Julie Davidson's blog recently and was excited to try it out.  It's a cute card, but let me tell you, it took some work.  The outside was pretty easy.  Just stamp the Stampin' Up Swallowtail stamp with some Momento Espresso Truffle ink.  Then, I just colored my little heart out with some colored pencils.  I added the sentiment in the same ink using a stamp from Inkadinkado's Thank You Words set.  Then I mounted that on some pink paper from Authentique's Lively collection in the 6x6 pad. 

 
Then I had to set that aside to work on the card base and the inside.  I drew out the card base in Silhouette and added a quarter inch extra to the long side to give me room to sandwich the two sides.  I added a perforated line at the standard 4 1/4 inch to fold the extra 1/4 inch part easily.  Then I duplicated it and horizontally flipped it so I would have two mirrored sides to sandwich together so it looked like this:
 
I cut that out of card stock and used my bone folder to fold over the small flaps so that they would be inside the card.  I then cut seven large and small butterflies with three of each size flipped horizontally so they could be sandwiched together. The larger cuts worked with the large butterfly in the Teresa Collins Spring Fling stamp set. Once they were stamped, I sandwiched the mirrored stamps with a clear acetate strip between them so they would "float" and set them aside to dry.  I skipped the stamping on the smaller butterflies and made just two sandwiches of those with the acetate.  I did a little more coloring on the larger butterflies.  Then, using really sticky tape, I taped the acetate holding the butterfly sandwiches to the flap of one card and then stuck the two halves of the card together.  I punched two pink border strips from the same pink paper and glued those to either side of the flaps to hide them.  I used the extra butterflies on the card base. The card is super cute, but a lot of work!    


Thursday, July 4, 2013

New Stamp Set - Lawn Fawn's Blue Skies

I was so excited to get my order from Two Peas in a Bucket in the mail because I've had my eye on Lawn Fawn's Blue Skies stamp set for a long time.  I've been playing with watercolors today after being inspired by Jennifer Maguire's video I watched yesterday.   It's something I've never really tried before so I was kind of excited to try it.  I started by just painting and blending a palette of colors like she did in her video and then decided to try my hand at coloring something.  So, of course, my new stamp set immediately came to mind.  I painted the background in a mix of faded jeans and tumbled glass then layered on my stamps, using pop dots for the bigger balloon.  I added the sentiment and some clouds, but I still thought it needed something.  Fortunately a bit back, my dear husband waited in the car while I checked out a local scrapbook store in another town.  They had just gotten in these glitter brushes from Zig.  The pen says "Wink of Stella Brush" on it and it adds just the perfect touch of glitter to finish off the card, even though it's not really noticeable on the star, hearts and clouds in this card.  Overall, not bad for my first card using watercolor and my new stamp set.  I'm sure you'll be seeing more on the blog.  In the meantime, happy 4th of July every one.  I'm off to watch the fireworks from our bedroom window.

Thursday, June 20, 2013

Another I'm Wild About You Card

Continuing on having fun with the Critters on the Savannah set from Lawn Fawn, I just had to do a second run at a card I've previously scraplifted.  I just love this card that was on the Lawn Fawn blog back in April.  I previously tried my hand at it in this post before I ever owned this set so I was excited to try again now that I have the set. 

I had already cut out and colored this cut little rhino and the birds, so I decided to focus just on them, which meant that landscape seemed a bit of a better layout than the vertical.  I cut out a speech bubble with my Cameo so I could stamp the sentiment.  I just picked up the Trendsetter 6x6 pad by Fancy Pants on sale at Craft Warehouse and it was still sitting on my craft room desk, so I decided to use it for the background paper.  So then it was just a matter of a little Martha Stewart baker's twine and a few pop dots to finish it off. 

Wednesday, June 19, 2013

I'm Wild About You Card

I just loved the Critters on the Savannah set from Lawn Fawn.  It's just too cute!  So after seeing all the amazing cards that others had made with it, I picked it up.  So here's the first of the cute cards that I scraplifted from the Lawn Fawn blog.  This one they found on Flickr by SweetMaeBell. 

So I spent some time playing with my new Spectrum Noir pens to color the stamps. This was my first time that I've really had the chance to use them and it was so much fun!  To finish it off, I played with my Mustard Seed and Wild Honey Distress Inks to make the background color.  I also added some Black Soot Distress Ink to the background I embossed with the Animal Print Sizzix embossing folder.  Then it was just a matter to put it all together and finish it off with some Hemptique twine.  Super cute and fun!

The hubby will find this card today as I'm off to DC for a quick meeting and he'll be holding down the fort at home with the fur babies. 

Friday, June 14, 2013

Happy Birthday Card Inspired by the Artistic Avenger

Last week was a week filled with birthdays and I had tons of fun making cards.  For this card for my cousin's husband, I was completely inspired by the Artistic Avenger.  I simply loved this card.  I loved the colors and style.  For my version, I wanted to a little more masculine so I went right to the Swagger collection from Fancy Pants.  I really love this paper pad for masculine cards.  The brown background and the candles are all from the Swagger paper.  I used some of the Snap line from Simple Stories for the centers of the flame and the yellow paper from the Park Bench pad from Fancy Pants that was on my desk from the last card for the base of the flame.  The sentiment is from Fiskars and I stamped it with Momento Espresso Truffle on some twill ribbon in my stash.  I just love how this card turned out.  Nice and masculine.

Thursday, June 13, 2013

Happy Birthday Card Inspired by Rocky Mountain Papercrafts

My sister-in-law's birthday was last week so, of course, I needed to make her a cute card.  I was flipping through a Pinterest board when this oh so cute card by Allisa at Rocky Mountain Papercrafts caught my eye.  I knew it was the perfect one.  So I flipped through my 6x6 paper pads and decided that Jillibean Soup's Apple Cheddar Soup was the right one for this card.  I choose the wood grained paper and the little flowers.  I then teamed them up with some plain brown card stock as a mat, some plain cream card stock for the sentiment and cream card base.  I couldn't find the right color to mat the flower, but then I found the perfect paper for that in my Fancy Pants Park Bench 6x6 pad.  I cut a flower with my Cameo and made a shadow for it.  Once I had it all assembled, I stamped my sentiment in Momento Espresso Truffle in using Technique Tuesday's Swanky Sentiments and stamped a flourish in Momento Toffee Crunch ink using a flourish from the Teresa Collins Spring Fling stamps.  It still needed a little something, so I dug a blingy brad from my stash and added a few Darice gems.  That finished it off nicely.

Tuesday, June 11, 2013

Congratulations Grad

I have one last graduation card to share.  My niece graduated from grade school last week and I wanted to do something to make it seem a little special for her.  I found this great card on Pinterest.  The original source comes from the Stampin' Connection, which I don't have access to so I can't share it. 

The card itself was super easy to put together.  I simply stamped the graduation cap from my TPC Studio's Graduation set on some blue paper using Momento black ink. I cut it out and then stamped the word "Congratulations" from my Cloud 9 Design Wedding set on some white card stock using StazOn ink in midnight blue.  I then cut out the word grad using the Aharoni font on my Silhouette using some Best Occasions glitter paper I've had for years.  I finished the card of with a little yellow cardstock from DCWV's Pastel Mat Stack and some blue cardstock from my stash.

Friday, June 7, 2013

A Graduation Card Inspired by Doodlebug Design

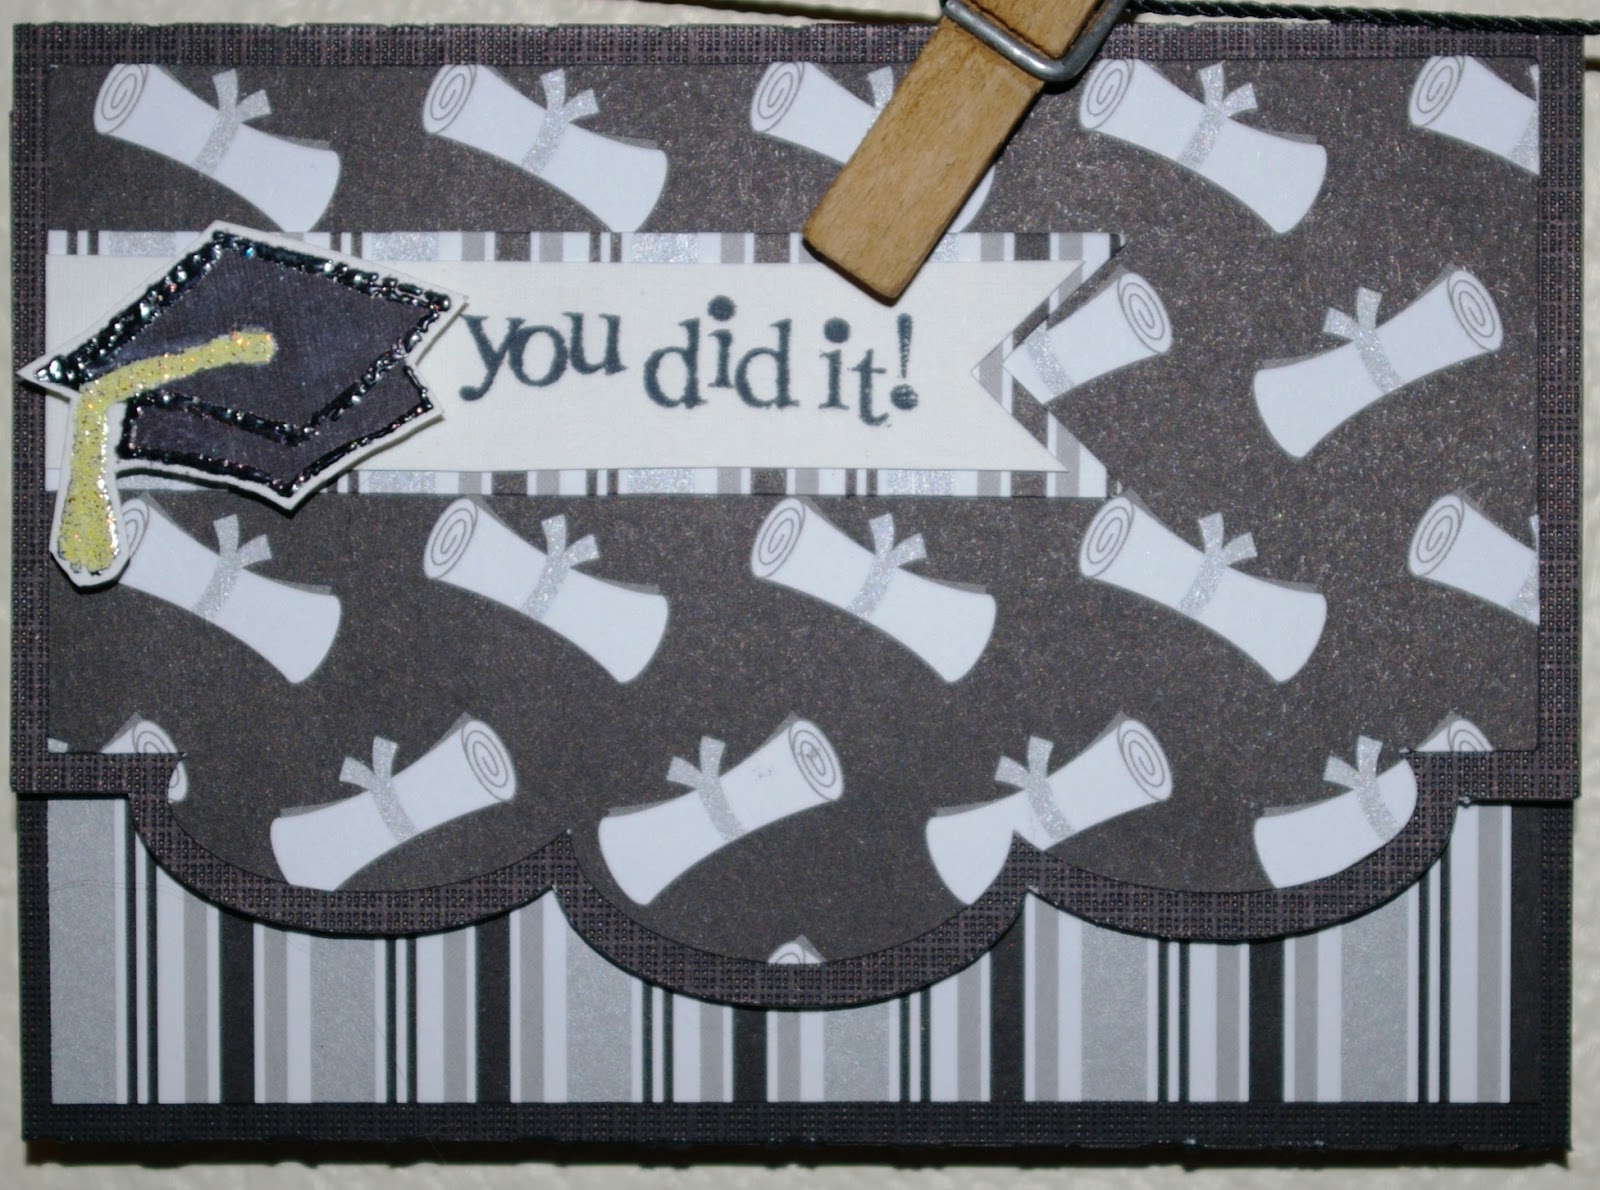
I was trolling Craft Warehouse for supplies and found this great graduation paper from Doodlebug Design.  Knowing that I was going to need a few graduation cards this year, I bought a sheet of the paper called Cap and Gown.  I then started surfing my Pinterest board with card inspiration ideas and found that I had actually pinned some ideas from Doodlebug Design's blog.  Once I saw this cute money holder card, I knew what I was going to be trying my hand at.  I found a card I had in my Silhouette designs (3 scallops edge card - although I could not find in the store today when I was looking for the design number).  I thought it was the perfect base.  I then cut out the card base out of black card stock and cut the Doodlebug paper for the top of the card.  I stamped the cap out of my TPC Studio Graduation set and embossed it in black and then the tassel in yellow.  I colored the cap in with some Spectrum Noir pens to finish it off.  The sentiment was stamp with my new Momento Brilliance ink on a sentiment from the All Occasions set from the Inkadinkado and finished it off perfectly.

Thursday, June 6, 2013

Another Birthday Card Inspired by the Technique Tuesday Blog

Since I my last try at the card inspired by Teri Anderson's card from the Technique Tuesday blog didn't turn out quite like what I originally had in mind, I thought I would give it another try.  This time, I really focused on the banner and the card came together very quickly.  I used some washi tape from my ever growing pile to create little pennants for the banner.  I strung them on some Martha Stewart baker's twine.  I hung the banner over some kraft card stock, backed it with white paper and used another DCWV card base from the Brights set.  Then, I stamped a sentiment from a set from Fiskars using Momento Espresso Truffle ink.  I still thought the card needed a little something so I added some Studio Calico veneer stars.  The Glossy Accents I used to glue them down were a little messy so I'm definitely going to have to work on my skills of attaching small embellishments.  But I do have to say that overall I really liked this card and I can't believe how one card can inspire so many looks. 

Wednesday, June 5, 2013

Happy Birthday Card Inspired by the Technique Tuesday Blog

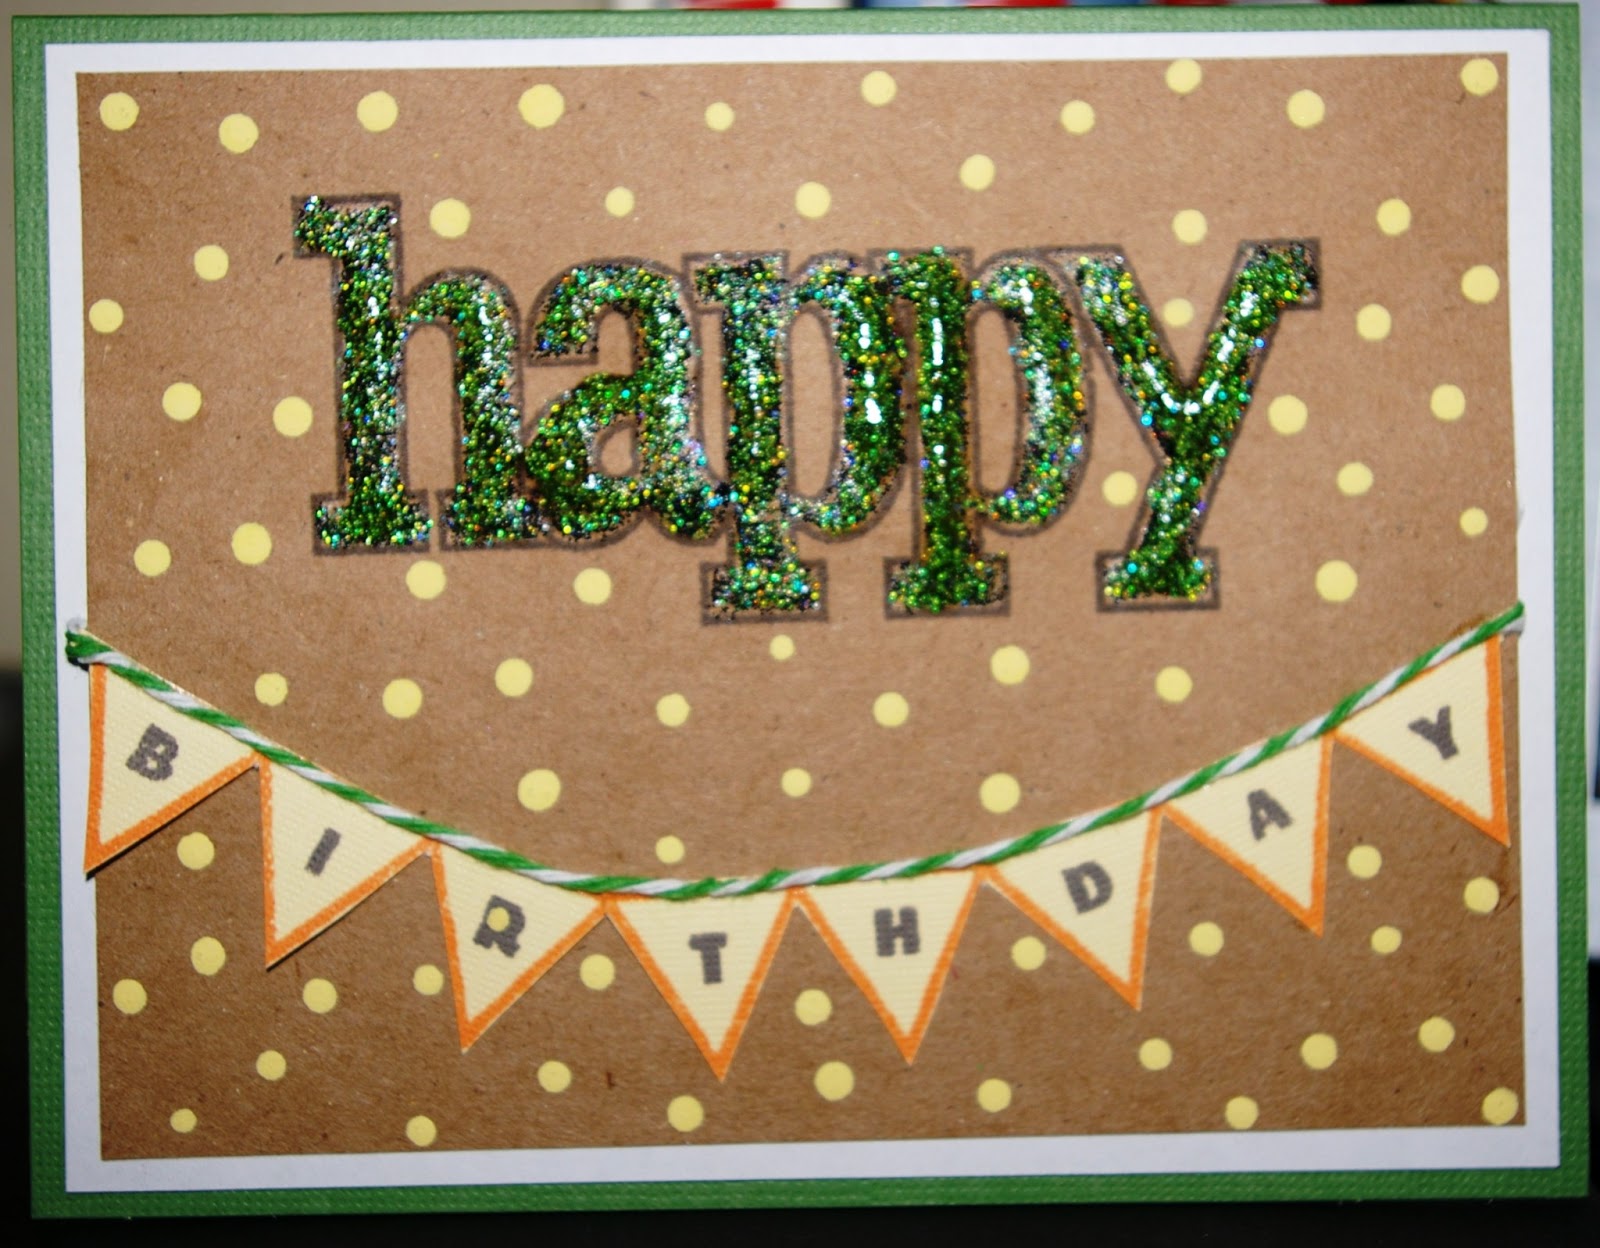
I loved a beautiful card I saw by Teri Anderson on the Technique Tuesday blog.  I loved the banners and the simplicity of the card.  I had this idea of making it my own using a clear stamp set I've had forever and can longer remember who the manufacturer is, but it has this very large "happy" stamp and smaller word stamps to coordinate.  I thought I would use the happy to coordinate with the banners.  As I played around with different ideas, I finally decided to try the Stampin' Up Designer Typeset stamp set I bought a while back when they had the free shipping.  I stamped the banner with some Momento Tangelo ink on some yellow card stock from the DCWV Pastel mat stack.  I then filled in the letters and stamped the happy with Moment Espresso Truffle ink.  I mounted the kraft card stock on white and then a base card from the DCWV Brights box of cards. 

It definitely still needed something.  I used a spare bit of baker's twine I had on my desk that was left over from something I was sent.  I glued it to the top of the banner.  I then took my sister's suggestion to add some polka dots.  I didn't have the right color of paint, so I mixed a little yellow and antique white Apple Barrel acrylic paints together until I had a good shade of yellow to coordinate with the banner.  I then filled in the happy with some green glitter glue from Studio G and realized I actually was starting to really like the card.

Tuesday, June 4, 2013

Happy Birthday Card Inspired by the Paper Players Challenge

I was really inspired by Nance Leedy's card from the Paper Players Challenge #147.  I loved how she stamped the large sunflower over the card and through I would give it a try with the Swallowtail stamp from Stampin' Up.  I simply adore that stamp.  I used four colors of card stock from DCWV's Pastel stack:  white, yellow, blue and green.  Then I stamped the image using Momento's Toffee Crunch ink and colored it in with some colored pencils.  I resized a card from the 3x4 Life Cards by Lori Whitlock in the Silhouette store (Design ID #25178) to make it super tiny and stamped the sentiment from a set of stamps I bought from Boxer before they closed.  I then tied the tag using some Hemptique twine onto some sheer yellow ribbon. 

 
Isn't it funny how sometimes you finish a card and you know exactly what you would do differently?  The minute I saw this card sitting on the shelf across the craft room, I thought I should have swapped the blue and yellow.  They would be more impact if they were in the opposition positions.