

Showing posts with label Stampin' Up. Show all posts
Showing posts with label Stampin' Up. Show all posts
Wednesday, June 4, 2014
Loads of Thanks
I wasn't sure I would make it into my craft room tonight. I'm fighting a bit of a sinus headache and I really just thought about crawling in bed, but it's Game 1 of the Stanley Cup Playoffs! How could I sleep through that? In fact, I have to thank those guys because in between periods (and overtime!) I played around in my craft room because I needed a thank you card. I pulled out a Newton's Nook stamp set called Wagon of Wishes that I think is just adorable and stamped out the wagon with the apples. I played with my copics trying to color the apples to match the apples that grow on the tree in our backyard. It was kind of hard to get that green, yellow with a little red combo, but I'm pretty happy with how it turned out. I was a little stumped for a layout for the card, but then I remembered that I loved the Mojo Monday layout and I haven't participated in that for a while so it seemed like the perfect time to try my hand at it. I've also been playing around with trying the current Inky Paws challenge which was to use wood, metal or cork on a card. So I started by breaking out the Hardwood stamp I bought during the Stampin' Up free shipping promotion a while back. I used Vintage Photo Distress Ink on some watercolor paper then used a damp brush to spread the color a little. To be honest, I wasn't sure I liked it and I really wasn't sure I liked it with the image I had colored, but I kept plugging along. I broke out my Lawn Fawn Circle Stackables and Scalloped Circle Stackables to set off the cute sentiment from the Newton's Nook set and then remembered how much I liked the tag stamp and die from the Lawn Fawn Winter Gifts that I used on a card a week or so ago. So the last piece I wasn't sure about was the strip on the right. I knew that a red strip would help tie it all together, but plain red wasn't working for me. I pulled out a couple of embossing folders. Wood grain didn't look quite right and I ended up debating between a dotted texture and this Quick Kutz Zig Zag folder. Fortunately, I have a great resource when I can't decide: my husband! So then it was just some glue, a couple of chomps of the corners of some pieces and a few wood veneer hearts to balance what seemed to be a bit of a plain spot in the corner and it was done. I actually walked back out to the family room and commented to my husband that I wasn't really sure about the pieces going together but I loved how it turned out in the end. I'll be linking this up to both challenges, but come play with me because it's always more fun if everyone plays. You have until Friday, June 6th for the Inky Paws challenge and until Sunday, June 8th for the Mojo Monday challenge.


Thursday, May 22, 2014
Happy Birthday - Inspired by Watercolor for Card Makers
Today's card features a background I made on the first day of class when I was so inspired by what I was learning that I just wanted to play. There was a fabulous class where the instructor mentioned circles. If you follow me on Instagram, Twitter or Facebook, you saw this picture (love the post-it note list of all the cards I need for coming up occasions in the background):

I was just having fun inking up circles in Distress Ink with no idea where the end product would be. There's something very freeing about just playing with ink. Well, today, I'm going to share with you where it ended after lots of circles, some water and some more water. The background was so colorful and really beautiful, it just made me smile so I decided to let it shine. I just stamped a quick sentiment from the Stampin' Up set I bought during their free shipping/retiring product promotion recently called Perfectly Penned. I used Versamark and some white embossing powder, then added a black mat on a white card base and a few clear sequins. I just love the result:

Wednesday, March 26, 2014
Another Newton's Nook Image
Today I have yet another card made with the Newton's Nook set called Newton's Birthday Bash. I used a design very similar to the one in yesterday's card. The images were stamped onto Neenah white cardstock using Tuxedo Black Momento Ink so I could color with my markers. For the card on the left, I used some markers from Stampin' Up (I wasn't really very happy with the outcome). For the card on the right, I used my new Copic markers. I liked the Copic markers much better for this process. I cut the finished images out using that same Lawn Fawn Stitched Journaling Card die. For the paper, I used two more sheets from the Crate Paper 6x6 Party Day pad cut down to an A2 side and wrapped with baker's twine. For the banners, I again couldn't find the right paper. This time I used a couple of Distress Ink ink pads and my blending tool to color them to go with the rest of the card. Then, I used that Lawn Fawn Bannerific stamp and die combined with the sentiment from Sophie's Sentiments.

Tuesday, January 21, 2014
Happy Birthday Card as Seen on Papercrafts
I was browsing through the blogs when I stumbled upon this adorable card using my favorite Stampin' Up stamp, Swallowtail, on the Papercrafts and Scrapbooking blog here. So while I watched the Seattle/49ers game yesterday, I made my own version. I stamped the butterfly in Versafine ink and heat embossed it with some clear embossing powder. I then colored in one with my Spectrum Noir markers and left the other black and white for the base. I then cut the black and white one down to fit a standard A2 card with a black mat and the colored version smaller. I then matted both of them on plain black card stock and layered them together. I stamped the sentiment from my Hero Arts All Occasions set in the Versafine on some vellum and heat embossed it with clear embossing powder to match. I ran the sentiment through my Xyron and adhered it across the bottom of the panel. Then all I had to was adhere the panel to my card base and I was done.
Looking back on it now, I kind of wish that I had made the colored panel a touch smaller. Well, maybe next time...

Looking back on it now, I kind of wish that I had made the colored panel a touch smaller. Well, maybe next time...
Saturday, October 12, 2013
Happy Birthday Card - Inspired by A Busy Llittle Craftee Bee
Today's card I gave to my aunt for her recent birthday (I'm a little late in getting it posted). I took the inspiration for this card from one I saw posted on A Busy Little Craftee Bee that you can see here.
The picture isn't the greatest because it was dark when I took the picture and every attempt I made to compensate for that made the stamping practically disappear. I did not have the oh so cute flower used in the inspiration piece from A Busy Little Craftee Bee, so I used one in my stash from the Heidi Grace Designs' Paradise stamp set. I used Stampin' Up's So Saffron ink. In person, it looks quite nice combined with the Hemptique baker's twine and the sentiment from Fiskars' How Many Candles set stamped in Versafine Ink. I finished it up with rounding the bottom corner with my We R Memory Keepers Corner Chomper.

The picture isn't the greatest because it was dark when I took the picture and every attempt I made to compensate for that made the stamping practically disappear. I did not have the oh so cute flower used in the inspiration piece from A Busy Little Craftee Bee, so I used one in my stash from the Heidi Grace Designs' Paradise stamp set. I used Stampin' Up's So Saffron ink. In person, it looks quite nice combined with the Hemptique baker's twine and the sentiment from Fiskars' How Many Candles set stamped in Versafine Ink. I finished it up with rounding the bottom corner with my We R Memory Keepers Corner Chomper.

Friday, September 13, 2013
Happy Birthday Card - Inspired by I Create and Freshly Made Sketches
A friend at work is celebrated acknowledged her birthday this week so I needed a card to celebrate acknowledge it. I turned to my lovely card layout board on Pinterest where I pin all the cards that I find in the blogs I read that I think I'll want to try my hand out or will inspire me. This wonderful card from Jen of I Create for the Freshly Made Sketches sketch #89 caught my attention. You can see the card here.
For my version, I changed it up from a square card to a A2 size. I stamped my rectangle of white linen card stock with some stamps from the Chocolate Chalet set from Cloud 9 Designs using Stampin' Up So Saffron ink. I then topped that with a sentiment from the Fiskars Happy Birthday set using Versafine Onyx Black ink. I cut little banners from some Jillibean Soup paper (yellow stripe) from the Southern Dumpling 6x6 pad and some Echo Park (yellow chevron) from the A Perfect Summer 6x6 pad.
I then layered the stamped paper on some black card stock, added the banners and then adhered it all to the kraft paper. I added the Hemptique baker's twine and cute white button from my stash. Then I was ready to at it to my A2 card base and call it cute!

For my version, I changed it up from a square card to a A2 size. I stamped my rectangle of white linen card stock with some stamps from the Chocolate Chalet set from Cloud 9 Designs using Stampin' Up So Saffron ink. I then topped that with a sentiment from the Fiskars Happy Birthday set using Versafine Onyx Black ink. I cut little banners from some Jillibean Soup paper (yellow stripe) from the Southern Dumpling 6x6 pad and some Echo Park (yellow chevron) from the A Perfect Summer 6x6 pad.
I then layered the stamped paper on some black card stock, added the banners and then adhered it all to the kraft paper. I added the Hemptique baker's twine and cute white button from my stash. Then I was ready to at it to my A2 card base and call it cute!

Monday, August 12, 2013
Fight Like a Girl - Inspired by Julie Davidson's Herringbone Faux Quilt Technique
I learned just before I left for Denver that another program manager in my office has cancer, which is just inconceivable considering there are only five of us, well four following the recent death of another co-worker. I wanted to make a card to let her know I'm pulling for her. Coincidentally while I was in Denver, the Stamps of Life released their new sets, including ribbon4cure. I had to call the hubster to give my my club code because I wanted the set right away and didn't want to wait to order it when I got home.

Strangely enough though, on Saturday I simply didn't feel like spending any time in my craft room. At first I thought it was the headache caused by the air pressure that led to Saturday's crazy thunder and lightning show. But yesterday, I realized that it went farther than that when the hubster and I both came up sick. I spent all day yesterday in bed watching a marathon of "Under the Dome." I even e-mailed in sick today because my throat was on fire and I was running a temp. But by 2 p.m., I had to get out of bed. I just could NOT lay there any longer, but I also found out that I have no energy to do anything else either. I managed to stumble up the street to the mail box. But by the time I got back (seriously the mail box is one house away) and sorted through the mail and unpacked the new Sodastream that arrived, I was exhausted. So then it was break time in the chair for more cuddling with Smoke and some crafty TV. That's where I saw the video by the Stamps of Life announcing the new set ribbon4cure that had arrived in the mail that I picked up earlier that day. From the video, I learned that all the profits of this stamp set go to the Susan Komen foundation and that the pink of the stamp is special for this limited release. Now that I had bit of a nap and some inspiring information about my new set, I went into my craft room and made this card based up a video showing the herringbone faux quilt technique posted by Julie Davidson today. I just used strips of the Lively 6x6 paper pad from Authentique to make the herringbone pattern. I matted it on another piece of paper from that pad and made the banner from a strip from that same pad. The sentiment from the new set was stamped on with Chocolate Chip Stampin' Up ink and then folded over to resemble a banner before I adhered it with pop dots.


Strangely enough though, on Saturday I simply didn't feel like spending any time in my craft room. At first I thought it was the headache caused by the air pressure that led to Saturday's crazy thunder and lightning show. But yesterday, I realized that it went farther than that when the hubster and I both came up sick. I spent all day yesterday in bed watching a marathon of "Under the Dome." I even e-mailed in sick today because my throat was on fire and I was running a temp. But by 2 p.m., I had to get out of bed. I just could NOT lay there any longer, but I also found out that I have no energy to do anything else either. I managed to stumble up the street to the mail box. But by the time I got back (seriously the mail box is one house away) and sorted through the mail and unpacked the new Sodastream that arrived, I was exhausted. So then it was break time in the chair for more cuddling with Smoke and some crafty TV. That's where I saw the video by the Stamps of Life announcing the new set ribbon4cure that had arrived in the mail that I picked up earlier that day. From the video, I learned that all the profits of this stamp set go to the Susan Komen foundation and that the pink of the stamp is special for this limited release. Now that I had bit of a nap and some inspiring information about my new set, I went into my craft room and made this card based up a video showing the herringbone faux quilt technique posted by Julie Davidson today. I just used strips of the Lively 6x6 paper pad from Authentique to make the herringbone pattern. I matted it on another piece of paper from that pad and made the banner from a strip from that same pad. The sentiment from the new set was stamped on with Chocolate Chip Stampin' Up ink and then folded over to resemble a banner before I adhered it with pop dots.

The inside was stamped with the large ribbon in Spun Sugar Distress Ink and the sentiment stamped on top of it with the same Chocolate Chip Stampin' Up ink.

And that's all the energy I have tonight. I'm going to bed.
Wednesday, July 17, 2013
Swallowtail Thank You Card
The hubster had to work on Saturday because they had a busy day of caterings. He then went on to explain that it was even busier than expected because one of the employees was in a car accident while making a delivery. He asked me to make a thank you card for a woman who witnessed the accident and stayed to get the employee some help. I knew just the card I wanted to try. I saw it on Julie Davidson's blog recently and was excited to try it out. It's a cute card, but let me tell you, it took some work. The outside was pretty easy. Just stamp the Stampin' Up Swallowtail stamp with some Momento Espresso Truffle ink. Then, I just colored my little heart out with some colored pencils. I added the sentiment in the same ink using a stamp from Inkadinkado's Thank You Words set. Then I mounted that on some pink paper from Authentique's Lively collection in the 6x6 pad.


Then I had to set that aside to work on the card base and the inside. I drew out the card base in Silhouette and added a quarter inch extra to the long side to give me room to sandwich the two sides. I added a perforated line at the standard 4 1/4 inch to fold the extra 1/4 inch part easily. Then I duplicated it and horizontally flipped it so I would have two mirrored sides to sandwich together so it looked like this:

I cut that out of card stock and used my bone folder to fold over the small flaps so that they would be inside the card. I then cut seven large and small butterflies with three of each size flipped horizontally so they could be sandwiched together. The larger cuts worked with the large butterfly in the Teresa Collins Spring Fling stamp set. Once they were stamped, I sandwiched the mirrored stamps with a clear acetate strip between them so they would "float" and set them aside to dry. I skipped the stamping on the smaller butterflies and made just two sandwiches of those with the acetate. I did a little more coloring on the larger butterflies. Then, using really sticky tape, I taped the acetate holding the butterfly sandwiches to the flap of one card and then stuck the two halves of the card together. I punched two pink border strips from the same pink paper and glued those to either side of the flaps to hide them. I used the extra butterflies on the card base. The card is super cute, but a lot of work!

Wednesday, June 5, 2013
Happy Birthday Card Inspired by the Technique Tuesday Blog
I loved a beautiful card I saw by Teri Anderson on the Technique Tuesday blog. I loved the banners and the simplicity of the card. I had this idea of making it my own using a clear stamp set I've had forever and can longer remember who the manufacturer is, but it has this very large "happy" stamp and smaller word stamps to coordinate. I thought I would use the happy to coordinate with the banners. As I played around with different ideas, I finally decided to try the Stampin' Up Designer Typeset stamp set I bought a while back when they had the free shipping. I stamped the banner with some Momento Tangelo ink on some yellow card stock from the DCWV Pastel mat stack. I then filled in the letters and stamped the happy with Moment Espresso Truffle ink. I mounted the kraft card stock on white and then a base card from the DCWV Brights box of cards.
It definitely still needed something. I used a spare bit of baker's twine I had on my desk that was left over from something I was sent. I glued it to the top of the banner. I then took my sister's suggestion to add some polka dots. I didn't have the right color of paint, so I mixed a little yellow and antique white Apple Barrel acrylic paints together until I had a good shade of yellow to coordinate with the banner. I then filled in the happy with some green glitter glue from Studio G and realized I actually was starting to really like the card.
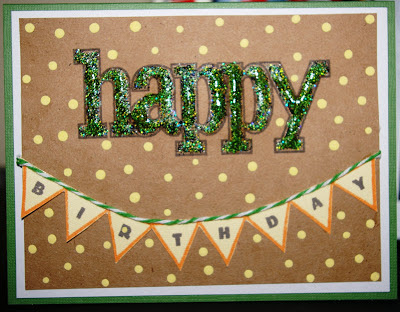
It definitely still needed something. I used a spare bit of baker's twine I had on my desk that was left over from something I was sent. I glued it to the top of the banner. I then took my sister's suggestion to add some polka dots. I didn't have the right color of paint, so I mixed a little yellow and antique white Apple Barrel acrylic paints together until I had a good shade of yellow to coordinate with the banner. I then filled in the happy with some green glitter glue from Studio G and realized I actually was starting to really like the card.
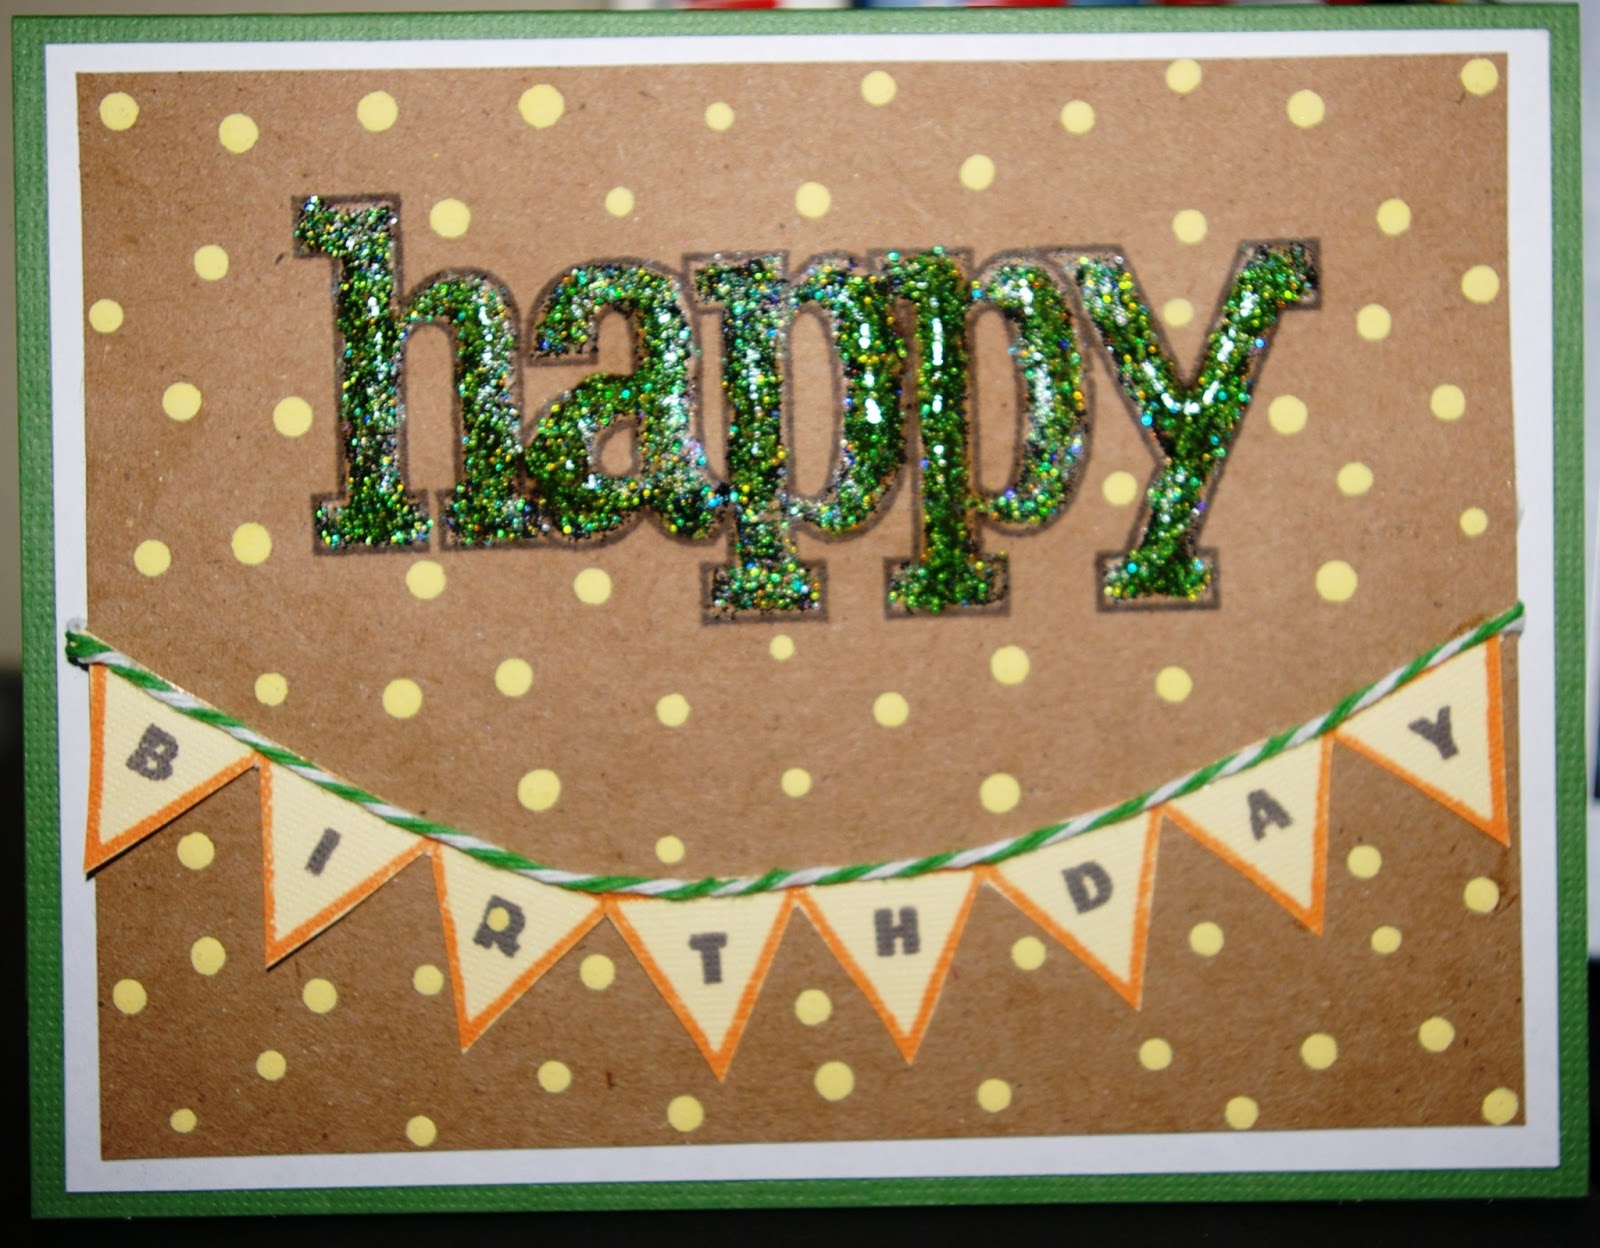
Tuesday, June 4, 2013
Happy Birthday Card Inspired by the Paper Players Challenge
I was really inspired by Nance Leedy's card from the Paper Players Challenge #147. I loved how she stamped the large sunflower over the card and through I would give it a try with the Swallowtail stamp from Stampin' Up. I simply adore that stamp. I used four colors of card stock from DCWV's Pastel stack: white, yellow, blue and green. Then I stamped the image using Momento's Toffee Crunch ink and colored it in with some colored pencils. I resized a card from the 3x4 Life Cards by Lori Whitlock in the Silhouette store (Design ID #25178) to make it super tiny and stamped the sentiment from a set of stamps I bought from Boxer before they closed. I then tied the tag using some Hemptique twine onto some sheer yellow ribbon.


Isn't it funny how sometimes you finish a card and you know exactly what you would do differently? The minute I saw this card sitting on the shelf across the craft room, I thought I should have swapped the blue and yellow. They would be more impact if they were in the opposition positions.
Friday, May 10, 2013
Another Butterfly Card
I loved the butterfly card using the Stampin' Up Swallowtail stamp on Stampin' Lab's blog. It's just gorgeous and I thought I could quickly create my own version, but I'm still so exhausted that my brain just wasn't helping me tonight. I didn't have the same stamp for the border, but I found a nice swirly one in my stash that I thought would work. I embossed both and then colored in the butterfly. I didn't have the right baker's twine, so I ran some white embroidery thread over some Distress Ink in old paper to give it a little age. I then added distress ink to the paper and put it all together with a vintage button from my stash. It should have a been a quick card, but I just needed a bit more time tonight.


Sunday, May 5, 2013
Hello Card - Design Principals with Britta Swiderski
 I'm sharing today a card I made as part of an online class called Design Principals with Britta Swiderski.
 I've just started this class and so far it's pretty interesting. In addition to a lecture video, there are three project videos: a tag of class information and two cards. I thought I would share with you one of the cards I made after watching her video. I used some paper from the mat stack for Mango Frost by DCWV and my Sizzix Top Note die for the shape and a EK Success punch called Bumpy Road for the strips. The sentiment is stamped in Chocolate Chip ink from Stampin' Up using a stamp from the Portfolio set by Pink Paislee. I inked the edges of all the paper except the sentiment with Aged Mahogany Distress Ink and finished it off with some Pearls by Recollections. It was pretty quick to make once I saw her video. I'm sure I'll share more finished projects as I work through the class.

Saturday, May 4, 2013
Butterfly Card
There is one thing about Pinterest that really frustrates me: when people pin things such that I cannot find the original source. Sometimes this is because the person making the pin doesn't understand how Pinterest works. The person is reading a blog and sees something she likes. She pins it not realizing that you have to pin from the specific entry, otherwise Pinterest will simply take me back to the most recent post of the blog. Then I have to sort through all the entries to find the one that is really for the item that caught my attention. Sometimes, however, I cannot access the original source because I simply don't have access. The Stampin' Connection is a good example. I cannot log in to see the sources, but I can see the pictures on Pinterest. Sometimes the artist is smart and leaves me a breadcrumb in the form of a watermark that at least lets me know who I can give credit to for the inspiration. That's the case here. I loved this butterfly card I saw on Pinterest. Of course, it was a Stampin' Connection link so I could see where it had been pinned from. But the watermark is from Carrie Gaskin, the Artistic Avenger. She stopped blogging in October last year and some of the pictures on her blog simply would not load for me, so I couldn't find if she had posted on her blog about it. It was really kind of a shame too because from the few pictures I did get to load, I can tell I would have found even more inspiration.
The only paper on here that wasn't from my scraps bin is the green pattern paper peeking in the background. It's from the 6x6 pad called For the Record 2 by Echo Park and designed by Lori Whitlock. The butterflies were cut on my Cameo using the Echo Park butterfly design. I cut out only the base and then inked them with various shades of Distress Ink. I used a french curve to draw the butterfly path and then poked the holes with my stylus and my Stampin' Up paper piercer template to make sure the path remained reasonably evenly spaced. I finished it off with Hemptique baker's twine instead of ribbon and some glossy accents down the middle of each butterfly.
I've left off the sentiment on this one because I'm not quite sure what I want to use it for. I think it could do well as a birthday card, a sympathy card or even just a thinking of you card. So for now, I'll leave those possibilities open.

The only paper on here that wasn't from my scraps bin is the green pattern paper peeking in the background. It's from the 6x6 pad called For the Record 2 by Echo Park and designed by Lori Whitlock. The butterflies were cut on my Cameo using the Echo Park butterfly design. I cut out only the base and then inked them with various shades of Distress Ink. I used a french curve to draw the butterfly path and then poked the holes with my stylus and my Stampin' Up paper piercer template to make sure the path remained reasonably evenly spaced. I finished it off with Hemptique baker's twine instead of ribbon and some glossy accents down the middle of each butterfly.
I've left off the sentiment on this one because I'm not quite sure what I want to use it for. I think it could do well as a birthday card, a sympathy card or even just a thinking of you card. So for now, I'll leave those possibilities open.

Wednesday, May 1, 2013
Happy Birthday Card
I spent quite a bit of time over the weekend looking at old blog posts of new blogs I've started following. One of the new blogs I picked up was Rita's Creations. She's a Stampin' Up demonstrator and I don't have a lot of that product, but her style is pretty universal and beautiful. I like the challenge of trying to recreate the beautiful work she does in the supplies I have on hand, which is great because I have a huge stash and I really want to put it to use.
So for this card inspired by her post here, I used that NEVER-ENDING 6x6 pad from My Mind's Eye called Stella and Rose. I feel like I have been using that pad forever and yet I still have a lot of it left. For this card I used two coordinating papers with a cream background and a sentiment from the Fiskars Happy Birthday set stamped in Night of Navy Stampin' Up ink. I fished a button out of my stash and added some embroidery thread to finish it off.

So for this card inspired by her post here, I used that NEVER-ENDING 6x6 pad from My Mind's Eye called Stella and Rose. I feel like I have been using that pad forever and yet I still have a lot of it left. For this card I used two coordinating papers with a cream background and a sentiment from the Fiskars Happy Birthday set stamped in Night of Navy Stampin' Up ink. I fished a button out of my stash and added some embroidery thread to finish it off.

Friday, April 26, 2013
Sympathy Card
Continuing my quest to build my card stash, I just couldn't resist making my own version of this amazing card by Ann Schach from the Paper's Player's blog for challenge number 142. I just loved it and I love that I get to break out my new Swallowtail stamp from Stampin' Up again. It took me three, yes three, tries to get this one. On the first two attempts, I got ink everywhere, but on the third attempt I finally managed to stamp one without getting ink blotches on the card while removing my mask (that's a skill I just haven't mastered yet). Too bad I didn't fully ink my stamp so the image didn't come out as clean as the first two, but it was good enough that I could live with it. Unfortunately, I was a little heavy handed on the sentiment from the Fiskars' All Year Greetings set, but I decided I could live with it too. I just colored it a bit with my colored pencils and called it good.


Monday, April 22, 2013
Thinking of you card
When I saw all the amazing cards with the Swallowtail stamp from Stampin' Up, I just had to buy that stamp. I broke it out tonight and started playing with it. I found a cute card on Pinterest and traced back to the source at the Flowerbug blog. I skipped the heat embossing and went just with Chocolate Chip ink on cardstock. I love that. The whole card actually came together very quickly, but used four different stamp sets! Of course, there was the Swallowtail stamp from Stampin' Up. For the sentiment, I used an Inkadinkado stamp set called Expressions and Frames. The small butterfly is from the Teresa Collins Spring Fling Stamps set. Finally, the floral stamp is from the Heidi Grace Designs set called Paradise. I cut a vellum butterfly on my Cameo using an Echo Park design purchased in the Silhouette store. I added some ribbon from my stash and called it good.


Monday, April 8, 2013
Get Well Soon Card...
I've been sick since the middle of last week, so when I learned that a family member had gone into the hospital, I really didn't have the energy to make a card and used the one and only one from my stash. So then when I found out that two more relatives were under the weather, well, I had to make a few cards really fast. Fortunately I had just got a stamp set and matching die at the recent CKC convention that I really wanted to use and was perfect for the convention. I used the umbrella4you set from The Stamps of life and a card sample from the gallery to make this quick and easy card. I used a base from the DCWV Neutrals box of cards. The card came together quite quickly but was a reminder of why I don't use my old Stampin' Up ink with clear stamps: the images just don't stamp really well on clear stamps. I think I'll see how the Quick Quotes ink does next time.


Saturday, March 16, 2013
Not quite right...
I really liked the simplicity of this card I found on Pinterest and tracked back to My Paper Secret. The colors were beautiful and clean and the card was elegant in its simplicity. But unfortunately, it didn't translate well when I tried my own hand at it. I have a stash of pre-made card bases, but none that seemed quite right except this green one. I loved how it looked with this scrap of pink DCWV paper from my stash of scraps from other projects. I tried several options for the center button: green, white, blue, pink, but the one that looked the best to me was this yellow.
Where I think it all went wrong is in the stem and sentiment. I'm not very artistic. I can't draw a straight line without a ruler and I can't draw a curved line without a french curve. So I drew one in pencil to give me an idea of the right balance of curve. Slight problem, I didn't like the first curve so I tried to erase it, but I got a smudge on the card. Sigh...
So then I find the right curve, but when I went back to add my green stem, I couldn't quite get all the pencil erased. It's like it's actually under the ink. I added the sentiment from my Inkadinkado All Occasions set in Green Galore Stampin' Up ink to run across like leaves as in the inspiration piece, but I really should have used a darker color. It's just too close in color to the rest. Then when I was really being OCD about the still visible pencil line, I managed to erase a bit of my sentiment in my zeal to erase the pencil marks. Well double sigh to that... I was able to fix it a bit by coloring in with my stem pen, but it just really didn't quite come out like I had it all envisioned. Oh well, it's the thought that counts.

Where I think it all went wrong is in the stem and sentiment. I'm not very artistic. I can't draw a straight line without a ruler and I can't draw a curved line without a french curve. So I drew one in pencil to give me an idea of the right balance of curve. Slight problem, I didn't like the first curve so I tried to erase it, but I got a smudge on the card. Sigh...
So then I find the right curve, but when I went back to add my green stem, I couldn't quite get all the pencil erased. It's like it's actually under the ink. I added the sentiment from my Inkadinkado All Occasions set in Green Galore Stampin' Up ink to run across like leaves as in the inspiration piece, but I really should have used a darker color. It's just too close in color to the rest. Then when I was really being OCD about the still visible pencil line, I managed to erase a bit of my sentiment in my zeal to erase the pencil marks. Well double sigh to that... I was able to fix it a bit by coloring in with my stem pen, but it just really didn't quite come out like I had it all envisioned. Oh well, it's the thought that counts.

Friday, March 15, 2013
And sometimes it doesn't look like the inspiration at all...
Still on my quest to re-fill my stash, or at least keep it from being depleted any further, I found another pin on Pinterest for a "thinking of you" type card. It was from one of my favorite card blogs I'm in Haven. I love her clean cards and this one was no exception. I started off casing using some pages from that Stella and Rose 6x6 paper pad from My Mind's Eye that I love so much. I cannot believe how many things I have made from that pad already and I still have lots of paper left.
When I was looking for something to do the branch and birdies, I found I didn't have something spot on, but I had something pretty close in a branch design and a cute bird from Echo Park. Then it all went a bit of different direction with the decision to mat the card with a bit of a twist by using my ticket edge Stampin' Up punch that's been in my stash for a long time. I finished it off with the perfect sentiment from the Fiskars' All Year Greetings set using the Night of Navy ink from Stampin' Up that my friend Nancy gave me.
 Altogether it was another very easy card to put together in that all the pieces just seemed to fall in place. But this one turned out very different than the piece that inspired it.
When I was looking for something to do the branch and birdies, I found I didn't have something spot on, but I had something pretty close in a branch design and a cute bird from Echo Park. Then it all went a bit of different direction with the decision to mat the card with a bit of a twist by using my ticket edge Stampin' Up punch that's been in my stash for a long time. I finished it off with the perfect sentiment from the Fiskars' All Year Greetings set using the Night of Navy ink from Stampin' Up that my friend Nancy gave me.

Thursday, March 14, 2013
Sometimes it all comes together...
I decided to put aside my scrapbooking tonight to make a few cards. I realized my stash was getting a little depleted. So I turned to my Pinterest board for cardmaking for some inspiration. First, I have to say that I was completely shocked when I realized how many people are following my little cardmaking layout inspiration board. I guess there are a lot of cardmakers out there that get inspiration from the same things that inspire me.
The card I picked tonight comes from a blog called Glenda's Paper, Scissors, & Rocks (cute name, huh?). I loved the simple elegance of the card. I pulled the Beautiful Moments 6x6 pad from Carta Bella that I picked up at Craft Warehouse on sale a bit back. It has some absolutely lovely patterns in it and I knew immediately they would be perfect for casing Glenda's card.
And that brings me to the title of the post today. It all just came together. Sometimes it can take me a long time to make a single card because I can't decide on the paper or the sentiment or whatever, but today was one of those beautiful times when everything just all came together like it was meant to be. I think I spent all of ten minutes making this card and more than half of those were finding the right ink (Stampin' Up Chocolate Chip, but if I did it again, I think it would switch to Close to Cocoa), baker's twine (Hemptique) and color of Liquid Pearls (Bisque) to finish it off. Cutting the card, folding it, rounding the edges and two quick cuts of the Cameo to make some butterflies and I was done. Honestly this post took longer to write than the card did to make.
 The only thing I really regret is that I put my Inkadinkado stamp on my block a little carelessly so it came out a little crooked on the card. But, oh well, that's what makes it unique.
The card I picked tonight comes from a blog called Glenda's Paper, Scissors, & Rocks (cute name, huh?). I loved the simple elegance of the card. I pulled the Beautiful Moments 6x6 pad from Carta Bella that I picked up at Craft Warehouse on sale a bit back. It has some absolutely lovely patterns in it and I knew immediately they would be perfect for casing Glenda's card.
And that brings me to the title of the post today. It all just came together. Sometimes it can take me a long time to make a single card because I can't decide on the paper or the sentiment or whatever, but today was one of those beautiful times when everything just all came together like it was meant to be. I think I spent all of ten minutes making this card and more than half of those were finding the right ink (Stampin' Up Chocolate Chip, but if I did it again, I think it would switch to Close to Cocoa), baker's twine (Hemptique) and color of Liquid Pearls (Bisque) to finish it off. Cutting the card, folding it, rounding the edges and two quick cuts of the Cameo to make some butterflies and I was done. Honestly this post took longer to write than the card did to make.

Subscribe to:
Posts (Atom)