Showing posts with label DCWV. Show all posts

Thursday, November 6, 2014

It's Your Birthday with Newton's Nook Inky Paws Challenge

Wow, it's been a while since I posted but I've headed into the busiest time of the year at work and I'm just dog tired by the time I get home every night and weekends are busy now too.  I'm sure you all know how that goes.  But I wanted to pop on here to share the card I made for the Inky Paws Challenge over at Newton's Nook.  I love their challenges almost as much as I love their stamps.  This one was all about sparkle and you know how I love that.  You can find the challenge here.

For this only slightly more than one layer card, I used a technique from a class I took a month ago to do some partial die cutting.  I stamped the oh so cute kitty in a box from Newton's Birthday Bash and colored him with my copics.  Then I very carefully cut around the kitty and slid my Simon Says Stamp Brilliant Gifts die behind it.  I cut out the present die from the card, then again from black card stock and some DCWV glitter cardstock.  Then it was just a matter of rebuilding the presents behind the kitty.  I added some Wink of Stella to the kitty's box and covered it with Glossy Accents.

Monday, October 13, 2014

On a Halloweed Card Kick

Today I go back to work after my first week-long vacation in at least a couple of years.  It's been a lovely break, but I'm not looking forward to how buried my desk must be.  One of the nice things about never taking time off is that I can just about keep up with the flow of things.  Once I take a day or two off, it gets tricky to keep things moving.  I'm really nervous about how missing a week is going to be.  It will be the real test of how easy it's going to be to take time off in larger chunks going forward (something I'm going to have to do since I'm maxed out on vacation time and now am earning even more since I passed my 15 year mark at work).

I have to say though that the week off was great.  Hubby and I celebrated our 10-year wedding anniversary, we went camping, spent time with my family, and I got to spend quite a bit of time making cards, which always makes me happy.  In preparation for the trip, I picked up a couple of new things, some new Prismacolor pencils, new Newton's Nook, which I've shown over the last few days, the October card kit from Simon Says Stamp and my very first ever Stampendous House Mouse Design stamps (but I'm pretty sure they won't be the last).  I spent quite a bit of our camping time crafting (okay, just to be clear when I say camping, I mean in an RV with a satellite dish for TV and my Keurig coffee maker.  I do not sleep in tents or on the ground). 

I started out my doing all my September Project Life.  It's the fastest I've done an entire month ever.  I think it took less than four hours to do four weeks.  Of course, I had my photos all printed and in packets for the weeks so that helped.  But I also find that limiting myself to my Citrus Twist kit really helps too.

So I had lots of time to play with my new things.  The first thing I decided to play with was the Stampendous House Mouse Trick or Treat stamp.  I stamped it out on watercolor paper and watercolored it with Distress Ink markers.  I didn't have my heat gun plugged in (okay so I was too lazy to go pull it out my craft tub and plug it in) so I found I had to work a bunch of different areas at a time because I tend to use a lot of water.  It didn't realize this before this trip until Mom and I talked about because she colored a second stamping of the image with Distress Inks as well.  But she uses way less water.

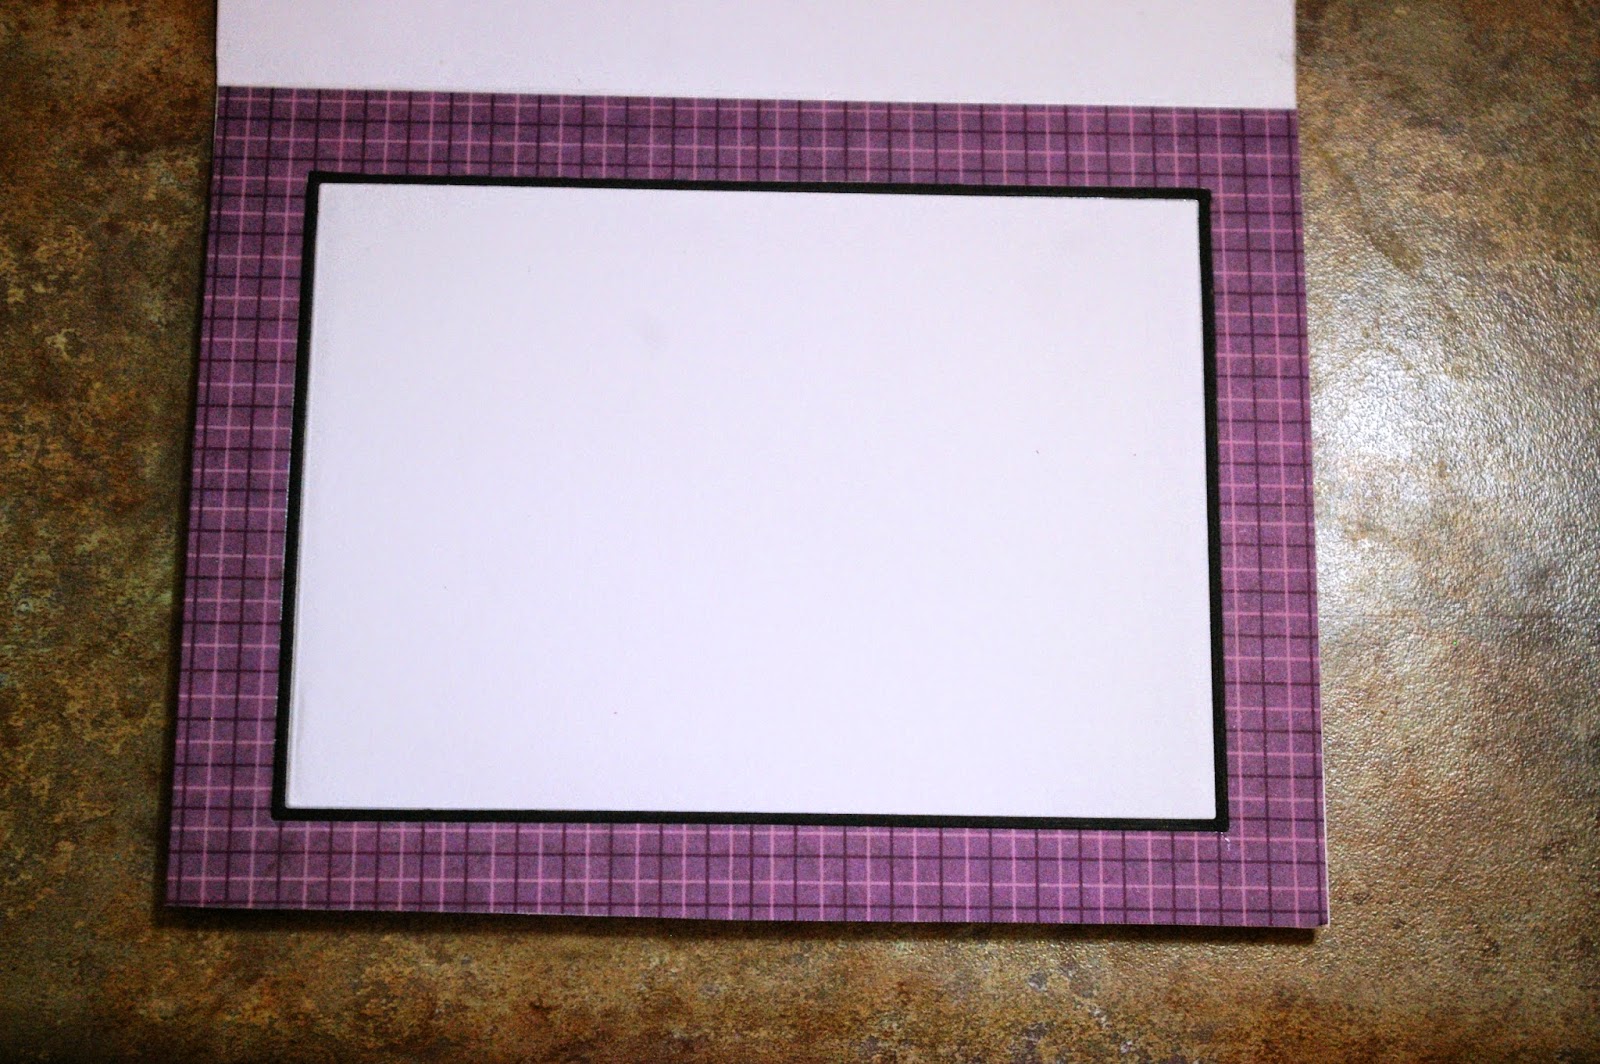
I wasn't sure what to do with the panel when I was done.  I only have one Halloween 6x6 pad and it didn't really fit.  I pulled out an old DCWV Fall Stack looking for something and found this purple plaid that really made the one mouse pop and that sealed the deal.  I cut the paper to fit my card base, trimmed down my watercolor piece and framed it with a slight black frame.  Because I used a pretty lightweight card stock for my base (I really need to go get some heavier duty white card stock), I decided to add a little to the inside.  I cut a second piece of the purple plaid to fit my card inside, used the Simon Says Stamp Frames die to cut out the center.  I then used the same frame to cut a black piece and a white piece.  Then it was just a matter of nesting the die cut pieces together.  I'm still not sure about a sentiment, so I left it blank for now.

Sunday, August 3, 2014

Wish You Were Here Card Two Featuring Newton's Nook

I really had a great time with this stamp set and since it's a beach themed card, it fits the Newton's Nook challenge to make a beach themed card.  There's still time to play so head over to their blog and check it out.  You can find it here.    The cards just seemed to make themselves and I loved coloring all the kitties.  I've colored them to look like the furballs, Tigger, Cha-Ching and for today's card, I decided to try my hand an orinch one (yes I know that's not the correct spelling).  After coloring my panel, I ran it through my Sizzix with the Lawn Fawn Stitched Journaling Card.  I cut some sand paper from the Summer Stack from DCWV to a slightly larger size and chomped the corners with my We R Memory Keepers Corner Chomper.  I messed up my sentiment (missed that I had a piece of lint on it), so I stamped it again on a scrap of the sand paper.  I then used the banner from the Lawn Fawn dies to cut out the banner and then ran it through again with the stitched journaling die to get the stitched look on the end.  For the background, I used a couple sheets of paper from that Echo Park 6x6 paper pad A Perfect Summer.  I added some Peppermint Lawn Trimmings at the join of the two papers.  I added my panel with pop dots and then finished it off with some Doodlebug sequins. 

Thursday, July 31, 2014

Happy Bird-day Featuring Newton's Nook

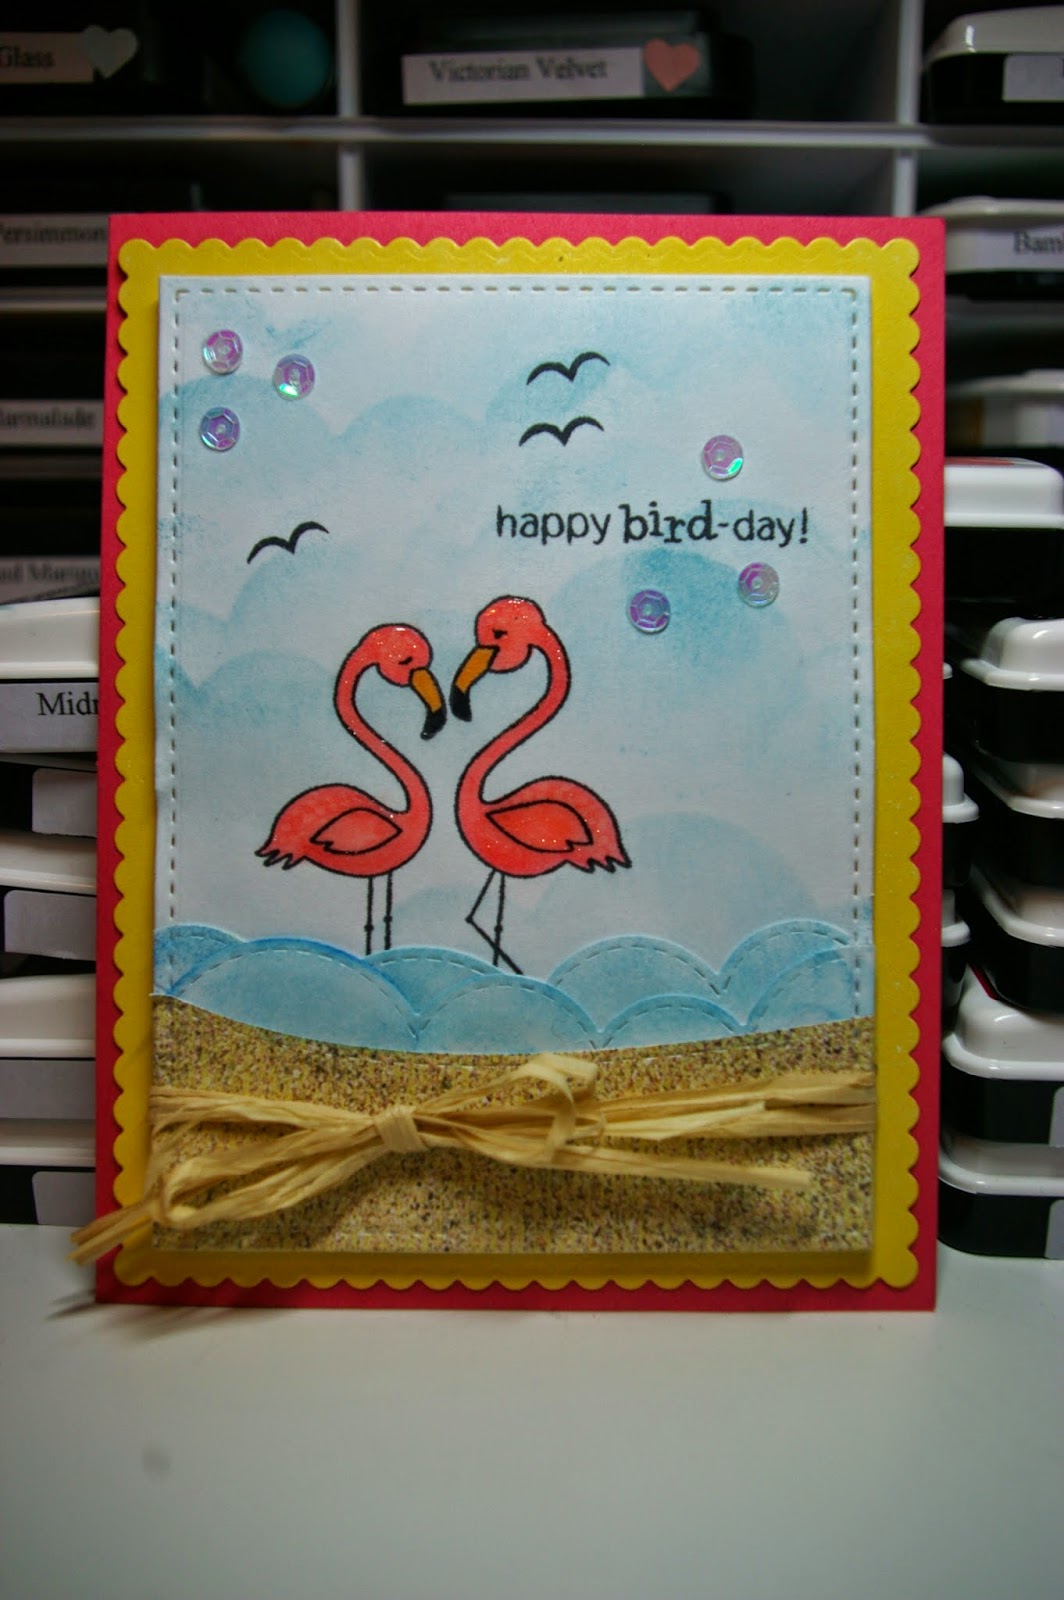
I had so much fun playing with my Newton's Nook stamps, that I thought I would keep going.  For today's card, I wanted to play with the Landscape Trio dies from Mama Elephant.  It took me forever to get these dies.  They were always sold out; I mean everywhere!  I've always thought that the scalloped one would work well for surf too so I cut it out a couple of times, inked it up with some Distress Inks and used one of the sloped dies to cut out some more of the DCWV paper for the beach.  On the background panel, I stamped the double bird stamp and colored with copics.  I covered it with a mask and used the negative from the die cuts for the surf to sponge in some background clouds in the sky.  I added a few birds to the background.  I had to cheat for these. I had pulled the bird stamp off the Flirty Flamingos set, but when it came time to stamp I could not find them anywhere!  I'm sure they will turn up when I clean off my craft desk (it's embarrassing to admit this, but this happens all the time).  So I used the birds from Lawn Fawn's Life Is Good set.  I layered everything together and then ran it through my die cut machine using the stitched frame from Mama Elephant's Femme Frames, which I also finally find this week after stalking the various websites for a long time to try to find a place where it, too, wasn't sold out (Ellen Hudson had it in the Basics set).  I then used some cute yellow paper from the Echo Park 6x6 paper pad A Perfect Summer to cut out the larger frame.  I tied some raffia around the beach and then used pop dots to place the panel on the yellow paper and adhered that to the card base.  I added Wink of Stella and Glossy Accents to the flamingos.  I added white Wink of Stella to the "surf" and some clear sequins to finish it off.  Because it's a beach themed card, it fits the challenge over at Newton's Nook to create a beach themed card.  You can find lots of inspiration on their post here.  The challenge is open until August 8th, so go check it out and play along!

Wednesday, July 30, 2014

Wish You Were Here Featuring Newton's Nook

This week and next week are going to be crazy busy at work. I'm basically covering the work of three people for two weeks and one of those weeks I won't even be in this state. So, although, we're really short handed, I decided to take last Friday off.  I had been scheduled off since the beginning of the month to use some use-it-or-lose-it time before I lose it at the end of this month and I had worked long hours all week so I really needed a break, plus hubby had the day off.  We spent some time together doing a lot of nothing, which was nice.  He worked on Saturday, so I had thought about going into the office, but I also realized that I had things around the house I wanted to get done since I knew I was going to be working long hours and wouldn't to have any time this week or next.  So I stayed home and cleaned the house, snuggled a furball or two (at the same time!) and watched a few crafty videos in between loads of laundry.  It was the perfect break to feel like I was human again and not just a working machine.  Then I it was time to spend some time in my craft room to exercise a different part of my brain with some new goodies I've picked up recently.

Specifically, Newton's Nook recently released some new (adorable) stamp sets.  I'm such a sucker for Newton so I had to pick up Newton's Summer Vacation and my sister loves flamingos so, of course, I had to get Flirty Flamingos.  When I was catching up on my blog reading, I noticed Newton's Nook had a new challenge to create a beach themed card and thought it was the perfect opportunity to play with my new stamps.  You can find out all about the challenge over on the Newton's Nook blog here.  It's open until August 8th so go check it out and play along.

For my card, I started with the Flirty Flamingos set.  I inked up the solo flamingo in Memento Tuxedo Black ink and colored it with copics.  I then created mask for my flamingo so I could sponge in some waves with Distress Ink and sponge daubers and then colored in some sand and sky with my copics.  I used the Amy Tangerine dies to cut a polaroid shape.  I stamped the sentiment from the Newton's Summer Vacation and colored in the little heart with the same copics used for the flamingos.  I remembered having some "sand' paper and found in an old DCWV Summer Stack.  I used the Dotted Die from Avery Elle to cut out that paper and mounted my "polaroid" on it.  To finish it off, I added a few Doodlebug sequins, some Glossy Accents on the floaty ring and a some Wink of Stella on the waves. 


Wednesday, July 23, 2014

Hippo Birdie Two Ewe Revisited...

Since I already had the stamps out on my desk, I decided to make a second card with the Year Four, Critters on the Farm, Hello Sunshine, Technique Tuesday Grid and Jessie's ABC's stamps and dies along with the Mama Elephant Landscape Trio dies.  This time I also pulled out the Stitched Journaling die from Lawn Fawn as well.  I used the same green polka dot paper from DCWV but this time I used a sheet from the 6x6 paper pad from the Maggie Holmes collection for Crate Paper for the sky background and some DCWV polka dot paper left over from a prior project to cover my card.   It turned out so different even though it mostly the same products: 

Tuesday, July 22, 2014

Hippo Birdie Two Ewe!

Last week was rough.  I got some bad news about a co-worker and it just sort of threw me for a loop because there's nothing I can do to "fix" the situation (I don't like not being in control).  I also realized that the next few weeks are going to a be a bit rough at work so that means I need to really relax during my down time to keep my sanity.  But Saturday I had a headache that didn't seem to want to go away so I curled up in a chair with a kitty and watch crafty videos most of the day.  I know I don't feel well when I don't want to run into my craft room after a few videos.  Fortunately, Sunday I felt a whole lot better (the weather change had completed) and all I wanted to do was play in my craft room.  That means I managed to get a few cards made.

I've been playing with some Lawn Fawn stamps I recently got my hands on, including the oh so cute Year Four set.  I've had this idea for a card using the phrase hippo birdie two ewe, which I often use for birthday greetings when I'm just dropping a quick line to the birthday boy or girl.  I colored the die cut the hippo and bird from the Year Four set and two sheep from the Critters on the Farm set (for which I just finally got the dies - yay! no more fussy cutting). 

I also broke out my Mama Elephant Landscape Trio dies.  I've seen so many crafters using these and I love the cute little stitched elements.  I drug some DCWV polka dotted paper from my scraps bin and sheet of blue graph paper from the Snap Life 6x6 paper pad from Simple Stories for the background.  I found a scrap of yellow paper, stamped it in Simon Says Stamp Lemon Chiffon ink using the Technique Tuesday Grid stamp for a little added interest then cut it out with the die from the Hello Sunshine set from Lawn Fawn.  I used the Jessie's ABCs set from Lawn Fawn to spell out my sentiment. 

Wednesday, May 28, 2014

I "Seally" Like You...

A dear friend of mine at work is fighting breast cancer. She was just diagnosed this month and she has to be aggressive because she has other complicating factors.  There's not much I can do for her.  Her family is taking care of the usual things, like keeping her refrigerator stocked.  So I feel like the best I can do is remind her that I'm here for her and I adore her.

We have this little joke that I adopted her when my boss was promoted and she's joked about getting a seal for the papers.  So I've always had this idea of doing something with a seal, rather than  seal in a little punny twist.  Fortunately, Lawn Fawn has an adorable seal in their Critters in the Snow set.  I colored it along with some fish and a crab from the Critters in the Sea set.  I created a beachy scene by tearing some DCWV white core card stock and die cutting the Lawn Fawn Stitched Scallop Borders (and using the other side) several times from three colors of blue card stock.  I used several colors of Distress Ink (Peacock Feathers, Broken China and Tumbled Glass) to make the sky, then layered by "sea" and finally my sand.  I used several colors of Distress Ink markers and a Spectrum Noir marker to stipple the "sand" and then placed my critters in their places.  It still needed one thing so I cut a sun with the dies from Hello Sunshine to finish it off.

All the sentiment on this card is on the inside where it says:

I "seally" like you!  You have my seal of approval.

 I hope this card lifts her spirits and reminds her that we're all pulling for her. 

Tuesday, May 6, 2014

Happy Birthday Bethany!

A co-worker's daughter is celebrating her 13th birthday today and she needed a special card.  Along comes this cute little one I made just playing with some fun Lawn Fawn stamps sitting on my craft desk.  The polka dot paper in the background is from the DCWV Celebrations stack and was left over from some Easter treat boxes.  I thought it was the cutest place to start.  I love this cute little Yeti for the Yeti, Set, Go stamp set and thought he would be adorable in duplicate holding a banner.  The words are from the Sophie's Sentiment set and the banner is from Bannerific.   where I used the balloons to make the background paper.  I used some copics to color the yeti and banner.  I had to fussy cut the yetis (hey Kelly Marie from Lawn Fawn - when are we going to get dies for Yeti, Set, Go?  I'm ready, set, go for them now!), but the banner was easy with the dies for Bannerific.  The card still needed something, so I decided to take up the Lawnscaping challenge and stamp my background.  I stamped the balloons from the Admit One set I recently picked up.  After some color, I die cut the background using the Stitched Journaling Card dies.  Then it was just a little glossy accents to finish off the balloons.  Super fun!

Saturday, April 19, 2014

Easter Treats

Today was the birthday party for my youngest niece so I wanted to take both nieces a little Easter treat to the party.  I had seen some adorable things made with Lawn Fawn's Happy Easter set, so thought I would start there.  I used a couple of pages from the Echo Park Perfect Summer 6x6 pad from last year.  I used the Lawn Fawn Grassy Border die with some scraps of green paper from the pad, plus cut the background from some blue paper from the pad with the dies from Winter Gifts set.  I stamped the bunny and eggs form the Happy Easter set.  I added their names with the Jessie's ABC's set just to finish them off.  The cute little pillow boxes were made from the Celebration stack from DCWV using design ID 1184 on my Cameo.  Super quick and fun.  Then I tied the tags on with some Lawn Fawn Silver Sparkle Lawn Cuts.  I'm sure the part they liked the best was the chocolate inside!


Friday, January 17, 2014

Finally Satisfied

The third time is definitely the charm.  While I was happier with my second version, I had pieces for a third try on my desk simply calling my name:  "Try again ... try again ..."   So I played with a couple of different colors of Distress Ink on some scrap paper and decided to switch the embossing up with Tumbled Glass.  This time I also ended up with a more subtle streaking on the paper.  I'm not sure if was just working a little faster, the change in color or I used less or more pressure, or a combination of all those factors, but I really liked how the background came out this time. It's a nice subtle texture to the card.  Then I did pretty much all the same things I had done on version two, but I used shorter pieces of baker's twine so I had to do a lot less fiddling to bring it all together.  When I had it finally all together, I was finally very pleased with the result. 

Thursday, January 16, 2014

Flying By - Take Two

So as I mentioned, I wasn't very happy with the card that I made inspired by Lawn Fawn's blog post here.  So I tried a second version.  This time, I played with a technique I've been wanting to try for a while.  I used my Darice Cloudy Sky embossing folder to emboss some white paper, but before I ran it through my Sizzix, I swiped the folder with some Broken China Distress Ink.  Then when it came out of the Sizzix, I had white puffy raised clouds on a blue sky.

Instead of trying to stamp the little dotted lines, I stamped my sentiments on plain white paper and then cut it to resemble little banner.  A quick punch of the smallest hole on my Crop-a-dile gave me a way to tie on my baker's twine so I could give the illusion of the paper airplanes flying the banners of the sentiment.  I used a few pop dots to give the planes and banners a little dimension.  This time I matted the whole thing with some scraps of DCWV paper form the Everyday Stack left over from making a couple of envelopes with my We R Memory Keepers Envelope Punch Board.

I honestly liked this card better (and really loved the inking technique with the embossing folder), but I still thought it needed some tweaking (and you can get a sneak peek of what's to come in the left side of the picture.

Thursday, October 31, 2013

Happy Halloween!

I'm sharing today the one and only Halloween card I made.  I love the holiday but I rarely do cards for it.  But I wanted to use the cute Lawn Fawn set I picked up called Heebie Jeebies.  One of my favorite crafting on-line stores, Two Peas in Bucket, runs a message board where people can sell the stuff they no longer want.  It's totally random what you'll find there, but I've managed to pick up a couple of things from there that I cannot get in any store anymore.  One of my favorite finds was a bundle of a couple of Lawn Fawn sets.

So I just stamped the spider web, spider and bat in Onyx Black Versafine and heat embossed them. Then I fussy cut them and colored in the spider with some Spectrum Noir pens.  I then dug through some of my stash and found some cute Halloween paper in an old Fall Stack from DCWV.  I cut both the mat and the background paper then layered them together and wrapped them with some Queen & Co. black and white baker's twine.  I then adhered them to a black card base I found in my stash.  Then I just added my stamped pieces with some pop dots to finish it off. 

I decided to dress up the inside of this card too by matting my sentiment panel and adding the spider and bat from the outside to the inside along with the a sentiment stamp from the set.  Too cute!

So here's the really fun part.  I bought the We R Memory Keepers envelope punch board, but I haven't really gotten to play with it yet.  I also picked up a new score board; it's the smaller, more portable version of my big Martha Stewart one.  When I was packing it for our recent failed camping trip, I noticed that it had markings for making envelopes on the back.  So I decided to play with those pieces when I was making this card.  I started out with another sheet from that same DCWV Fall Stack and followed the instructions on the Martha Stewart board to make the envelope.  It turned out pretty good.  I decided it needed a liner so I used some scraps of paper from making the card to cut a liner using the punch board.  It turned out pretty good for my first try.
 

Sunday, October 27, 2013

A Bear-y Wonderful Birthday

Today I got to play in my craft room a bit courtesy of a failed attempt to go camping this weekend.  I was putting away the supplies I had packed to take with me when I found this adorable Inky Antics set called Delivery Benton.  I just couldn't resist stamping it out and playing with it.  A co-worker's birthday is next weekend so I thought this one would be cute for a birthday card.  I stamped him out with Versafine ink and heat embossed the design.  I colored him with my Spectrum Noir pens and added a little Wink of Stella on the flowers for a pop of sparkle.  I added some shiny ribbon from my stash and then mounted the card on some green card stock from my stash and adhered it all to a DCWV Neutrals card base. 

Tuesday, October 15, 2013

Oh Deer - Inspired by Owl Be Craftin' with Tracy

My father-in-law has been in the hospital and the new the recovery center for a while so hubby and I went to visit him on Sunday.  I made him a get well card that we took with us.  It's funny how inspiration works.  I started by looking at this cute card on Tracy's blog Owl Be Crafting.  As I started working on my version, I thought I would do a Christmas card and somehow it completely morphed into this get well soon card.

I started with embossing some DCWV blue card stock using a Darice embossing folder called Cloudy Sky.  In then brushed on some white Color Box ink onto the clouds.  I then stamped the cute little tree from the Lawn Fawn set Critters in the Forest set onto some paper from the Snap Color Vibe 6x6 paper and cut it out with the matching dies.   I was about to make it snowy when the card took an abrupt turn when I saw the cute little deer from the Into the Woods set from Lawn Fawn.  I just had to use it.  I stamped it onto some brown card stock I added the deer on top of some greed card stock cut to look like a hill and stamped with the grass from the Lawn Fawn set Critters in the Burbs in Mowed Lawn Distress ink.

I then used the banner die from the Lawn Fawn Stitched Journaling Card to cut the cute little banner that I stamped with the Oh Deer sentiment from the Into the Woods set.  For the inside, I added together two from the Stamps of Life Umbrella4you set for the perfect sentiment.

Monday, October 14, 2013

Have a Roarin' Good Birthday Card

My nephew recently celebrated a birthday so I went on the hunt for a card for inspiration.  I found this adorable one from A Bit of This, A Bit of That I had pinned to my card layout board on Pinterest.  So I went hunting through my Lawn Fawn stamps for the ones for the card and got side tracked when I saw the Critters on the Savanna set and my original plan was abandoned in favor of a new idea.  I had a bit of fun with stamping, sponging and coloring with this one.  I used the lion, two little birds, tree, rock and grass from the Critters on the Savanna set and the hat and presents from Lawn Fawn's Year Two set.  I stamped all but the grass using Versafine ink then clear embossed it.  I stamped the grass with Mowed Lawn Distress Ink and clear embossed that.  I then sponged on the Mowed Lawn and colored in the trees and sky with Spectrum Noir pens.  I cut the banner from the Lawn Fawn Stitched Journaling Card die set and stamped on the sentiment from the Critters on the Savanna set.  Then it was just a matter of gluing it all together and adding some pop dots.  I then backed my scene with a mat of white and adhered that to a yellow card base from the DCWV Brights Box of Cards.

For the inside, I added a mat of white upon which I had stamped the little bird from Critters on the Savanna and the little hat from Year Two in Versafine.  I added some grass in Mowed Lawn Distress Ink and colored in the bird and hat with Spectrum Noir markers.  Too cute for a little boy who is too cute.

Wednesday, September 11, 2013

Many Thanks Card

My dear cousin sent me the cutest pillow cases so I, naturally, needed to send her a thank you card.  After cleaning my craft room, which was a horrible mess, I pulled out my new Simon Says Stamp die called All Seasons Tree and my favorite Lawn Fawn sets, Critters in the 'Burbs and Home Sweet Home to make this sweet thank you card.  I used some scrap DCWV paper for the grass and inked the sky with Distress Ink, then cut and colored the cute kitty with my Spectrum Noir markers.  I stamped and die cut the sentiment banner.  Then it was just the simple matter of building the card on a DCWV card base. 

Tuesday, September 10, 2013

Shine Brightly Card

A co-worker has been tempted away from the fold and I wanted to give her a card to wish her well in her new job.  I didn't have any idea what I wanted to do, but I pulled out my Lawn Fawn stamps since they are in fact my current favorite.  I saw the Lunar Lights set and realized I hadn't used it yet.  So I did a Google Image search and found an adorable card on the My Paper Journey blog that used both the Lunar Lights and the Good Fortune set (a two-fer).  I knew it immediately it was the perfect choice for this situation.  It was a pretty simple card to make even though it was a bit time consuming.  I stamped and colored the little lanterns, the bird from Home Sweet Home that I decided to for a little something more and then fortune cookies using a mask to stack the stamping.  I had a little bleeding even though I used paper specially designed for alcohol markers and Momento ink.  I'm thinking that maybe I didn't let the ink dry quite enough.  Then I hand cut them all out.  I had stamped a fourth cookie as a stand alone one, colored it with my Spectrum Noir markers and was able to run that one through the die to cut it out super fast and easy. I also die cut the fortune papers and stamped them with Versafine ink.  Then I stamped the sentiment with Versamark and heat-embossed it with white Zing embossing powder.   Then it was just a matter of putting it all together.  I cut this cute starry red paper from the Homemade 6 Bean Soup 6x6 paper pad from Jillibean Soup down to fit on a card base from the Neutrals set from DCWV.  I then stamped my string for the lanterns and stamped the outline of the lanterns and the bird on the string.  Then I glued my cut out colored ones on top.  I added a touch of glitter with my Wink of Stella pen.  I then adhered my sentiment and the cookies.

For the inside, I added a small strip of the printed paper from the front and then layered my cookie with the full fortune.  It was so fun to make.

Saturday, August 10, 2013

Denver - Day Four

Oops - I thought I had this post ready to go for Thursday of my trip, but apparently I goofed up the process.  I just have to laugh though because it's ironic that the grey skies card stayed up on Thursday night.  The skies of Denver were very grey (the picture below does not do the sky justice - it was soo much darker than that) that night as it was the worst night of thunderstorms while I was there and they left me sick as a dog (or perhaps it was food poisoning), and I really wished that the hubster was there with me...

I loved this bird card uploaded by Silli when I saw it in the Splitcoaststampers Gallery.    I don't have the die she used, but I found a birdie in the Silhouette shapes I had that would work and branch in the Silhouette store that I liked (Design ID 1679).  Then it was just a matter of cutting the birdies from some scraps from my bin (I'm pretty sure they are DCWV card stock) and the branch from paper from the Swagger 6x6 pad from Fancy Pants.  I used another piece from that pad and my 1 inch punch to cut some circles.  Then it was just cut my white card stock for the background, round the corners with my Fiskars corner rounder and build the layers of the card.  For the glue, I used Glossy Accents and finished the card with a sentiments from the All Year Greetings from Fiskars stamped with Versafine Onyx Black ink.

Thursday, July 18, 2013

Get Well Soon Card Featuring Blue Skies by Lawn Fawn

The second card I made for the hubster was a get well soon card for the employee involved in the accident last weekend.  (Sadly enough, the corner where the accident occurred is a pretty bad one.  A long time ago when I used to work down in that area, there was a colleague in my industry that was killed in an accident at that same corner).  I flipped through my card board on Pinterest and found a card using the Blue Skies stamp set by Lawn Fawn.  Lawn Fawn has quickly become my favorite brand of stamps because they are so stinking cute!  The card that inspired me was made by fifi100479 and featured on the Friday Flickr post on the Lawn Fawn blog.  It was so cute the way it was, I didn't make any changes at all.  I stamped the large balloon and cut it out, then colored it with my Spectrum Noir pens.  I had previously cut and stamped the banner.  I had stored it in the bag with the stamps when I didn't use in my previous playing with paper.  I cut a couple of the balloons and found some red glittery paper (I think from DCWV) in my stash to make the banner.  For the paper in the background, I found this perfect balloon paper in the A Perfect Summer 6x6 paper pad from Echo Park Paper.  Then all that was left was stamp my sentiment from that same set in some Versafine ink and round the corners using my new Fiskars corner rounder.