After I finished my card for the Inky Paws Challenge over at Newton's Nook, I just had to start working on an idea that had been percolating while I made my challenge card. I inked up the Newton's Day Dream stamp but then wiped off the flowers. I then stamped it on my card stock and then again twice more on two post-it notes so I could have both sky and land masks. I masked the kitty before I inked up the small pumpkin from Newton's Perfect Pumpkin and stamped it on both sides. I also cut two more masks for the pumpkins. Once the kitty and pumpkins were stamped and masked, I used Lawn Fawn's Starry Backdrops inked in Versamark and then heat embossed in clear embossing powder to make the starry background. I used a variety of Distress Inks to sponge on the background starting with Squeezed Lemonade at the horizon, adding Seedless Preserves and finishing in Chipped Sapphire at the top and then blending back down. I wiped the excess ink off the stars and removed my kitty mask to replace it with the one to let me finish the ground. I sponged on Shabby Shutters and Mowed Lawn Distress Ink for the ground, leaving me with just white pumpkins and kitty.
My sister's cat Gus, a gorgeous house panther, isn't doing well. She's pretty sure he has kidney failure and, since he's 16, it's probably a pretty good guess. She's taken him to the vet for blood work and, when I was working on this, we were waiting for the results. So I decided that Gus would be my inspiration for this kitty. Not much technique involved in coloring an all black kitty, but I still had fun with my new Prismacolor colored pencils and gamsol. The pumpkins were a bit more of a challenge on the coloring scale. I was going to finish them off with one of the pumpkin faces that come in the Newton's Perfect Pumpkin set, but, of course, I can't for the life of me find it. I had pulled it off to size the stamp for the pumpkin and then set it aside to finish the coloring and now I can't find it. That happens to me all the time and the stamps eventually turn up stuck the back of another package or the side of my pencil case or whatever. My bet is that it will turn up just after I finish my last Halloween card of the year....
To finish off my panel, I wanted to do something a little simple. I bought the Simon Says Stamp Frames dies because I love the frame it cuts out. I saw so many ways it would be useful and I thought it would be perfect for this. So first I cut the panel down using the largest stitched die from My Favorite Thing's Blueprints #13 set and then centered up the Simon Says Stamp Frame Die over my panel and die cut it. I then die cut a white piece with the same frame. Then it was just a matter of piecing them all back together on my card base. Once I had it together, I added my sentiment from the Newton's Perfect Pumpkin set and washed the sky in Wink of Stella.
After the card was done, I was left with a starry frame that was perfect to frame Chewie! Of course, she would sit still so I could get an in-focus picture. This was the best I could get...
Showing posts with label Distress Ink. Show all posts
Sunday, October 12, 2014
Monday, October 6, 2014
Card Deconstruction
After getting the photos for my sister, I pulled apart the entire card and played with the pieces to make something totally different. This card just came together from nothing but I love it. I started with a Heidi Swapp stencil to add my falling snow. Before my embossing paste was dry, I added some Judikins Embossing Powder for a little sparkle. I then added a night sky with about six (!) colors of Distress Ink (Scattered Straw, Seedless Preserves, Faded Jeans, Chipped Sapphire, Tumbled Glass and Black Soot). I cut out the rolling snow hills with my Mama Elephant Landscape Trio dies. To the two in white card stock, I added some Versamark Dazzle and the same sparkling embossing powder. I stamped the sentiment from the Hero Arts set with the houses in some Simon Says Stamp Soft Navy ink and fishtailed the banner. Love this card, even though it not mass production friendly.
Wednesday, September 10, 2014
Have You Heard the News?
I'm having so much fun with the Monster Mash set from Lawn Fawn along with some new goodies from Simon Says Stamp and Hero Arts. For Labor Day, Craft Warehouse was running a 40% off coupon and I hadn't been there in a while. I wandered around and got some inspiration and decided I needed a new background stamp when I found the Newspaper Background stamp. I immediately knew it would work as a perfect neutral for cards that need a little something extra and that was the perfect extra for the card that I had in mind today. I inked that new stamp up with some Versafine Onyx Black ink and heat embossed it with some clear embossing powder. Now, of course, I had to ink that up using some of my favorite colors of Distress Ink of Worn Lipstick, Broken China and Spiced Marmalade.
Then I broke out my new Frames Dies from Simon Says Stamp. I've played with one of them, but I wanted to use the oval frame and thought this card was perfect for that. I used the frame to cut through my inked layer and the front of the card.
I added the large and small one-eyed monsters from the set that I colored in copics with pop dots so they came through the top of the card.
I printed the sentiment on some cardstock and cut it out with a die from Mama Elephant then adhered it to the front of the card before stamping the sentiment from Lawn Fawn on the inside.
Then I broke out my new Frames Dies from Simon Says Stamp. I've played with one of them, but I wanted to use the oval frame and thought this card was perfect for that. I used the frame to cut through my inked layer and the front of the card.
I added the large and small one-eyed monsters from the set that I colored in copics with pop dots so they came through the top of the card.
I printed the sentiment on some cardstock and cut it out with a die from Mama Elephant then adhered it to the front of the card before stamping the sentiment from Lawn Fawn on the inside.
Monday, September 1, 2014
Party Animal!
I just love this Avery Elle stamp set. I've loved it but never bought it until I saw it at Impress when my family was up there to take Sandy Allnock's class. I knew I just had to have it when I saw it in person and perfect timing too because I need a lot of birthday cards coming up.
For this card, I was playing with the background, I'm really enjoying sponging on Distress Ink with the round blending tool. It's so much easier to use. I then used a new chevron stencil from Memory Box to add some embossing paste for more texture and then dripped water onto the Distress Ink for a little more texture.
Then I stamped out the cute little balloon animal from the Avery Elle Party Animal set in some Simon Says Stamp Sunshine ink and then sentiment from the Lawn Fawn Chit Chat set using Slate ink from Simon Says Stamp. I cut them both out, added some Wink of Stella and then Glossy Accents. Once they were dry, I added them to the card with some pop dots and finished it off with some Pretty Pink Posh sequins.
For this card, I was playing with the background, I'm really enjoying sponging on Distress Ink with the round blending tool. It's so much easier to use. I then used a new chevron stencil from Memory Box to add some embossing paste for more texture and then dripped water onto the Distress Ink for a little more texture.
Then I stamped out the cute little balloon animal from the Avery Elle Party Animal set in some Simon Says Stamp Sunshine ink and then sentiment from the Lawn Fawn Chit Chat set using Slate ink from Simon Says Stamp. I cut them both out, added some Wink of Stella and then Glossy Accents. Once they were dry, I added them to the card with some pop dots and finished it off with some Pretty Pink Posh sequins.
Monday, August 25, 2014
Where's the Mojo?
I've been home the last two days and yet really haven't had the mojo to get some serious crafting done. Yesterday, I chalked it up to being tired from the whirlwind trip to Seattle. I did some playing, but not a whole lot. I expected today to be a marathon day in the craft room and, yet, I didn't really get much done. I finished up a card and then decided I needed to clean my craft room a bit. Hubby was home today so I mentioned a shelf I would like built for my craft room and we talked through a bit of a move around. Well that, of course, meant a trip to Lowe's. While there, I got the call that my intern died over the weekend. I was shocked. He had the flu last week and I sent him home to rest (and keep the rest of us from being exposed). We emailed every day but it didn't seem like it was anything out of the usual for a flu and now he's just gone. It seems a bit unreal.
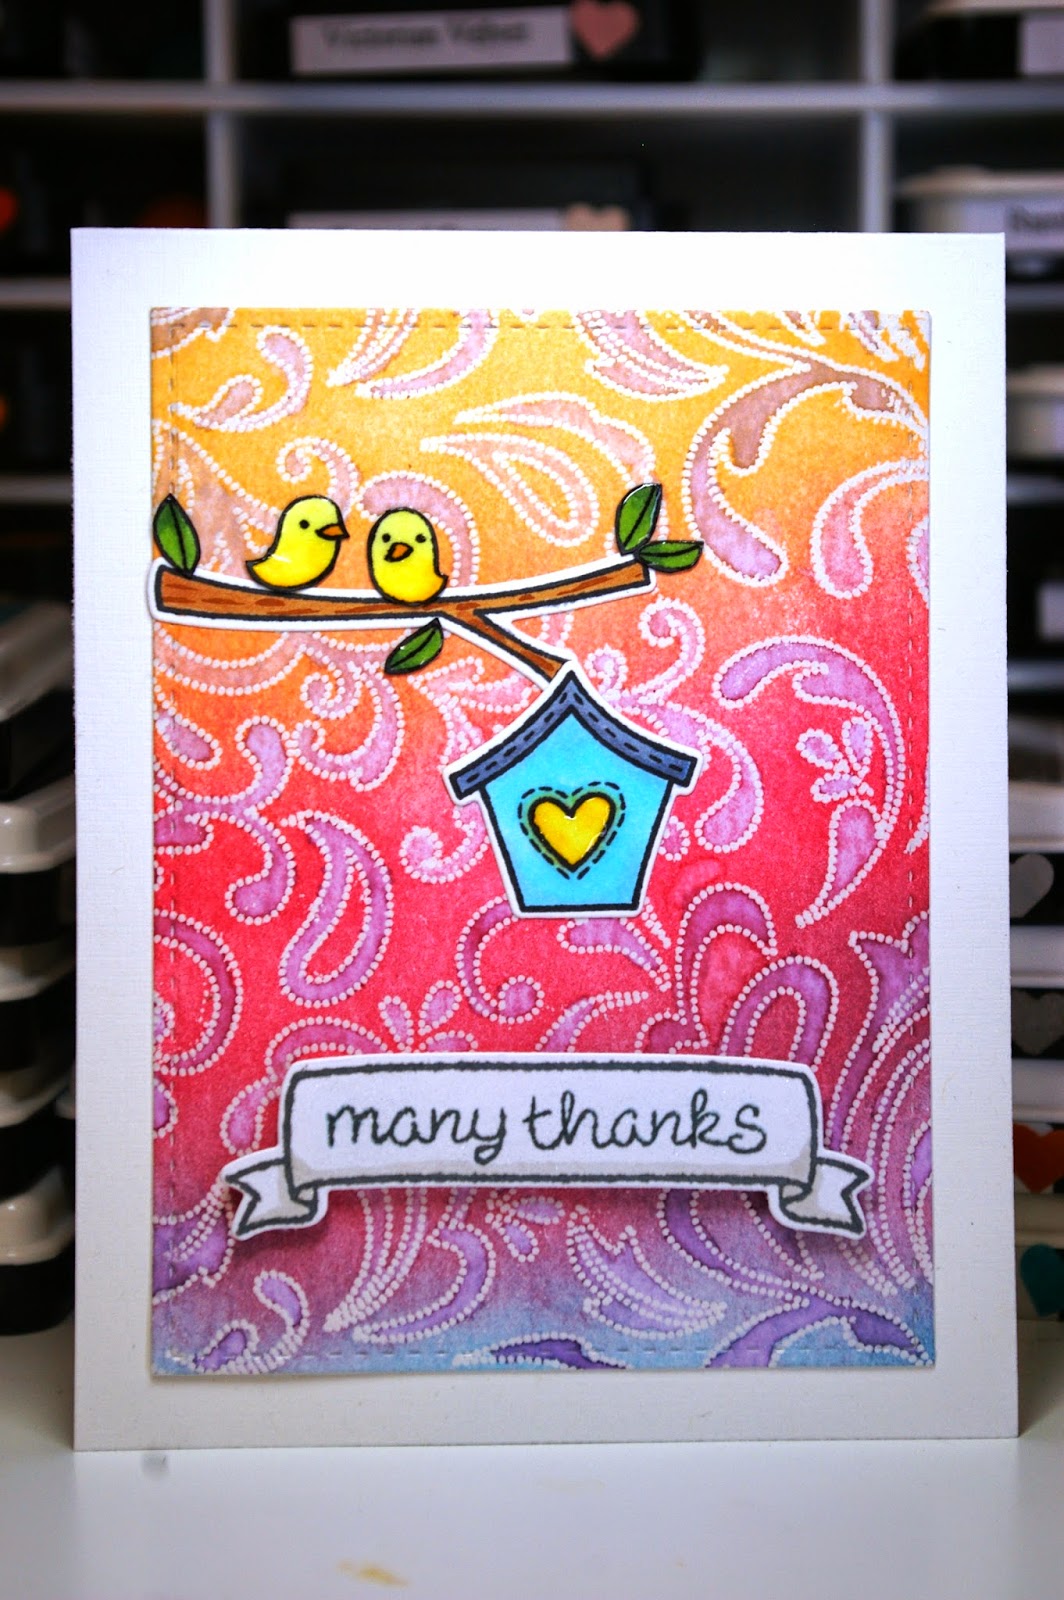
So needless to say, I'm not feeling very crafty right now. I've finished cleaning my craft room and I think that's all that's going to get done today. But at least I have this card I finished up to share with you. I posted the background I was working on it back on Instagram on Sunday. It's a background stamp I bought at Impress while I was there for Sandy's copic class. I stamped it with Versamark ink and heat embossed it with some clear embossing powder. I sponged on three colors of Distress Ink in overlapping stripes (I just love those new mini round applicators - I get much nicer results). Then I added some watered down Distress Ink over the flourishes but then toweled it off after a minute or so.
I cut the completed panel down with the smallest frame from Mama Elephant's Femme Frames. I practiced my copic coloring on images from Lawn Fawn's Home Sweet Home set then cut them out (fussy cutting for the birds and leaves and dies for the branch, banner and house). I stamped the banner in Smoke ink from Simon Says Stamp, but the rest were the standard Memento Tuxedo Black ink. Once it was all cut out, it was just a manner of gluing them in place and adding some pop dots on the sentiment. Then because I'm obsessed with Wink of Stella and Glossy Accents lately, I added Wink of Stella to the banner and Glossy Accents to the bird, the leaves and the heart on the bird house.
So needless to say, I'm not feeling very crafty right now. I've finished cleaning my craft room and I think that's all that's going to get done today. But at least I have this card I finished up to share with you. I posted the background I was working on it back on Instagram on Sunday. It's a background stamp I bought at Impress while I was there for Sandy's copic class. I stamped it with Versamark ink and heat embossed it with some clear embossing powder. I sponged on three colors of Distress Ink in overlapping stripes (I just love those new mini round applicators - I get much nicer results). Then I added some watered down Distress Ink over the flourishes but then toweled it off after a minute or so.
I cut the completed panel down with the smallest frame from Mama Elephant's Femme Frames. I practiced my copic coloring on images from Lawn Fawn's Home Sweet Home set then cut them out (fussy cutting for the birds and leaves and dies for the branch, banner and house). I stamped the banner in Smoke ink from Simon Says Stamp, but the rest were the standard Memento Tuxedo Black ink. Once it was all cut out, it was just a manner of gluing them in place and adding some pop dots on the sentiment. Then because I'm obsessed with Wink of Stella and Glossy Accents lately, I added Wink of Stella to the banner and Glossy Accents to the bird, the leaves and the heart on the bird house.
Friday, August 22, 2014
Congrats!
Yesterday I found out that a friend is engaged! So, of course, I needed to make a card and yesterday I blogged about my failed attempt. Of course you know I was in a hurry because I needed to pack for a quick trip to Seattle to take a class by the amazing Sandy Allnock. In fact, as this post goes live, I'll be on my way with my mom and sister for the girls' trip.
But, I still needed a card. I inked up the Hero Arts Antique Flower Background again and this time, changed the order of the inks and got exactly what I was meaning to have in the first card. I found a cut for Congrats for my Cameo and cut four to layer together. I adhered them together and then to the background and then to my card base. I added some Wink of Stella and some Glossy Accents to finish it off. Fun and fast!
Thursday, August 21, 2014
Sometimes a Failure is a Success
I was working on quick card tonight, but the idea I had didn't quite turn out. I was trying to do a nice color background with Distress Ink over the Hero Arts Antique Flower Background stamp to make a quick congratulations card, when it turned out a bit grey and not at all the cheery look I was going for with this one. Boo. But the more I looked it, the more I thought it would work for something just a little different.
I looked around my craft desk and saw the banner from the Dotted dies from Avery Elle and the many thanks sentiment from the Hero Arts Sending Smiles set and a new idea was born. I made a quick banner stamped with Slate ink from Simon Says Stamp and added a little wood veneer heart (with Wink of Stella and Glossy Accents, of course) and, all of the sudden, that failed background was perfect.
Friday, August 15, 2014
A Lawn Fawn Birthday Inspired by Stretch Your Stamps 2
I signed up for the Onlinecardclasses.com Stretch Your Stamps 2 class and I love it, but it's pretty bad timing because life is just crazy busy right now so I haven't had as much time to play as I would like. I was trying to clean my craft room when this card just sort of materialized out of things I had on my desk. I'm a crazy messy crafter so it seems like I'm always cleaning my room, but at the same time, the mix of crazy stuff all together brings up some of my best mojo. Today's card started when I stamped the Impression Obsession Circle Fusion stamp and heat embossed it. Then I just added some Distress Ink that were on my desk and yet seemed to go together well. Then I decided to cut it down using the Avery Elle Dotted die. I found this navy colored card base in my stash of pre-made card bases as I was putting it away. I wasn't quite sure where it was going until I found the Into the Woods set from Lawn Fawn. I just had to color and cut the cute fawn, but, for the sentiment, I needed a different set. I picked the Chit Chat set, also from Lawn Fawn. I looked at a few ink colors but finally settled on Audrey Blue from Simon Says Stamp. I really love that color. To finish it off, I added some crystal clear sequins from Pretty Pink Posh that I picked up at Impress during my trip to Seattle last week.
Thursday, July 31, 2014
Happy Bird-day Featuring Newton's Nook
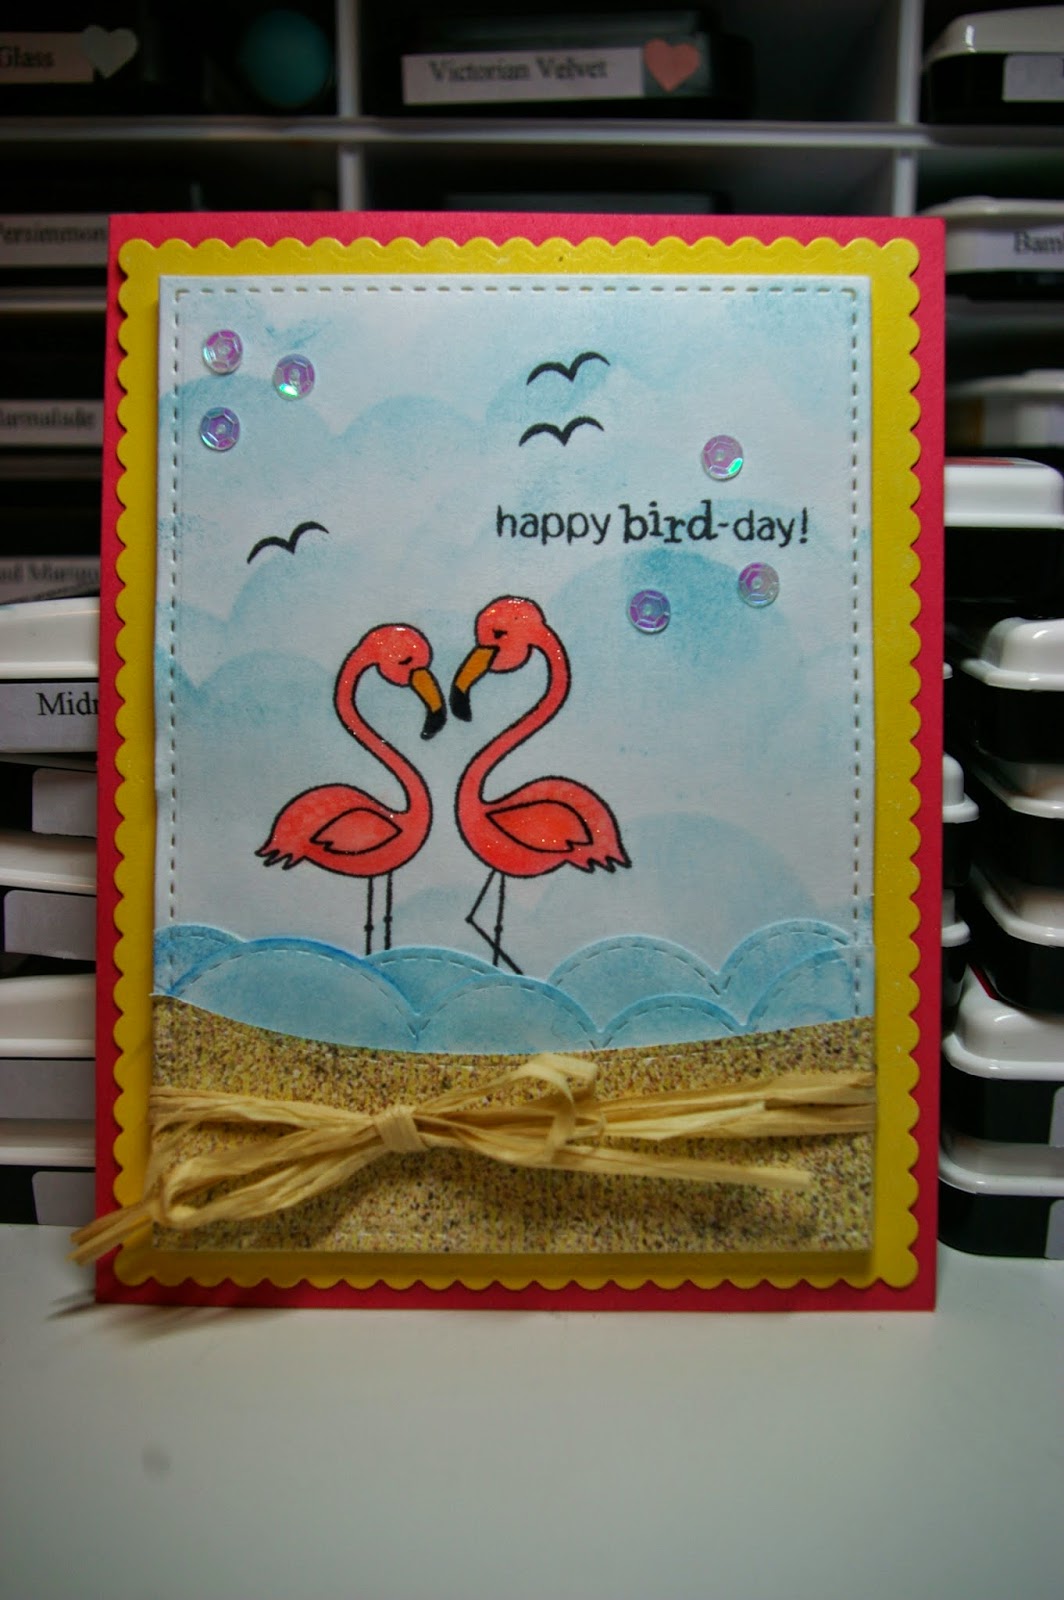
I had so much fun playing with my Newton's Nook stamps, that I thought I would keep going. For today's card, I wanted to play with the Landscape Trio dies from Mama Elephant. It took me forever to get these dies. They were always sold out; I mean everywhere! I've always thought that the scalloped one would work well for surf too so I cut it out a couple of times, inked it up with some Distress Inks and used one of the sloped dies to cut out some more of the DCWV paper for the beach. On the background panel, I stamped the double bird stamp and colored with copics. I covered it with a mask and used the negative from the die cuts for the surf to sponge in some background clouds in the sky. I added a few birds to the background. I had to cheat for these. I had pulled the bird stamp off the Flirty Flamingos set, but when it came time to stamp I could not find them anywhere! I'm sure they will turn up when I clean off my craft desk (it's embarrassing to admit this, but this happens all the time). So I used the birds from Lawn Fawn's Life Is Good set. I layered everything together and then ran it through my die cut machine using the stitched frame from Mama Elephant's Femme Frames, which I also finally find this week after stalking the various websites for a long time to try to find a place where it, too, wasn't sold out (Ellen Hudson had it in the Basics set). I then used some cute yellow paper from the Echo Park 6x6 paper pad A Perfect Summer to cut out the larger frame. I tied some raffia around the beach and then used pop dots to place the panel on the yellow paper and adhered that to the card base. I added Wink of Stella and Glossy Accents to the flamingos. I added white Wink of Stella to the "surf" and some clear sequins to finish it off. Because it's a beach themed card, it fits the challenge over at Newton's Nook to create a beach themed card. You can find lots of inspiration on their post here. The challenge is open until August 8th, so go check it out and play along!
Wednesday, July 30, 2014
Wish You Were Here Featuring Newton's Nook
This week and next week are going to be crazy busy at work. I'm basically covering the work of three people for two weeks and one of those weeks I won't even be in this state. So, although, we're really short handed, I decided to take last Friday off. I had been scheduled off since the beginning of the month to use some use-it-or-lose-it time before I lose it at the end of this month and I had worked long hours all week so I really needed a break, plus hubby had the day off. We spent some time together doing a lot of nothing, which was nice. He worked on Saturday, so I had thought about going into the office, but I also realized that I had things around the house I wanted to get done since I knew I was going to be working long hours and wouldn't to have any time this week or next. So I stayed home and cleaned the house, snuggled a furball or two (at the same time!) and watched a few crafty videos in between loads of laundry. It was the perfect break to feel like I was human again and not just a working machine. Then I it was time to spend some time in my craft room to exercise a different part of my brain with some new goodies I've picked up recently.
Specifically, Newton's Nook recently released some new (adorable) stamp sets. I'm such a sucker for Newton so I had to pick up Newton's Summer Vacation and my sister loves flamingos so, of course, I had to get Flirty Flamingos. When I was catching up on my blog reading, I noticed Newton's Nook had a new challenge to create a beach themed card and thought it was the perfect opportunity to play with my new stamps. You can find out all about the challenge over on the Newton's Nook blog here. It's open until August 8th so go check it out and play along.
For my card, I started with the Flirty Flamingos set. I inked up the solo flamingo in Memento Tuxedo Black ink and colored it with copics. I then created mask for my flamingo so I could sponge in some waves with Distress Ink and sponge daubers and then colored in some sand and sky with my copics. I used the Amy Tangerine dies to cut a polaroid shape. I stamped the sentiment from the Newton's Summer Vacation and colored in the little heart with the same copics used for the flamingos. I remembered having some "sand' paper and found in an old DCWV Summer Stack. I used the Dotted Die from Avery Elle to cut out that paper and mounted my "polaroid" on it. To finish it off, I added a few Doodlebug sequins, some Glossy Accents on the floaty ring and a some Wink of Stella on the waves.
Specifically, Newton's Nook recently released some new (adorable) stamp sets. I'm such a sucker for Newton so I had to pick up Newton's Summer Vacation and my sister loves flamingos so, of course, I had to get Flirty Flamingos. When I was catching up on my blog reading, I noticed Newton's Nook had a new challenge to create a beach themed card and thought it was the perfect opportunity to play with my new stamps. You can find out all about the challenge over on the Newton's Nook blog here. It's open until August 8th so go check it out and play along.
For my card, I started with the Flirty Flamingos set. I inked up the solo flamingo in Memento Tuxedo Black ink and colored it with copics. I then created mask for my flamingo so I could sponge in some waves with Distress Ink and sponge daubers and then colored in some sand and sky with my copics. I used the Amy Tangerine dies to cut a polaroid shape. I stamped the sentiment from the Newton's Summer Vacation and colored in the little heart with the same copics used for the flamingos. I remembered having some "sand' paper and found in an old DCWV Summer Stack. I used the Dotted Die from Avery Elle to cut out that paper and mounted my "polaroid" on it. To finish it off, I added a few Doodlebug sequins, some Glossy Accents on the floaty ring and a some Wink of Stella on the waves.
Monday, July 21, 2014
Thanks Card Using a Watercolor Technique
The other day when I posted the card that I made trying the reverse stamping technique I saw on Catherine Pooler's blog I mentioned that I wasn't really in love with how the panel turned out originally. So I immediately tried something a little different. I simply painted on Distress Inks using a watercolor brush and then used my heat tool to move them around while they dried. I loved how it turned out. I cut it down to fit on my card with a mat. I used a piece of black card stock to mat it before taping it to my white card base. I used my Lawn Fawn Scripty Thanks die to cut several thanks from some extra black card stock, then glued the layers together. I adhered that to my card front. I used black Wink of Stella to add some shimmer to the sentiment and some clear sequins to finish off the card.
Here's a close up of the layered and shimmery sentiment:
Sunday, July 20, 2014
Hello Card Inspired by Jennifer McGuire
As I posted before, I was completely enthralled watching Jennifer McGuire
use Distress Inks with embossing folders. You can see her beautiful
work and check out her video here. I immediately knew I
had to give it a try by making several panels. For this card, I used a Darice Basketweave embossing folder with my Distress Inks (this time I think Seedless Preserves, Picked Raspberry and Peacock Feathers). Once my panel was finished, I wasn't sure what to do with it. After all, it was the last of four panels I made using the same technique. So it sat on my desk for while, but in the hurricane of craft products on my desk I got an idea (if you remember this picture from my social media feed):
In fact, you can see the card in progress on my craft mat. It started with the Lawn Fawn Large Stitched Journaling Card. It's meant to cut a 4 by 6 panel for Project Life, but I've seen it used on cards on videos and blogs (although I can't remember where I specifically saw it), so I pulled it off the card and used it to cut the panel for my card. I then used that piece of Soft Navy card stock from Simon Says Stamp that you can see on the right side of my picture to make a card base. I used the We R Memory Keepers Corner Chomper to round the corners of the panel to match. For the sentiment, I cut out the word hello several times with the Lawn Fawn Scripty Hello die (see the paper on the right) then stacked them. I brushed the finished product with white Wink of Stella for a little glitter, then adhered it to my embossed panel. I added that on top of my card base, then finished it off with some Doodlebug sequins (although I'm not sure I like the color on the finished the card and I may switch them out for clear ones) and some Glossy Accents on the hello.
Here's a close up of the sentiment:
In fact, you can see the card in progress on my craft mat. It started with the Lawn Fawn Large Stitched Journaling Card. It's meant to cut a 4 by 6 panel for Project Life, but I've seen it used on cards on videos and blogs (although I can't remember where I specifically saw it), so I pulled it off the card and used it to cut the panel for my card. I then used that piece of Soft Navy card stock from Simon Says Stamp that you can see on the right side of my picture to make a card base. I used the We R Memory Keepers Corner Chomper to round the corners of the panel to match. For the sentiment, I cut out the word hello several times with the Lawn Fawn Scripty Hello die (see the paper on the right) then stacked them. I brushed the finished product with white Wink of Stella for a little glitter, then adhered it to my embossed panel. I added that on top of my card base, then finished it off with some Doodlebug sequins (although I'm not sure I like the color on the finished the card and I may switch them out for clear ones) and some Glossy Accents on the hello.
Saturday, July 19, 2014
Thinking of You Inspired by Jennifer McGuire
As I posted before, I was completely enthralled watching Jennifer McGuire
use Distress Inks with embossing folders. You can see her beautiful
work and check out her video here. I immediately knew I
had to give it a try by making several panels. For this card, I used the Darice Heart Background with my Distress Inks (Peacock Feathers and Seedless Preserves I think) to make the lovely embossed panel. I wasn't quite sure how I was going to use it on a card, but the idea came to me when I made a mess of a my craft desk. I hate when it's messy but I do have to admit that I'm more creative when things are chaotic on my desk. Somehow the mess of supplies leads me to think of things I might not have thought of if I hadn't seen random things laying together.
It all started with the Lawn Fawn Stitched Party Banners dies and I thought about using the smallest banner shape for my sentiment. But I didn't want to cover over all the texture and color, so I found some vellum in my stash. Fortunately, I have several weights of vellum because the first piece was way too heavy. It really was too opaque for what I wanted. But then I found the lighter weight pack and realized it was perfect. After cutting out my banner, I used the stamp from the Simon Says Stamp July 2014 Card Kit inked in Versamark and heat embossed with some Ranger Super Fine White Embossing Powder to finish the sentiment. I then marked the holes in the banner on my panel and used my Crop-a-dile to hole punch in the back panel. I used some Sky hemp cord from Lawn Fawn for a bow and then cut my panel just a bit smaller than the width of my card base made from a half of a sheet of Simon Says Stamp Soft Navy card stock. Once I had adhered it to the card base, I decided it really didn't need any further embellishment.
Friday, July 18, 2014
Hello Card Inspired by Jennifer McGuire
As I posted before, I was completely enthralled watching Jennifer McGuire use Distress Inks with embossing folders. You can see her beautiful work and check out her video here. I immediately knew I had to give it a try by making several panels. For this card, I used the Cuttlebug Script Texture with several colors of Distress Ink (Tea Dye, Gathered Twigs and Walnut Stain I believe). I cut the finished piece down and matted it on some cream card stock. I used a piece of brown linen card stock for the base of the card and then cut the hello several times using the die from the That Arrow Card die set from Technique Tuesday with some left over paper. I stacked the hello cuts to give it a bit of thickness. I also die the banner from the same cream card stock as the mat using Avery Elle's Pinked Elle-ments that I just picked up around the holiday. I decided to the leave the card as it was without any extra embellishment.
Thursday, July 17, 2014
Thanks Card Inspired by Catherine Pooler
While reading blogs on my iPad, I came across a fun card made by Catherine Pooler using the reverse side of a stamp. You can find the post and video here. I thought I would give it a shot. Since I didn't have the stamp she has, I used the backside of the Dahlia stamp from Crafty Secrets along with the Peacock Feathers, Mustard Seed and Picked Raspberry Distress Inks. I wasn't sure I really liked how it turned out, so I set it aside and worked on something else, but once it dried, I actually thought it wasn't too bad. Sometimes things just have to grow on me. So I cut the panel down to 4 x 5 1/4. Then I used the Lawn Fawn thanks die to cut my sentiment into the panel. I then taped the panel down to a card base made from Simon Says Stamp Soft Navy card stock, which is quickly becoming a favorite. I used some extra of that card stock to cut out another thanks using the die. I then inlayed the sentiment, which is a very popular technique right now. I added a few clear sequins to finish it off.
Wednesday, July 9, 2014
Thank You Inspired by Jennifer McGuire
I was completely enthralled watching Jennifer McGuire use Distress Inks with embossing folders. You can see her beautiful work and check out her video here. I immediately knew I had to give it a try.
For this background, I spread several colors of Distress Ink on the QuicKutz Zig Zag embossing folder, spritzed it with water and then ran it through my Big Kick. While it dried, I stamped the banner from Lawn Fawn's Bannerific with some Simon Says Stamp Soft Navy ink then cut it out with the matching die. I stamped the two cute little birdies from the set with some Grey Flannel Memento ink and colored them with my copic markers. I had to fussy cut those but they are so cute on the card as if they are holding the banner. I love how they look with some pop dots behind them. I added a little Wink of Stella to the banner and some simple coloring to shade the banner. I finished it off with some clear sequins because lately it seems like everything needs sequins.
Saturday, June 21, 2014
Thinking of You - Inspired by Kristina Werner
I spent the first part of the week in DC. I never really sleep well when I'm away from home, especially if I'm on my own. So I watched a lot, I do mean a lot, of crafting videos and couldn't wait to get home to get into my craft room. But, jet lag, work and life just got in the way until today. It turned out that was okay because I also got to open some new goodies, including the new round blending tools, so I was super excited to play with them.
One of the videos I watched was a fabulous one-layer card made by the equally fabulous Kristina Werner. You can find her blog post and the video here. I encourage you to subscribe to her You Tube channel and blog. They are amazing.
So for today's card, I made my own version into a thinking of you card. I used a Heidi Swapp heart stencil I picked up at the Creating Keepsakes Convention, some Worn Lipstick Distress Ink and the new round blending tool. Can I just tell you how much I love, love, LOVE the round tool? It's so much easier to use. I can see a lot more blending with Distress Ink in my future.
After I had my hearts down, I shifted the stencil and used a black pen to outline the hearts on the shadow and added Wink of Stella to the hearts. Then I added a sentiment from the Fiskars All Year Greetings set with some Versafine Ink. Then I matted it on some black card stock and popped it onto a white top folding card base. But I didn't like how the sentiment looked.
So on to version #2. I did all the same, except I masked off the place for my sentiment and made the panel slightly larger. I made the mat a little smaller too. I liked this version a lot better.
One of the videos I watched was a fabulous one-layer card made by the equally fabulous Kristina Werner. You can find her blog post and the video here. I encourage you to subscribe to her You Tube channel and blog. They are amazing.
So for today's card, I made my own version into a thinking of you card. I used a Heidi Swapp heart stencil I picked up at the Creating Keepsakes Convention, some Worn Lipstick Distress Ink and the new round blending tool. Can I just tell you how much I love, love, LOVE the round tool? It's so much easier to use. I can see a lot more blending with Distress Ink in my future.
After I had my hearts down, I shifted the stencil and used a black pen to outline the hearts on the shadow and added Wink of Stella to the hearts. Then I added a sentiment from the Fiskars All Year Greetings set with some Versafine Ink. Then I matted it on some black card stock and popped it onto a white top folding card base. But I didn't like how the sentiment looked.
So on to version #2. I did all the same, except I masked off the place for my sentiment and made the panel slightly larger. I made the mat a little smaller too. I liked this version a lot better.
Wednesday, June 11, 2014
I Love You to the Stars and Back
I've had this idea percolating in my head since Sunday and I finally had some time to get my fingers inky. I used two Lawn Fawn stamps sets: Happy Trails and Lucky Stars. I inked the sentiment and stars using Versamark and heat embossed them with clear power. Then it was time for some inky fingers. I used Scattered Straw, Seedless Preserves, a little bit of Dusty Concord and a whole lot of Chipped Sapphire Distress Ink to make my night sky. I really need to get those round blending tools, but I made the rectangle ones and some Tsukineko dabbers work. After stamping out my trees, car and trailer in Momento ink, I colored them pretty simply with my copic markers. Then I cut them out with the matching dies. I decided they needed some grass, so I cut out some green card stock with my Lawn Fawn grassy border die and added a little Mowed Lawn Distress Ink to the edges. Then it was just a matter of building the background with some tape and pop dots.
Saturday, June 7, 2014
Looking for My Mojo
I just don't get it. I have the whole day to myself because hubby has catering to do today. I've been looking forward all week to a whole day to play in my craft room without feeling guilty about taking away from time we could spend together. Now that it's here, apparently my mojo took the day off just when I had planned to make a handful of cards to have ready to encourage my friend as she goes through her upcoming surgery and chemo and reconstruction. I could be in my craft room, but I've been folding clothes, changing sheets on the bed, trying to fix a slow drain... When cleaning the house appeals more than playing with paper, something is wrong. Does this ever happen to you? If so, what do you do about it?
I've got my usual tricks: reading blogs, watching YouTube videos, surfing Pinterest and remaking something someone else has done. But I think my favorite is shopping. I just love shopping for new supplies (as evidenced by my craft room), but there's a pretty limited selection here in town so I'm forced to look online for a lot of my supplies. So today, when I couldn't really find my mojo, I noticed that Simon Says Stamp was running a 20% off sale on their branded products (use code "Twenty" through 11:59 EST on 6/8). I found some things I like and have wanted for a while, put them in my cart, got all the way to the checkout and stopped. I still don't know why. I know that each of things I picked out are things I will love to play with and am excited to play with, but I just stopped. So weird.
But, maybe just the act of shopping did the trick. I started playing with my Art Impression watercolor stamps and Distress Markers. Just as I finished a panel, I heard the buzz of the dryer. So I set the panel aside and headed off to fold some more laundry. When I got back, I discovered that I must have set the panel on a slight angle because some of the water ran and pooled, ruining part of the design. Grrrrrr..... After thinking about tossing the whole thing, I decided I would try to save it by covering the puddled ink with a banner with a sentiment stamped from the Inkadinkado All Occasions set on some watercolor paper. I then matted it with a pop of red and then used a pre-made card base in a swirl pattern. I'm not sure it's totally successful, but maybe it will grow on me and hopefully my mojo will return.
I've got my usual tricks: reading blogs, watching YouTube videos, surfing Pinterest and remaking something someone else has done. But I think my favorite is shopping. I just love shopping for new supplies (as evidenced by my craft room), but there's a pretty limited selection here in town so I'm forced to look online for a lot of my supplies. So today, when I couldn't really find my mojo, I noticed that Simon Says Stamp was running a 20% off sale on their branded products (use code "Twenty" through 11:59 EST on 6/8). I found some things I like and have wanted for a while, put them in my cart, got all the way to the checkout and stopped. I still don't know why. I know that each of things I picked out are things I will love to play with and am excited to play with, but I just stopped. So weird.
But, maybe just the act of shopping did the trick. I started playing with my Art Impression watercolor stamps and Distress Markers. Just as I finished a panel, I heard the buzz of the dryer. So I set the panel aside and headed off to fold some more laundry. When I got back, I discovered that I must have set the panel on a slight angle because some of the water ran and pooled, ruining part of the design. Grrrrrr..... After thinking about tossing the whole thing, I decided I would try to save it by covering the puddled ink with a banner with a sentiment stamped from the Inkadinkado All Occasions set on some watercolor paper. I then matted it with a pop of red and then used a pre-made card base in a swirl pattern. I'm not sure it's totally successful, but maybe it will grow on me and hopefully my mojo will return.
Thursday, June 5, 2014
Withholding Judgment
So I'm not so sure about today's card. I had this idea but it didn't quite translate the way I had it in my mind. So I'm not in love with this card. I keep looking at it thinking that it needs something, but I'm not sure just quite what. So I'm going to sleep on it and take another look at it tomorrow. In the meantime, what got me started tonight was the newest sketch over at Freshly Made Sketches, another challenge block that I stalk read every week, but haven't participated in for a while. I really liked Rita's sketch this week and I've had this Happy Trails set from Lawn Fawn that I picked up at CKC about two months ago, but haven't broken out yet. But now that I've played with the set, I really, really want to go camping, but the RV is in the shop. Boo.
I had stamped the stars from the Lawn Fawn Lucky Stars set, heat embossed the stars with some Versamark and clear embossing powder, stamped the car and trailer from Lawn Fawn's Happy Trails set, inked the starry night background and grass with some colors of Distress Ink, and had the car and trailer pretty much colored with Copics when my husband came in my craft room. He immediately commented on how cute it was (which he rarely does when something is in progress). So I felt like I was on the right track, especially when I added Wink of Stella to the starry night, but it just fell apart after that. I love the starry background embossed with the Darice Stars folder using paper from the Lemon Lush 6x6 pad from Studio Calico. I wasn't sure on the banners because I couldn't find a paper I liked, so I just colored them with a marker to match. Basically I like each of the elements by itself, but they just don't really come together right... So you just may see this card again soon when I figure out what's not quite right. Do you ever have that happen to you?
Subscribe to:
Posts (Atom)