In fact, you can see the card in progress on my craft mat. It started with the Lawn Fawn Large Stitched Journaling Card. It's meant to cut a 4 by 6 panel for Project Life, but I've seen it used on cards on videos and blogs (although I can't remember where I specifically saw it), so I pulled it off the card and used it to cut the panel for my card. I then used that piece of Soft Navy card stock from Simon Says Stamp that you can see on the right side of my picture to make a card base. I used the We R Memory Keepers Corner Chomper to round the corners of the panel to match. For the sentiment, I cut out the word hello several times with the Lawn Fawn Scripty Hello die (see the paper on the right) then stacked them. I brushed the finished product with white Wink of Stella for a little glitter, then adhered it to my embossed panel. I added that on top of my card base, then finished it off with some Doodlebug sequins (although I'm not sure I like the color on the finished the card and I may switch them out for clear ones) and some Glossy Accents on the hello.
Showing posts with label Doodlebug Design. Show all posts
Sunday, July 20, 2014
Hello Card Inspired by Jennifer McGuire
As I posted before, I was completely enthralled watching Jennifer McGuire
use Distress Inks with embossing folders. You can see her beautiful
work and check out her video here. I immediately knew I
had to give it a try by making several panels. For this card, I used a Darice Basketweave embossing folder with my Distress Inks (this time I think Seedless Preserves, Picked Raspberry and Peacock Feathers). Once my panel was finished, I wasn't sure what to do with it. After all, it was the last of four panels I made using the same technique. So it sat on my desk for while, but in the hurricane of craft products on my desk I got an idea (if you remember this picture from my social media feed):
In fact, you can see the card in progress on my craft mat. It started with the Lawn Fawn Large Stitched Journaling Card. It's meant to cut a 4 by 6 panel for Project Life, but I've seen it used on cards on videos and blogs (although I can't remember where I specifically saw it), so I pulled it off the card and used it to cut the panel for my card. I then used that piece of Soft Navy card stock from Simon Says Stamp that you can see on the right side of my picture to make a card base. I used the We R Memory Keepers Corner Chomper to round the corners of the panel to match. For the sentiment, I cut out the word hello several times with the Lawn Fawn Scripty Hello die (see the paper on the right) then stacked them. I brushed the finished product with white Wink of Stella for a little glitter, then adhered it to my embossed panel. I added that on top of my card base, then finished it off with some Doodlebug sequins (although I'm not sure I like the color on the finished the card and I may switch them out for clear ones) and some Glossy Accents on the hello.
Here's a close up of the sentiment:
In fact, you can see the card in progress on my craft mat. It started with the Lawn Fawn Large Stitched Journaling Card. It's meant to cut a 4 by 6 panel for Project Life, but I've seen it used on cards on videos and blogs (although I can't remember where I specifically saw it), so I pulled it off the card and used it to cut the panel for my card. I then used that piece of Soft Navy card stock from Simon Says Stamp that you can see on the right side of my picture to make a card base. I used the We R Memory Keepers Corner Chomper to round the corners of the panel to match. For the sentiment, I cut out the word hello several times with the Lawn Fawn Scripty Hello die (see the paper on the right) then stacked them. I brushed the finished product with white Wink of Stella for a little glitter, then adhered it to my embossed panel. I added that on top of my card base, then finished it off with some Doodlebug sequins (although I'm not sure I like the color on the finished the card and I may switch them out for clear ones) and some Glossy Accents on the hello.
Tuesday, July 8, 2014
Hello - Playing with Gelatos
I've been watching lots of videos of people having fun with gelatos from Faber Castell. While I bought some a bit ago, I hadn't played with them yet. So I pulled them down off the shelf and played for a little while. I didn't do anything fancy, just a few stripes of color, and then I used a little bit of water and a bit of another color of gelato to make a bit of mist. Once it was all dry, I topped it with a simple frame cut from the Hi Banner die by Technique Tuesday (with the banner cut off) and then a stacked together set of the scripty hello die from Lawn Fawn. I added a few sequins from Doodlebug Design for a bit of bling to finish it off.
Sunday, June 9, 2013
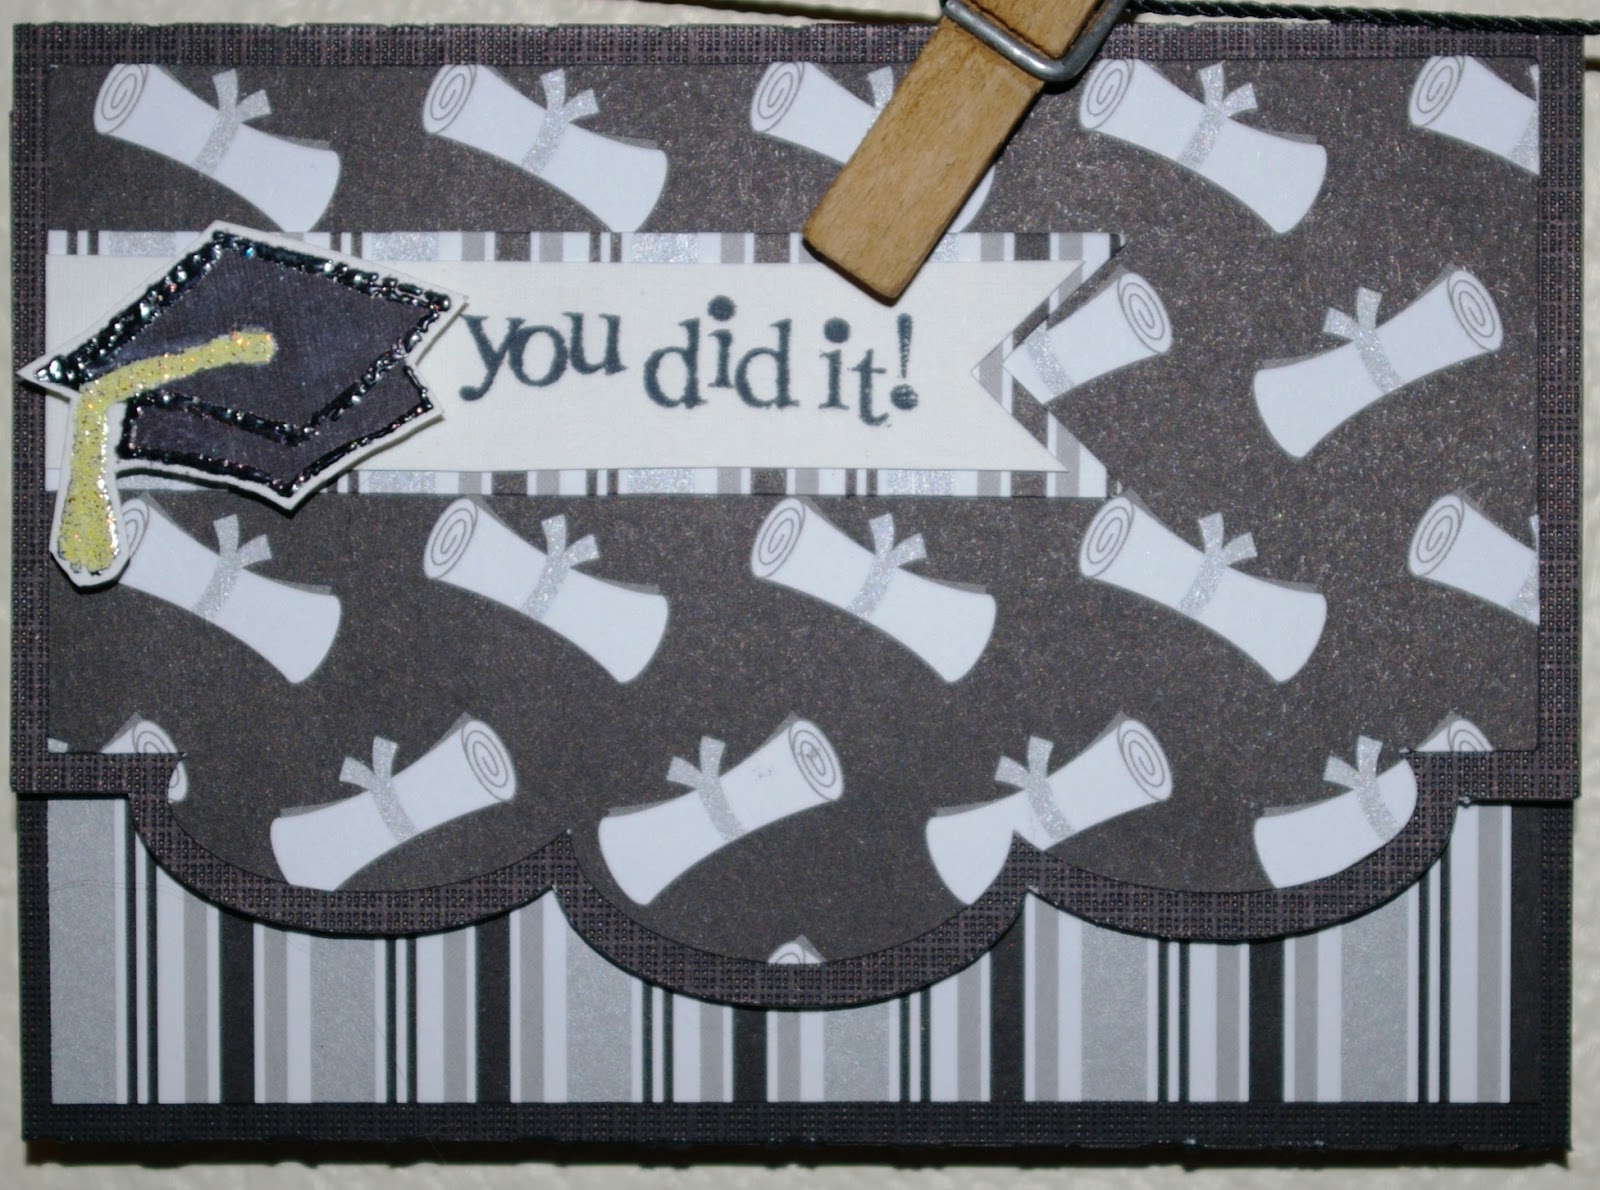
Congrats ... You did it!
This post is courtesy of my sister-in-law who was kind enough to send me a picture of the card because, silly me, I gave it to her before I took a picture of it.
I was browsing our local Craft Warehouse where I found the cutest graduation paper from Doodlebug. So I snapped up a piece of their Diploma Day paper from the Cap and Gown collection. So cute! Then I trolled for inspiration and found it in this card by Flowerbug's Inkspot. It was also a good opportunity to breakout a stamp set I bought a while back knowing that this day was coming: TPC Studio's Graduation set. I also used a sentiment on the inside from the All Occasions set from Inkadinkado. I can't believe how often I find myself pulling that set out. It really is quite versatile. I also took this opportunity to use a card base from the DCWV Shimmer box of cards. I always seem to forget that I have these, but I noticed them on the shelf when I was hunting out the DCWV shimmer paper I used for the red around the circle. It seemed like a match made in heaven.
Friday, June 7, 2013
A Graduation Card Inspired by Doodlebug Design
I was trolling Craft Warehouse for supplies and found this great graduation paper from Doodlebug Design. Knowing that I was going to need a few graduation cards this year, I bought a sheet of the paper called Cap and Gown. I then started surfing my Pinterest board with card inspiration ideas and found that I had actually pinned some ideas from Doodlebug Design's blog. Once I saw this cute money holder card, I knew what I was going to be trying my hand at. I found a card I had in my Silhouette designs (3 scallops edge card - although I could not find in the store today when I was looking for the design number). I thought it was the perfect base. I then cut out the card base out of black card stock and cut the Doodlebug paper for the top of the card. I stamped the cap out of my TPC Studio Graduation set and embossed it in black and then the tassel in yellow. I colored the cap in with some Spectrum Noir pens to finish it off. The sentiment was stamp with my new Momento Brilliance ink on a sentiment from the All Occasions set from the Inkadinkado and finished it off perfectly.
Wednesday, September 7, 2011
You're Purrfect card
My absolute favorite stamp right now is from a Recollections set called Meow, Meow and it looks like our cat Chewie. So of course I had to make a cut file to go with the stamp. My test cut worked perfectly, but my stamping isn't very good. After coloring in Chewie, I trolled my bookmarks looking for a card that it would work with. I don't have a card in mind because Chewie doesn't go with the whole list of birthday cards I need to make, but I was going to make this card anyway. Then I found this sketch I had bookmarked on Scrappity Dappity Doo!, which is really from the Doodlebug Design blog post here. I decided it was perfect. So I cut a scalloped circle on my Cricut using a scallop from the BeaOriginal blog here. Then a little grosgrain ribbon and an heat embossed saying from a We R Memory Keepers stamp set called "You're Purrfect" and a piece of paper from my scraps and I was done.
Subscribe to:
Posts (Atom)