

Showing posts with label Technique Tuesday. Show all posts
Showing posts with label Technique Tuesday. Show all posts
Monday, July 28, 2014
The Last Card With the July 2014 Simon Says Stamp Card Kit
This is it! It's the very last card I made with the 2014 July Card Kit from Simon Says stamp. I only have small bits of paper left that really aren't enough to do a full card from and I long ago ran out of card stock from the kit. I really made this kit stretch and I know I'm still going to get lots of use from the stamp set because it's such a fabulous design (Kristina Werner designs the most amazing stamp sets) and I have loads of washi tape left too. But all I had left was the full sheet of this blue triangle paper. I had a few of the stamped envelopes left over too. I decided to use the Technique Tuesday Notebook Card die as a base for my sentiment. I added the Sending stamped in Soft Navy ink to the thanks cut several times from the Lawn Fawn Scripty Thanks die and then layered for a little dimension. I added a few of the last envelopes from prep for a prior card to finish it off.
And that's it. I went back to count them up and I made (by my count) 19 cards using supplies from the kit by adding in some extra plain card stock from my own stash. I did use a bunch of dies and ink and a few extra supplies from my own stash, but I'm pretty impressed by how far this kit went. I'll definitely be buying others in the future. In fact, I'm debating about the August kit right now, but I'm not sure if I can trust myself to make so many cards featuring ice cream without eating a bunch of it myself!


Tuesday, July 22, 2014
Hippo Birdie Two Ewe!
Last week was rough. I got some bad news about a co-worker and it just sort of threw me for a loop because there's nothing I can do to "fix" the situation (I don't like not being in control). I also realized that the next few weeks are going to a be a bit rough at work so that means I need to really relax during my down time to keep my sanity. But Saturday I had a headache that didn't seem to want to go away so I curled up in a chair with a kitty and watch crafty videos most of the day. I know I don't feel well when I don't want to run into my craft room after a few videos. Fortunately, Sunday I felt a whole lot better (the weather change had completed) and all I wanted to do was play in my craft room. That means I managed to get a few cards made.
I've been playing with some Lawn Fawn stamps I recently got my hands on, including the oh so cute Year Four set. I've had this idea for a card using the phrase hippo birdie two ewe, which I often use for birthday greetings when I'm just dropping a quick line to the birthday boy or girl. I colored the die cut the hippo and bird from the Year Four set and two sheep from the Critters on the Farm set (for which I just finally got the dies - yay! no more fussy cutting).
I also broke out my Mama Elephant Landscape Trio dies. I've seen so many crafters using these and I love the cute little stitched elements. I drug some DCWV polka dotted paper from my scraps bin and sheet of blue graph paper from the Snap Life 6x6 paper pad from Simple Stories for the background. I found a scrap of yellow paper, stamped it in Simon Says Stamp Lemon Chiffon ink using the Technique Tuesday Grid stamp for a little added interest then cut it out with the die from the Hello Sunshine set from Lawn Fawn. I used the Jessie's ABCs set from Lawn Fawn to spell out my sentiment.

I've been playing with some Lawn Fawn stamps I recently got my hands on, including the oh so cute Year Four set. I've had this idea for a card using the phrase hippo birdie two ewe, which I often use for birthday greetings when I'm just dropping a quick line to the birthday boy or girl. I colored the die cut the hippo and bird from the Year Four set and two sheep from the Critters on the Farm set (for which I just finally got the dies - yay! no more fussy cutting).
I also broke out my Mama Elephant Landscape Trio dies. I've seen so many crafters using these and I love the cute little stitched elements. I drug some DCWV polka dotted paper from my scraps bin and sheet of blue graph paper from the Snap Life 6x6 paper pad from Simple Stories for the background. I found a scrap of yellow paper, stamped it in Simon Says Stamp Lemon Chiffon ink using the Technique Tuesday Grid stamp for a little added interest then cut it out with the die from the Hello Sunshine set from Lawn Fawn. I used the Jessie's ABCs set from Lawn Fawn to spell out my sentiment.
Friday, July 18, 2014
Hello Card Inspired by Jennifer McGuire
As I posted before, I was completely enthralled watching Jennifer McGuire use Distress Inks with embossing folders. You can see her beautiful work and check out her video here. I immediately knew I had to give it a try by making several panels. For this card, I used the Cuttlebug Script Texture with several colors of Distress Ink (Tea Dye, Gathered Twigs and Walnut Stain I believe). I cut the finished piece down and matted it on some cream card stock. I used a piece of brown linen card stock for the base of the card and then cut the hello several times using the die from the That Arrow Card die set from Technique Tuesday with some left over paper. I stacked the hello cuts to give it a bit of thickness. I also die the banner from the same cream card stock as the mat using Avery Elle's Pinked Elle-ments that I just picked up around the holiday. I decided to the leave the card as it was without any extra embellishment.

Tuesday, July 8, 2014
Hello - Playing with Gelatos
I've been watching lots of videos of people having fun with gelatos from Faber Castell. While I bought some a bit ago, I hadn't played with them yet. So I pulled them down off the shelf and played for a little while. I didn't do anything fancy, just a few stripes of color, and then I used a little bit of water and a bit of another color of gelato to make a bit of mist. Once it was all dry, I topped it with a simple frame cut from the Hi Banner die by Technique Tuesday (with the banner cut off) and then a stacked together set of the scripty hello die from Lawn Fawn. I added a few sequins from Doodlebug Design for a bit of bling to finish it off.

Saturday, July 5, 2014
Happy Mail Using Simon Says Stamp's July 2014 Card Kit
I'm back... I had to take a bit of time to do my June Project Life, plus four bonus layouts from my two days in DC in June. Now that the first half of 2014 is in the book, I took five minutes tonight to clean up the Project Life goodness in my craft room. Five minutes later, it's, well, not so clean as I immediately drug back out the July 2014 card kit from Simon Says Stamp and started playing. While I watched the last episode of the first season of Fargo (not sure how I missed that one episode on the DVR until now), I put together a little card to get the juices flowing for a whole day in my craft room tomorrow (eek, so excited).
For this card, the only items not from the kit are a piece of red card stock from my stash, the white card base and some Wink of Stella. I used a banner die from the Hi Banner story card dies from Technique Tuesday to cut my smaller banners, but those totally could be cut by hand (although I liked that I could use the die to line up the hello paper. So here's my quick, simple and fun card for tonight:

For this card, the only items not from the kit are a piece of red card stock from my stash, the white card base and some Wink of Stella. I used a banner die from the Hi Banner story card dies from Technique Tuesday to cut my smaller banners, but those totally could be cut by hand (although I liked that I could use the die to line up the hello paper. So here's my quick, simple and fun card for tonight:
Sunday, May 11, 2014
Happy Mother's Day - Inspired by Watercolor for Card Makers
Happy Mother's Day to all the moms out there. Here's the card I made for my Mom:

Yes, it's another card from things I learned in the onlinecardclasses.com class Watercolor for Card Makers. You are going to see a lot of posts about it because that class rocks. This card was made with a Cover-a-Card background stamp from Impression Obsession called Circle Fusion. I heat embossed it with some VersaMark Dazzle and clear embossing powder. Then I played with my watercolors over the image (and wiped up the excess on top of the image with a baby wipe). I then watercolored some stamps from Lawn Fawn's Our Friendship Grows set and cut them out with the matching dies. I stamped the sentiment using the "happy" from Simon Says Stamp's Happy Sentiments set and the "mother's day" from Technique Tuesday's Swanky Sentiment set. Then I cut a flagged banner and added some Old Paper Distress Ink to tone down the white a bit. A few pop dots and glue and I was done.
Yes, it's another card from things I learned in the onlinecardclasses.com class Watercolor for Card Makers. You are going to see a lot of posts about it because that class rocks. This card was made with a Cover-a-Card background stamp from Impression Obsession called Circle Fusion. I heat embossed it with some VersaMark Dazzle and clear embossing powder. Then I played with my watercolors over the image (and wiped up the excess on top of the image with a baby wipe). I then watercolored some stamps from Lawn Fawn's Our Friendship Grows set and cut them out with the matching dies. I stamped the sentiment using the "happy" from Simon Says Stamp's Happy Sentiments set and the "mother's day" from Technique Tuesday's Swanky Sentiment set. Then I cut a flagged banner and added some Old Paper Distress Ink to tone down the white a bit. A few pop dots and glue and I was done.
Sunday, March 23, 2014
Inspired by Kristina Werner to Play with Distress Inks
I was perusing blogs for inspiration when I watched a video Kristina Werner made showing a fun watercolor technique with Distress Inks. If you haven't subscribed to Kristina's You Tube channel, you are missing out. So hop right over to her channel for some fabulous inspiration.
I just had to try my hand at her "spritz and flick" method using my new Distress Ink markers and some heat embossing using a fun stamp set from Technique Tuesday called All Occasions. Watch out though, it's a bit addictive. I ended up making something like 12 cards!


I just had to try my hand at her "spritz and flick" method using my new Distress Ink markers and some heat embossing using a fun stamp set from Technique Tuesday called All Occasions. Watch out though, it's a bit addictive. I ended up making something like 12 cards!
I even loved how my craft table looked with all inks pooled in a rainbow effect. So pretty!
Friday, January 24, 2014
Inspired by Laura Williams on Papercrafts & Scrapbooking
I was trolling through the blogs I read (hmm... I wonder how many times I've written that?) when I saw this clean and simple, but oh so wonderful card made by Laura Williams on the Papercrafts & Scrapbooking blog. I had marked it to pin to my Pinterest Card Layout board for some day when I needed some quick inspiration, but it struck me that it was the perfect card to use a new set I just received from Technique Tuesday called Say It - Hello.
On a side note: After a disastrous try of a kit club a while back, I shied away from them for a long time. But then I finally broke down and joined two stamp clubs (Stamps of Life and Studio AE from Technique Tuesday) and the Project Life kit from Citrus Twist. I must say that each of them is exactly what I expect from a good monthly club and have revived my belief in the concept. I also love that with both Studio AE and Citrus Twist I can add extras for no extra shipping. Stamps of Life charges extra shipping, but it's very reasonable and they give you a discount on the stamps that pretty much evens it all out.
 Back to our regularly scheduled post: I couldn't believe how quickly this card came together. I pulled out a rainbow of Distress Ink: Fired Brick, Spiced Marmalade, Mowed Lawn, Broken China and Dusty Concord. Then I stamped them using my Martha Stewart stamp press just to make sure I lined them up well. Once I had that done, I noticed the "Just Saying" sentiment stamp and light bulb went off. A little VersaFine Tuxedo Black ink added the right touch. I rummaged through my box of card blanks and narrowed it down to a sunny yellow or this beautiful teal. Teal won out in the end through. I used my We R Memory Keepers Corner Chomper to round a few corners then added that last touch with some enamel dots from the Cut & Paste line from My Mind's Eye.
I have to say that I really liked this one (even the hello I heat embossed in VersaMark on the inside, but you don't get to see that here).
On a side note: After a disastrous try of a kit club a while back, I shied away from them for a long time. But then I finally broke down and joined two stamp clubs (Stamps of Life and Studio AE from Technique Tuesday) and the Project Life kit from Citrus Twist. I must say that each of them is exactly what I expect from a good monthly club and have revived my belief in the concept. I also love that with both Studio AE and Citrus Twist I can add extras for no extra shipping. Stamps of Life charges extra shipping, but it's very reasonable and they give you a discount on the stamps that pretty much evens it all out.
I have to say that I really liked this one (even the hello I heat embossed in VersaMark on the inside, but you don't get to see that here).
Monday, October 7, 2013
Happy Birthday Uncle Jim - Inspired by Stampin' Pretty
October 1st was my Uncle Jim's birthday and I was fortunate enough to give him his card personally. That's a rarity since he lives almost two days' drive from us, but he was here for my parents' 50th anniversary. Yay! When it came time to make his card, I opened up my card layout board on Pinterest and was drawn immediately to this card that was featured on the Stampin' Pretty blog here. Although the card started as the inspiration, I knew I would do a standard A2 size. I also immediately knew I wanted to use one of my favorite Technique Tuesday stamps called "Swanky Sentiments. A while back I turned the frame stamp into a cut file for the Cameo courtesy of my scanner, Photoshop and Inkscape, so I cut one for the sentiment and another, slightly larger version, as a mat. I inked out the sentiment from that stamp set with some Faded Jeans Distress Ink and the frame in Tea Dye Distress Ink. Then it was just a matter of cutting the paper from the Fancy Pants Swagger 6x6 pad for the background, mat for the background, and then a few banner strips. I just love the Swagger paper for a card for a man. With a little tape from my ATG gun and a bit of pop dots on the back of the sentiment piece, it was done.


Sunday, June 16, 2013
Happy Father's Day
Before I show the card I made, I've been lucky to have a fabulous father and I'm grateful for everything he has done for me over the years and the memories we've gotten to make together. Happy Father's Day Dad! I want to take a moment to wish my father-in-law a happy Father's Day. We're grateful that he's still with us and finally out of the hospital! Also, happy Father's Day to my Uncle Jim, Uncle Louis, Uncle Gordon, Cousin Pat, and Brother-in-Law Mike. Finally, to my wonderful husband, I'm sorry you never got to the be the fabulous father I know you would have been, but we have four great fur babies who are awfully lucky to have you.
So now on to the card of the day. A while back I found this cute card from The Sweetest Thing pinned on Pinterest. It wasn't a Father's Day card per se, but I loved the masculine look of the card and decided I would scraplift it into a Father's Day card. I used kraft card stock and some white linen paper for the sentiment and mat, but everything else was from the Swagger 6x6 pad from Fancy Pants. It's the perfect paper set for a masculine card. It simply cut two 1 1/2 inch strips and one 1 1/4 inch strips from paper selected from the pad. I cut the edges into a banner then taped them together offsetting a little. I cut a background piece to 4 inch square and poked holes all the way around it using my handy Stampin' Up paper piercer and eyelet placing tool. I hardly ever stitch on my layouts cards. I love the look but never take the time, so thing time I didn't a faux stitching with a white pen. I then adhered that to a mat cut from the linen paper at 4 1/8.
I used my Cameo to cut the linen paper for my sentiment and then stamped in Vintage Photo Distress Ink using the Swanky Sentiments set from Technique Tuesday. I added some Martha Stewart baker's twine then used pop dots to adhere the sentiment. I found a button from my stash, tied it off with a scrap of baker's twine and glued it to the edge of my sentiment.
All that was left was to cut a 4 1/2 by 8 1/2 chunk of kraft card stock to make my card base and tape it all together. I love how it all turned out.

So now on to the card of the day. A while back I found this cute card from The Sweetest Thing pinned on Pinterest. It wasn't a Father's Day card per se, but I loved the masculine look of the card and decided I would scraplift it into a Father's Day card. I used kraft card stock and some white linen paper for the sentiment and mat, but everything else was from the Swagger 6x6 pad from Fancy Pants. It's the perfect paper set for a masculine card. It simply cut two 1 1/2 inch strips and one 1 1/4 inch strips from paper selected from the pad. I cut the edges into a banner then taped them together offsetting a little. I cut a background piece to 4 inch square and poked holes all the way around it using my handy Stampin' Up paper piercer and eyelet placing tool. I hardly ever stitch on my layouts cards. I love the look but never take the time, so thing time I didn't a faux stitching with a white pen. I then adhered that to a mat cut from the linen paper at 4 1/8.
I used my Cameo to cut the linen paper for my sentiment and then stamped in Vintage Photo Distress Ink using the Swanky Sentiments set from Technique Tuesday. I added some Martha Stewart baker's twine then used pop dots to adhere the sentiment. I found a button from my stash, tied it off with a scrap of baker's twine and glued it to the edge of my sentiment.
All that was left was to cut a 4 1/2 by 8 1/2 chunk of kraft card stock to make my card base and tape it all together. I love how it all turned out.

Thursday, June 13, 2013
Happy Birthday Card Inspired by Rocky Mountain Papercrafts
My sister-in-law's birthday was last week so, of course, I needed to make her a cute card. I was flipping through a Pinterest board when this oh so cute card by Allisa at Rocky Mountain Papercrafts caught my eye. I knew it was the perfect one. So I flipped through my 6x6 paper pads and decided that Jillibean Soup's Apple Cheddar Soup was the right one for this card. I choose the wood grained paper and the little flowers. I then teamed them up with some plain brown card stock as a mat, some plain cream card stock for the sentiment and cream card base. I couldn't find the right color to mat the flower, but then I found the perfect paper for that in my Fancy Pants Park Bench 6x6 pad. I cut a flower with my Cameo and made a shadow for it. Once I had it all assembled, I stamped my sentiment in Momento Espresso Truffle in using Technique Tuesday's Swanky Sentiments and stamped a flourish in Momento Toffee Crunch ink using a flourish from the Teresa Collins Spring Fling stamps. It still needed a little something, so I dug a blingy brad from my stash and added a few Darice gems. That finished it off nicely.


Saturday, June 8, 2013
Happy Father's Day Card Inspired by I Create
I found this fabulous card on the I Create blog. I just loved the colors, the layout and the whole look. It was just so wonderful I knew I had to create my own version and it was the perfect time to pull out the Swagger 6x6 paper pad by Fancy Pants I picked up during the National Scrapbooking Day sale at Craft Warehouse. I love these masculine prints and I haven't had the opportunity to put them to use yet. So I teamed it up with a Technique Tuesday stamp set I love called Swanky Sentiments and the Four Petal Flower embossing folder from Sizzix then finished it off with a few eyelets from my stash. It was such a fun card to make even though it sat on pieces on my desk for days while I didn't have time to play in my craft room.


Thursday, June 6, 2013
Another Birthday Card Inspired by the Technique Tuesday Blog
Since I my last try at the card inspired by Teri Anderson's card from the Technique Tuesday blog didn't turn out quite like what I originally had in mind, I thought I would give it another try. This time, I really focused on the banner and the card came together very quickly. I used some washi tape from my ever growing pile to create little pennants for the banner. I strung them on some Martha Stewart baker's twine. I hung the banner over some kraft card stock, backed it with white paper and used another DCWV card base from the Brights set. Then, I stamped a sentiment from a set from Fiskars using Momento Espresso Truffle ink. I still thought the card needed a little something so I added some Studio Calico veneer stars. The Glossy Accents I used to glue them down were a little messy so I'm definitely going to have to work on my skills of attaching small embellishments. But I do have to say that overall I really liked this card and I can't believe how one card can inspire so many looks.


Wednesday, June 5, 2013
Happy Birthday Card Inspired by the Technique Tuesday Blog
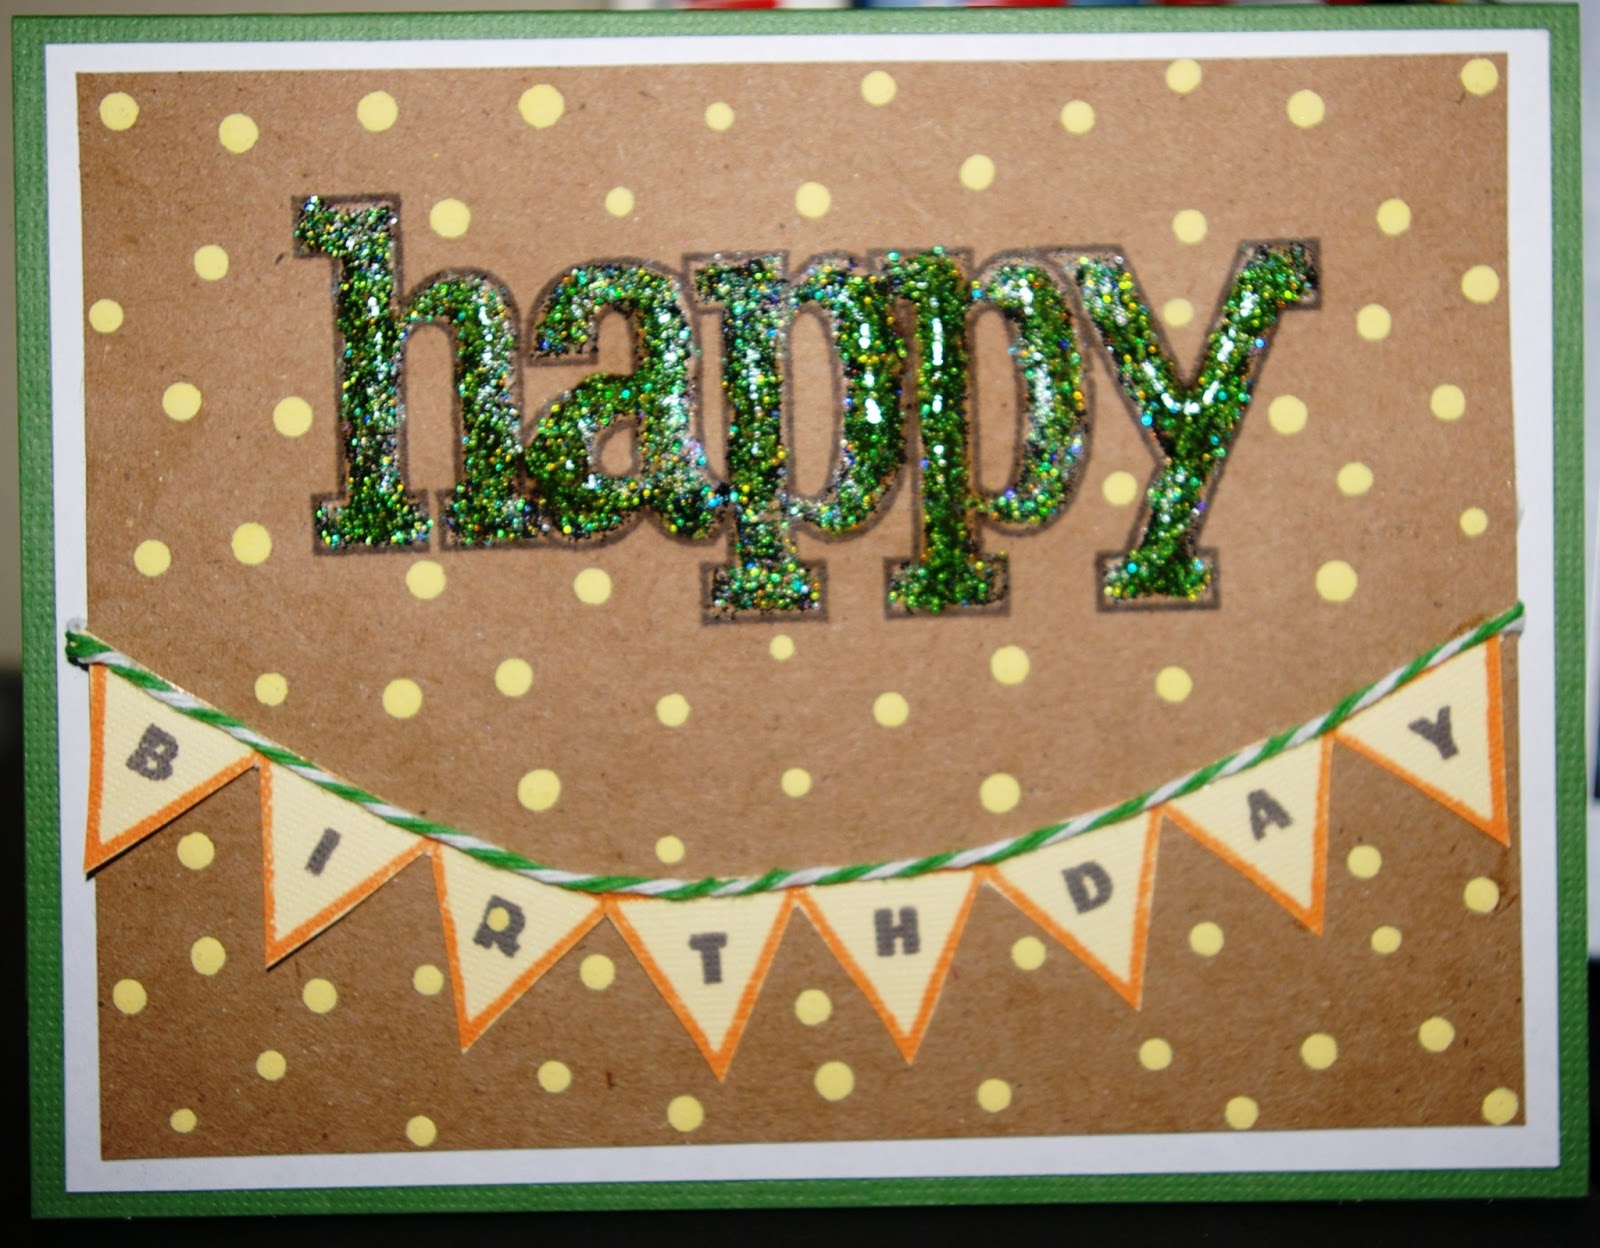
I loved a beautiful card I saw by Teri Anderson on the Technique Tuesday blog. I loved the banners and the simplicity of the card. I had this idea of making it my own using a clear stamp set I've had forever and can longer remember who the manufacturer is, but it has this very large "happy" stamp and smaller word stamps to coordinate. I thought I would use the happy to coordinate with the banners. As I played around with different ideas, I finally decided to try the Stampin' Up Designer Typeset stamp set I bought a while back when they had the free shipping. I stamped the banner with some Momento Tangelo ink on some yellow card stock from the DCWV Pastel mat stack. I then filled in the letters and stamped the happy with Moment Espresso Truffle ink. I mounted the kraft card stock on white and then a base card from the DCWV Brights box of cards.
It definitely still needed something. I used a spare bit of baker's twine I had on my desk that was left over from something I was sent. I glued it to the top of the banner. I then took my sister's suggestion to add some polka dots. I didn't have the right color of paint, so I mixed a little yellow and antique white Apple Barrel acrylic paints together until I had a good shade of yellow to coordinate with the banner. I then filled in the happy with some green glitter glue from Studio G and realized I actually was starting to really like the card.
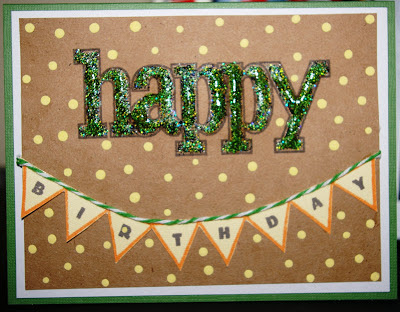
It definitely still needed something. I used a spare bit of baker's twine I had on my desk that was left over from something I was sent. I glued it to the top of the banner. I then took my sister's suggestion to add some polka dots. I didn't have the right color of paint, so I mixed a little yellow and antique white Apple Barrel acrylic paints together until I had a good shade of yellow to coordinate with the banner. I then filled in the happy with some green glitter glue from Studio G and realized I actually was starting to really like the card.
Subscribe to:
Posts (Atom)