When I saw this sweet milk carton design from Sabine on the Lawnscaping Challenge Blog, I just knew I had to give it a try myself. It was so stinking cute! For my version, I choose some blue paper from My Mind's Eye Twinkle, Twinkle Little Boy 12x12 paper pad that I love so much I bought two. Then it was just a lot of stamping, coloring and fussy cutting from a few Lawn Fawn stamps sets including Critters on the Farm (thanks Mom for the cow, sheep and hay) and Critters from the 'Burbs (tree). Then I just cut some green paper with my Martha Stewart fringe scissors (thanks again Pat) since the cute new grass die from (who else?) Lawn Fawn doesn't hit the stores until later this month. I downloaded the milk carton from Silhouette and cut it out on my Cameo. I put it all together and filled it with some chocolate before sealing it up. But the top just seemed a little too plain. So I cut a cute scalloped edge with Deco Scallop border punch from EK Success on two sides of a small strip of white card stock. Once it was glued in place, I punched a couple of holes with my We R Memory Keepers chomper and threaded through some twine I had left over from the packaging of a Citrus Twist kit. Super cute!
Showing posts with label Silhouette. Show all posts
Friday, February 7, 2014
Wednesday, October 9, 2013
Monogram Golf Balls - Inspired by Silhouette
As I mentioned in yesterday's post, I knew my brother-in-law was getting a set of golf clubs for his birthday, so I decided to get him golf balls to go with. But it couldn't be just any golf balls, I wanted to give him some with his monogram, much like I did for my father for a previous Father's Day. For a great tutorial on how to do it (and where I found my inspiration), check out this post on the Silhouette blog.
Dear hubby helped me pick out some golf balls and then I used my Cameo and the tattoo paper to make the custom monograms using a font called Caslon Swash. Then it was just a matter of print, cut and adhere. Easy peasy lemon breezy!
Tuesday, October 8, 2013
Go Fore It - Inspired by Snippets by Design
My brother-in-law's birthday was back in June, but his party was cancelled by an unplanned hospital visit. Thankfully he's fine, but we never did get around to celebrating his birthday. So when his wife, who is my best friend as well as sister-in-law, celebrated another birthday on October 1st, it seemed like perhaps it was long past due for giving him his gift and card. I knew he was getting golf clubs for his birthday, so I wanted to keep with the theme. My quest for a golf themed card began with a Google search (yes, a good Google search often is the solution to my inspiration needs) that took me to Snippets by Design where I found an adorable golf card.
I began by cutting a piece of white card stock down to 4 by 5.25. I then cut a mask from a piece of scratch paper in the shape of a hill using a French curve (because we all know I cannot draw a straight or a curved line). I used the top piece to mask off the "sky" and used Mowed Lawn Distress Ink to add the darker hill in the background. Then I masked off the hill and removed the sky mask. I colored in the sky with Broken China Distress Ink. I die cut a couple of clouds from some spare white card stock using the dies from Lawn Fawn's Sunny Skies set. For the rest, I decided to use the A Perfect Summer 6x6 pad from Echo Park. I cut one of the green papers down to 4 inches wide then cut in the curve using a French curve. Once I adhered it to the background, I finished trimming it to size. Then I drew an oval in my Silhouette software in my Cameo and cut it out of another piece of paper from that pad. I also hand cut the flag from another sheet from that paper pad. For the hole, I punched a hole from some scrap black paper using (believe it or not) my Cropodile big bite on the largest hole punch setting. For the golf ball, I used the smaller setting on some scrap white paper. I cut a long, thin strip from the black scrap paper and cut it down to a height that worked for the card. Then it was just a matter of taping it all together, cutting off any excess and then mounting it to the background.
For the sentiment, I used the Happy Birthday from a Fiskars set called How Many Candles stamped with Versafine Ink. For the inside, which I completely forgot to take a picture, I stamped the sentiment "Go fore it!" using Lawn Fawn's Harold's ABCs. I love that I can customize the sentiment with those stamps and I love how this card turned out. Too cute and just perfect for the occasion.
I began by cutting a piece of white card stock down to 4 by 5.25. I then cut a mask from a piece of scratch paper in the shape of a hill using a French curve (because we all know I cannot draw a straight or a curved line). I used the top piece to mask off the "sky" and used Mowed Lawn Distress Ink to add the darker hill in the background. Then I masked off the hill and removed the sky mask. I colored in the sky with Broken China Distress Ink. I die cut a couple of clouds from some spare white card stock using the dies from Lawn Fawn's Sunny Skies set. For the rest, I decided to use the A Perfect Summer 6x6 pad from Echo Park. I cut one of the green papers down to 4 inches wide then cut in the curve using a French curve. Once I adhered it to the background, I finished trimming it to size. Then I drew an oval in my Silhouette software in my Cameo and cut it out of another piece of paper from that pad. I also hand cut the flag from another sheet from that paper pad. For the hole, I punched a hole from some scrap black paper using (believe it or not) my Cropodile big bite on the largest hole punch setting. For the golf ball, I used the smaller setting on some scrap white paper. I cut a long, thin strip from the black scrap paper and cut it down to a height that worked for the card. Then it was just a matter of taping it all together, cutting off any excess and then mounting it to the background.
For the sentiment, I used the Happy Birthday from a Fiskars set called How Many Candles stamped with Versafine Ink. For the inside, which I completely forgot to take a picture, I stamped the sentiment "Go fore it!" using Lawn Fawn's Harold's ABCs. I love that I can customize the sentiment with those stamps and I love how this card turned out. Too cute and just perfect for the occasion.
Saturday, August 10, 2013
Denver - Day Four
Oops - I thought I had this post ready to go for Thursday of my trip, but apparently I goofed up the process. I just have to laugh though because it's ironic that the grey skies card stayed up on Thursday night. The skies of Denver were very grey (the picture below does not do the sky justice - it was soo much darker than that) that night as it was the worst night of thunderstorms while I was there and they left me sick as a dog (or perhaps it was food poisoning), and I really wished that the hubster was there with me...
I loved this bird card uploaded by Silli when I saw it in the Splitcoaststampers Gallery. I don't have the die she used, but I found a birdie in the Silhouette shapes I had that would work and branch in the Silhouette store that I liked (Design ID 1679). Then it was just a matter of cutting the birdies from some scraps from my bin (I'm pretty sure they are DCWV card stock) and the branch from paper from the Swagger 6x6 pad from Fancy Pants. I used another piece from that pad and my 1 inch punch to cut some circles. Then it was just cut my white card stock for the background, round the corners with my Fiskars corner rounder and build the layers of the card. For the glue, I used Glossy Accents and finished the card with a sentiments from the All Year Greetings from Fiskars stamped with Versafine Onyx Black ink.
Friday, July 19, 2013
Farewell Sweet Mythbusters Kittens
Tonight was the last night of the Mythbusters Kittens on Foster Dad John's Livestream feed. Tomorrow they are all (hopefully including Mom Kari) off to their new furr-ever homes. While I was watching, I was inspired to do a little playing with my new Lawn Fawn set, Critters in the Burbs. So I fussy cut four of the cat stamps and colored each of them with Spectrum Noir markers to resemble one of the kittens (too bad I didn't have a bigger cat for Kari). For the card base, I stamped the tree and tire swing, fussy cut a mask for each piece and then free hand cut masks for the skyline. After masking off the areas I didn't want color, I sponged the sky with Distress Ink and then covered the sky to sponge the grass. I colored the tree and tire with the Spectrum Noir markers and then added the sweet little kittens. For the sentiment, I used the one that came with that set, but added the banner background from the Home Sweet Home set, also from Lawn Fawn. I knew I wanted some hearts, but I didn't have a punch that small, so I found a cut file in my Silhouette library. I cut bunches of the little hearts that I attached with Glossy Accents for just that right finishing touch.
I simply can't believe how cute the card turned out and it was the perfect way to spend the last night watching these cute little rascals. I wish them all the best in their new homes. As a foster failure (tried to foster just once but could not let the kittens go, except one to my sister), I'm constantly in awe of his ability to love each litter with all his heart then let them go off to their furr-ever homes. He gives them such a great start in life and for that, he truly is the cat's meow.
Monday, July 1, 2013
Project Life Week 26
Wow, it's hard to believe it's been a half a year already, that I've stuck with Project Life and that I'm not behind. I'm going to start the next week in a whole new book too because the one I have isn't going to be big enough for the whole year and it looks perfect the way it is. So I finished off the last layout in the book with the Basic Grey Hey Boy, Hey Girl and Hey You papers and embellishments, along with one cut file resized from the Silhouette Store and a journaling card made from the Journal It set from My Creative Time. For this week, I have a number of videos that I included using QR codes. I really love being able to include those.
Saturday, June 15, 2013
Happy Birthday Card Inspired by Our Change of Art
I'm back to share yet another card for last week's birthdays. I had another co-worker's birthday to celebrate and I wanted something colorful for her, so when I saw this card by Jennifer Rzasa on Our Change of Art, I knew it would be the right choice. I decided to use the Sunnyside 6x6 paper pad by Pebbles for this card because of the bright and pretty color palette. I created the shape in the Silhouette software by drawing a square with curved edges and then placing smaller squares in opposite corners to form the peaks. Then I welded it together and created a shadow for matting. Easy peasy lemon squeezy.
Then all I had to do was cut my seven shapes and seven mats, glue them together and adhere them to the card with pop dots. I stamped the sentiment from the Inkadinkado Expressions and Frames set and it was done. Fun and quick!
Tuesday, June 11, 2013
Congratulations Grad
I have one last graduation card to share. My niece graduated from grade school last week and I wanted to do something to make it seem a little special for her. I found this great card on Pinterest. The original source comes from the Stampin' Connection, which I don't have access to so I can't share it.
The card itself was super easy to put together. I simply stamped the graduation cap from my TPC Studio's Graduation set on some blue paper using Momento black ink. I cut it out and then stamped the word "Congratulations" from my Cloud 9 Design Wedding set on some white card stock using StazOn ink in midnight blue. I then cut out the word grad using the Aharoni font on my Silhouette using some Best Occasions glitter paper I've had for years. I finished the card of with a little yellow cardstock from DCWV's Pastel Mat Stack and some blue cardstock from my stash.
Sunday, June 9, 2013
Congrats ... You did it!
This post is courtesy of my sister-in-law who was kind enough to send me a picture of the card because, silly me, I gave it to her before I took a picture of it.
I was browsing our local Craft Warehouse where I found the cutest graduation paper from Doodlebug. So I snapped up a piece of their Diploma Day paper from the Cap and Gown collection. So cute! Then I trolled for inspiration and found it in this card by Flowerbug's Inkspot. It was also a good opportunity to breakout a stamp set I bought a while back knowing that this day was coming: TPC Studio's Graduation set. I also used a sentiment on the inside from the All Occasions set from Inkadinkado. I can't believe how often I find myself pulling that set out. It really is quite versatile. I also took this opportunity to use a card base from the DCWV Shimmer box of cards. I always seem to forget that I have these, but I noticed them on the shelf when I was hunting out the DCWV shimmer paper I used for the red around the circle. It seemed like a match made in heaven.
Friday, June 7, 2013
A Graduation Card Inspired by Doodlebug Design
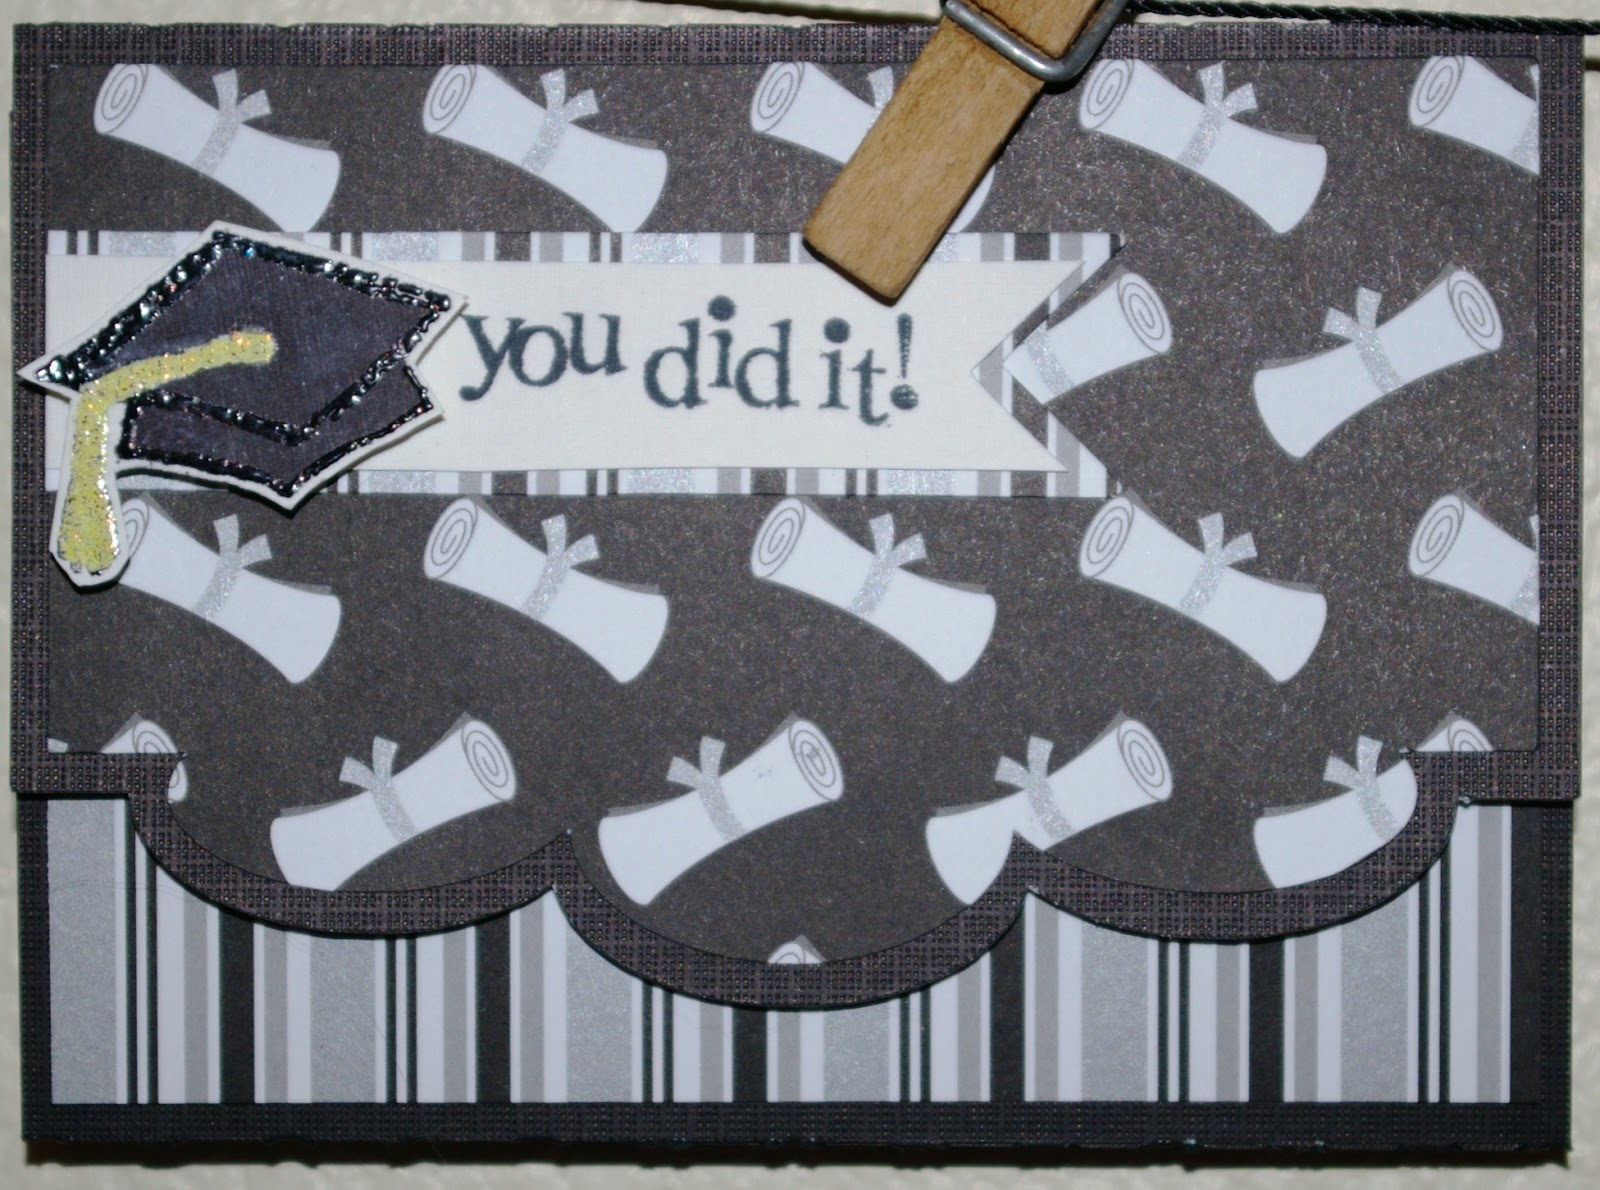
I was trolling Craft Warehouse for supplies and found this great graduation paper from Doodlebug Design. Knowing that I was going to need a few graduation cards this year, I bought a sheet of the paper called Cap and Gown. I then started surfing my Pinterest board with card inspiration ideas and found that I had actually pinned some ideas from Doodlebug Design's blog. Once I saw this cute money holder card, I knew what I was going to be trying my hand at. I found a card I had in my Silhouette designs (3 scallops edge card - although I could not find in the store today when I was looking for the design number). I thought it was the perfect base. I then cut out the card base out of black card stock and cut the Doodlebug paper for the top of the card. I stamped the cap out of my TPC Studio Graduation set and embossed it in black and then the tassel in yellow. I colored the cap in with some Spectrum Noir pens to finish it off. The sentiment was stamp with my new Momento Brilliance ink on a sentiment from the All Occasions set from the Inkadinkado and finished it off perfectly.
Tuesday, June 4, 2013
Happy Birthday Card Inspired by the Paper Players Challenge
I was really inspired by Nance Leedy's card from the Paper Players Challenge #147. I loved how she stamped the large sunflower over the card and through I would give it a try with the Swallowtail stamp from Stampin' Up. I simply adore that stamp. I used four colors of card stock from DCWV's Pastel stack: white, yellow, blue and green. Then I stamped the image using Momento's Toffee Crunch ink and colored it in with some colored pencils. I resized a card from the 3x4 Life Cards by Lori Whitlock in the Silhouette store (Design ID #25178) to make it super tiny and stamped the sentiment from a set of stamps I bought from Boxer before they closed. I then tied the tag using some Hemptique twine onto some sheer yellow ribbon.
Isn't it funny how sometimes you finish a card and you know exactly what you would do differently? The minute I saw this card sitting on the shelf across the craft room, I thought I should have swapped the blue and yellow. They would be more impact if they were in the opposition positions.
Labels:
3x4 Life Cards,
Cameo,
DCWV,
Design ID # 25178,
Hemptique,
Lori Whitlock,
Momento,
Pastel Stack,
sheer ribbon,
Silhouette,
Stampin' Up,
Swallowtail,
The Paper Players,
Toffee Crunch.
Sunday, June 2, 2013
Congrats Grad Layout
During Week 21 of Project Life, we celebrated my sister-in-law graduating from college. While at her party, I took a great picture of her and my mother-in-law hugging. I knew it needed to have it's own layout in the week. I started my scrolling through my Pinterest board of scrapbook layout ideas where I pin pages and sketches that I think will inspire me. That's were I found a page created by Rhonda of Scrappity Dappity Doo based upon a sketch posted by Quick Quotes. I thought it was the perfect place to start.
I again used the Basic Grey Fact line I've been using for my Project Life pages for Week 21. For this layout, I used some of the paper to cut a tag and created a hidden envelope for it. A bit of baker's twine makes it easy to slide it out of the hidden pocket. I took a heart from the 11 Hearts by Lori Whitlock set in Silhouette (Design ID #24813) and opened the nodes. I moved a few of the nodes around to get a more stylized heart. I then duplicated it and move a bit of the nodes on the second one so they would be similar, but not exactly the same. Then it was just cutting my scraps, layering them together until I had a layout I liked. I added my favorite brown Thickers called Marquis and then finished it off with some Darice studs in a brown color. This was my finished page:
Labels:
American Crafts,
baker's twine,
Basic Grey,
Darice,
Design ID # 24813,
Fact,
Hemptique,
Lori Whitlock,
Marquis,
Pinterest,
Project Life,
Quick Quotes,
Scrappity Dappity Doo,
Silhouette,
studs,
Thickers
Thursday, May 2, 2013
Bee-You-Ti-Ful
I love the honeycomb and bee theme I've been seeing around for a while now, but I've never used them myself until I found inspiration in SwanLady21's card on the Silhouette blog. I purchased the honeycomb background and bee at 50% off with Silhouette's sale earlier this week (love those sales - I always have a wish list of things that I want to get some time and those sales are the perfect time to clear out that list). I didn't have any bee stamps or sentiment stamps that fit, so I cut the "you" and hand stamps the rest with my Ginger alpha stamps from American Crafts. I used some paper from the 6x6 Take a Hike pad from Simple Stories for the bee body and a page from the Beautiful Moments 6x6 pad from Carta Bella to back the honeycomb. When I was done, I thought it still "needed something." I pulled out my black Stickles to accentuate the "you" and added some Stardust Stickles to the dots and the bees wings. I then still thought it wasn't quite enough so I added some dots of Glossy Accents to the honeycomb. It's pretty subtle, but I like it.
Wednesday, April 3, 2013
Happy Birthday Dear Sis
Today is my sister's birthday so, of course, I needed a card. I looked through my inspiration board on Pinterest and found a pin I just adored, but the person that pinned it, didn't track it back to the source, so I have no idea where it really came from. So, whomever the artist is, thank you so much for the inspiration.
All the paper for the card comes from my never-empty scrap bin. The cupcake was cut with a design from the Silhouette Design Studio. I had some fun looking at all my embossing folders and finally settled on the Sizzix Dots and Flowers set for the background and two Cuttlebug folders: Candy Cane Stripes for the "wrapper" and Musical Flourish for the "frosting." Then I hand dotted the background with some acrylic paint. It was pretty fun to make and I sure hope my sister loves it.
Wednesday, February 27, 2013
You Are So Loved
I absolutely fell in love with the sentiment on this card on I'm in Haven. It was so wonderful that I just had to try my own hand at it. I opted to use more paper from the My Mind's Eye 6 x 6 paper pad called Love Me and a flower cut from some DCWV cardstock using a rose pattern I downloaded from Silhouette. Of course, once again, I didn't have the stamp but I didn't let that stop me. I typed the sentiment in my Silhouette software using the Vivaldi font, flipped the sentiment horizontally and printed it on inkjet transparency. I then used that as a rub-on to put the sentiment on my card. I've never done it before, but this won't be the last time I use that technique. It was super simple to do and really has opened up some new creative opportunities.
Sunday, December 16, 2012
Inspired by Julie Davidson...
I was looking for the original post for the thank you card with the leaves that I posted yesterday because the original pinner pinned the blog, not the post. While I was cruising through various posts looking for just the right one, I found other cards that inspired me, including this simply elegant thank you card with a snowflake. It was absolutely perfect for what I wanted. I used a snowflake out of last week's freebies from Silhouette cut in glitter paper (thank you to Christy Anderson who invited me to the Scrapbook Expo a few years ago where we found entire packs of glitter paper for a steal - you cannot believe how far that glitter paper has stretched). For the background, I just used some scrap paper from my stash with the corners cut using my Stampin' Up ticket punch. I added a brad from my stash and the sentiment is stamped from the Inkadinkado set Garden Flowers.
Friday, September 21, 2012
A New Tumbler for Michele...
My darling sister picked up some new acrylic tumblers for me to make her a new cup a while ago. Okay, so it was a year ago now. I've thought about doing it a couple of times, but I wasn't sure what to put on it. So tonight she came over for a Real Housewives marathon. I made her watch in my craft room so I could play on my Silhouette. I found a flamingo that was perfect and had her pick out a font. Then I rooted around in my stash of vinyl to find all the right colors for the flamingo and the absolute perfect flecked shiny blue for her name. A bit of cutting on my machine and her new cup was done. Yeah! Now I can cross that off my to do list and stop feeling guilty every time I open the closet in my craft room and see her cup sitting on the shelf.
I can tell she really likes it since she's been drinking out of it as we finished up our marathon.
Wednesday, September 19, 2012
Inspired by Pinterest and Jill Parker
Lately I've found such good stuff on Pinterest and today is no exception. I needed a quick card for a former co-worker who just adopted her second child from overseas. I needed to make the card tonight because tomorrow is my one and only opportunity to get it to her before she's gone for a while. Fortunately I found this sweet paint-chip inspired card on Pinterest. If I had been smart I would have followed it back to Jill Parker's blog Sweet & Korny Stuff right away. But no, I had to stumble through thinking out the cuts when, if I would have just looked at her blog, I would have seen that she had them all for me. Oh well.
I just used some basic white card stock and four pieces of scrap paper from my stash. I cut the butterflies out using the base of a design I purchased in the Silhouette store. I added a little Distress Ink to the end of the base piece. I stamped the sentiment in white Color Box ink using a stamp from the Fiskars All Year Greetings set and then finished it all off with some silver Liquid Pearls.
Ta da! Now I'm off to bed. I'm tired!
I just used some basic white card stock and four pieces of scrap paper from my stash. I cut the butterflies out using the base of a design I purchased in the Silhouette store. I added a little Distress Ink to the end of the base piece. I stamped the sentiment in white Color Box ink using a stamp from the Fiskars All Year Greetings set and then finished it all off with some silver Liquid Pearls.
Ta da! Now I'm off to bed. I'm tired!
Tuesday, June 12, 2012
A Different Graduation Card
My niece is graduating to middle school this year and her family had a little party for her Monday night. I needed a graduation card, but I wanted something a little different. Surfing through the blogs on Sunday night, I found the perfect card on Michelle's blog here. Interestingly enough, she had cased it from Stamping Impressions here. Unfortunately, I didn't have that stamp, but I do have the fabulous Silhouette (I am still so in love with this machine, my hubby for getting it for me and my mom for helping him pull off the surprise). I used the new skills I'm acquiring in text and color to re-create their stamp in the right colors and give a little depth to the card by popping up the arrow Then with just a Sizzix embossing folder, my Stampin' Up paper piercing tool, some Irock gems and little scrap paper, I was able to create this:
Too bad tonight I have to go give a speech and the next two days are going to be insanely busy so I won't be able to play in my craft room. I'm really looking forward to the weekend and the opportunity to relax.
Monday, June 11, 2012
Birthday Card
Subscribe to:
Posts (Atom)