
Showing posts with label Splitcoaststampers. Show all posts
Showing posts with label Splitcoaststampers. Show all posts
Monday, June 24, 2013
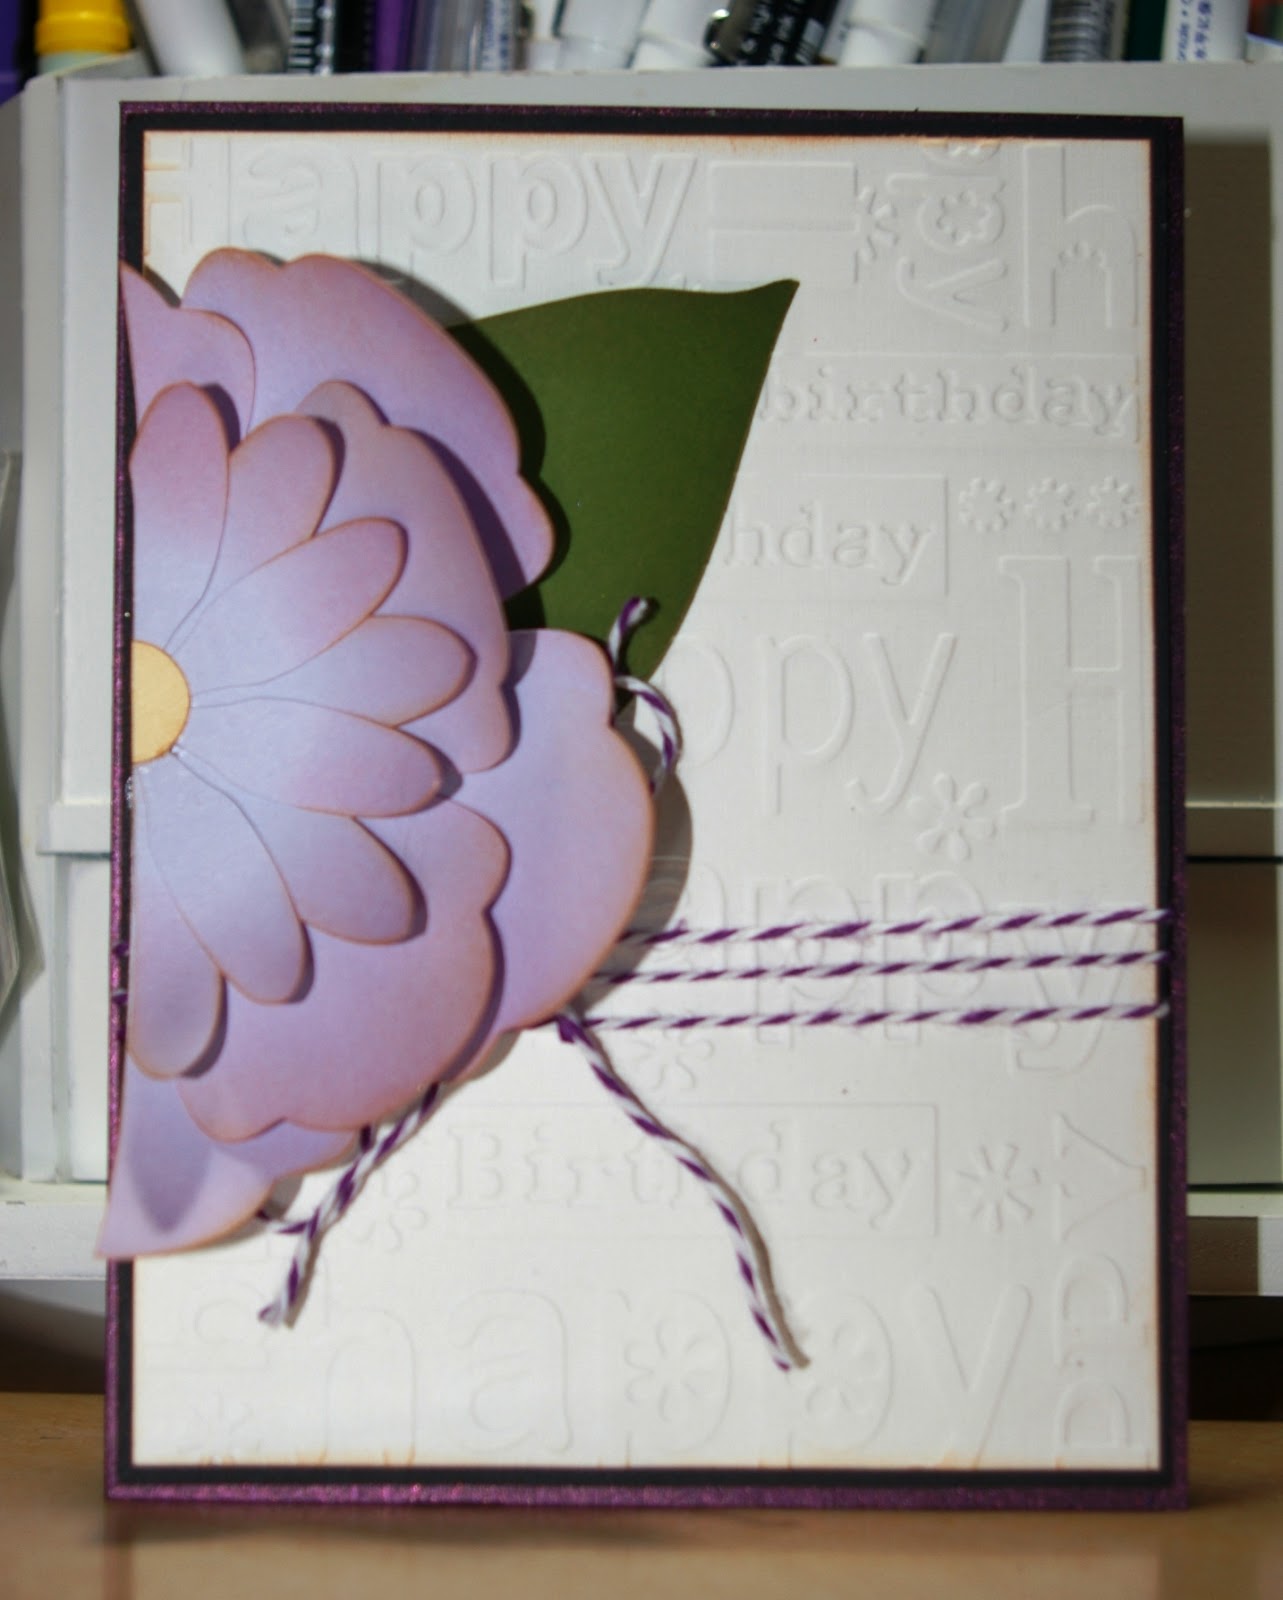
Happy Birthday Card
Last week was my mother-in-law's birthday so I went trolling on Pinterest for some inspiration and found a lovely birthday card pinned from Jaydekay on Splitcoaststampers.com. I just loved the look of this card. Of course, I don't have the lovely retired Sizzix die, but I do have a Cameo and lots of 3rd flowers. I finally selected this 3rd layered flower, which is Design ID #38042, from Patty Young/MODKID. I cut it out of a random piece of card stock from my stashed then inked the flower with Spun Sugar Distress Ink. I finished inking all the edges of the flower, center and leaf in Tea Dye Distress Ink. Then it was just a matter of running the white card stock through the Happy Birthday Cuttlebug embossing folder and tied it all together with some Hemptique baker's twine. I decided it all needed matting with black before I adhered it all to my purple card stock card base.


Tuesday, April 30, 2013
Rainbow Birthday Wishes
I absolutely loved this card I found via Pinterest from SplitCoast Stampers from Yours Truly. She tells the story of having to rescue the rainbow from her card when she messed up stamping the sentiment (now who hasn't done that before?), but I think her "rescue" turned out amazing and I just had to try it for myself. I used seven shades of Distress Ink and a lot of post-it notes for masking. I love how it turned out with the Darice rainbow studs sprinkled on it. The sentiment is from that Inkadinkado Garden Flowers stamp set. It's funny how many stamps sets I have with sentiments, but I find there are several that I use all the time: this one and the Fiskars All Occasions set are probably the most used sets I own. I added a few more studs and little dot of Stardust Stickles to finish it off. Quick, easy and adorable!


Friday, March 1, 2013
Wood Grain Fun
I've wanted a wood grain patterned embossing folder for a long time, but no one sold one in town and I never got around to buying one off the Internet. But I was at Craft Warehouse the other day and was so happy to see that they are carrying a whole line of Darice embossing folders. I just couldn't help but buy the wood grained pattern I had wanted for so long. So then when I was trolling Splitcoaststampers where I stumbled across this fabulous masculine valentine using wood grain, I just had to try my own hand at it. I embossed the card, then cut out a heart using my Cameo. I then drew in some texture in the opening using my colored pencils and added my "carving." I finished it off with a metal piece from my stash and some Martha Stewart baker's twine. Pretty simple to do but I love the masculine feel of it.


Turns out this was hubby's favorite card of them all.
Thursday, February 14, 2013
So Much Love
No, not a Valentine's Day card. I posted that one a while back without stating that it was the card for my dear hubby. No, this is a congratulations card for my boss who got married back in December, but we are finally getting around to celebrating it now. I found this wonderful monochromatic card on SplitcoastStampers. I started to make this card following that scheme but it just didn't have the pop that her card had. So I swapped out the white for some soft yellow and green and realized I finally liked how the card looked. I never really get to use my Sizzix dies enough and I so love this swirly one a lot, particular how it compliments the flower cut from the Silhouette Design Studio topped with a pearl from Recollections. I back it all with an embossed background using the Sizzix Musical Flourish embossing folder. I then finished off with a sentiment stamped from an old Studio G mini stamp set I've had for several years.


Sunday, December 30, 2012
Snow Many Thanks

Sunday, August 19, 2012
Back in my room, but not quite back to normal
Today I had a whole day in my craft room, but I couldn't quite find my inspiration to craft. Instead, I did the laundry from last week, made a loaf of artisan cheese bread that I'll bake later today and put together meatloaf for the hubby with cheesy biscuits. I watched a little Sabrina (the one with Harrison Ford - my, my he's an attractive man) and caught up on Design All Stars and Craft Wars. After a little time on Pinterest, I decided it was time to actually start playing with paper. I managed to make one card today. I loved this one I found and followed it through SplitCoastStampers all the way to her blog Paper Pursuits. So I made my own version, building the sentiment in the Silhouette Design Studio using some beautiful ledger paper from the store. I just love how I can fill any shape with anything I want. I was able to fill the shape with the paper, layer a flourish over it, and add the text. Such fun... I loved how it combined with the patterned paper from the Stella and Rose collection from My Mind's Eye. I added the cherry blossom cut from a design from the SDS and then finished it off with some baker's twine I picked up from Hemptique at Paper Source in Boston last week and some liquid pearls.


Tuesday, June 26, 2012
Thinking of You
Tonight's card was one I struggled with. A co-worker asked for a day off to take a friend and her son to the doctor. The son has cancer throughout his whole body and now just getting out to visit the doctor is difficult. But just as I approved the time off, she e-mailed me to tell me that she didn't need the day off after all because he had taken a turn for the worse and was in the hospital. She immediately jumped at my offer to make a card for her to give her friend.

So this card had to be really special. I spent a lot of time going through my idea file, my books and trolling the blogs. I finally found my inspiration in the splitcoaststampers.com gallery. So thank you to Beckyluvs2stamp for inspiring me tonight. I used a sheet from the 6x6 Stella and Rose pad by My Mind's Eye (love, love, love that one - can you tell?), some We R Memory Keeper's ribbon, my Stampin' Up border punch and plain card stock to build the card. The sentiment is stamped in Chocolate Chip ink from Stampin' Up using the All Year Greetings from Fiskars. The leaves were a design I downloaded in Silhouette then ungrouped to pull the stem from the leaves so that the leaves were solid instead of outlines. Then I cut off all but the last three sets of leaves because those are the only ones I needed. I then cut off a piece of the stem that I pulled off what I cut away and welded it what I saved so that the leaves would end in stem to end in the flower. The flower is that design by Lori Whitlock that I love so much from the Silhouette Design Studio. Didn't recognize it? That's because I dropped out the bottom layer of petals and the top layer. Then I took the middle petal, made a copy and welded them together exactly opposite one another. That gave me the four petal flower to match the one in the paper. Two Irock gems finished off the flower.

Sunday, January 1, 2012
1st Thank You Card

I'm making progress. I found a great thank you card on Splitcoaststampers.com that I scraplifted into girlie colors. I finally used my "Jack's World" stamps from Cosmo Cricket but I did modify them. The "thank you" stamp has a lion on it, but I cut it off (gasp). Yes, I cut a stamp. I love the lion but I'll use the stamp more without it. I can still add the lion when it's appropriate, but I love the craziness of the letters of the thank you and they were perfect for this card made with scraps from my scrap bin.
Friday, June 17, 2011
Happy Father's Day
Today this post is going up as we drive to the restaurant to share a meal with both my father and father-in-law. It's wonderful that I still have them both in my life and that they live close enough that we can spend time together all the time (like on Friday night when we called my mom and dad on the spur of the moment to see if they could have dinner with us). I know that I'm very lucky in that regard.
I'm thinking that if I try this card again, I might try using pictures where all the yellow paper with the soft blue mats are (the ones you can't hardly see in this picture). These are all hidden when the card is closed but would be something that would be really nice to display for a while for the recipient.
So today I want to share with you the father's day cards I made. I was trolling the blogs on Friday night when I came across a video posted on M y Creative Time about using punches on a card. Well, of course, I didn't have the right size of punch, sheer ribbon, a cute little charm or anything like that, but I did have my imagination. I cut the squares, the used my Sure Cuts a Lot program to cut a scalloped mat that I found on the DoodleLicious blog, then cut the charm out of the Fabulous Finds cartridge and stamped it with this stamp from the "It's All Good" set from Stampin' Up. The charm wasn't exactly what I had in mind, but it gets the job done. I used regular ribbon instead of sheer. The best part about it is the whole thing is the paper. I had this little 6x6 Mini Deck from the Cosmo Cricket called Wanted that I won at a Cricut class at Craft Warehouse some time ago. The paper has these little cowboys on it. Since my father-in-law worked on a dairy, I thought it was perfect. The sentiment on the inside says "Happy Father's Day to a true cow-boy."
 y Creative Time about using punches on a card. Well, of course, I didn't have the right size of punch, sheer ribbon, a cute little charm or anything like that, but I did have my imagination. I cut the squares, the used my Sure Cuts a Lot program to cut a scalloped mat that I found on the DoodleLicious blog, then cut the charm out of the Fabulous Finds cartridge and stamped it with this stamp from the "It's All Good" set from Stampin' Up. The charm wasn't exactly what I had in mind, but it gets the job done. I used regular ribbon instead of sheer. The best part about it is the whole thing is the paper. I had this little 6x6 Mini Deck from the Cosmo Cricket called Wanted that I won at a Cricut class at Craft Warehouse some time ago. The paper has these little cowboys on it. Since my father-in-law worked on a dairy, I thought it was perfect. The sentiment on the inside says "Happy Father's Day to a true cow-boy."
 My dad's card was inspired by a post I found on the Paper Zone blog. It wasn't so mu ch the twisted easel format, but the argyle design. I immediately thought back to this whole pack of paper I bought at CKC this year. I just LOVE argyle, especially this argyle paper from Fancy Pants called Recess in the All Fall line. I immediately thought of that paper for my card. So while I wasn't up to trying a twisted easel, I did get my inspiration from their project. I made a little square ribbon slide on Sure Cuts a Lot, used my Cri-Kit gel pens to write the sentiment (although it does look a little fuzzier than I would like. Then just matted the paper with some card stock from DCWV and made the card body with kraft paper from The Paper Company. At first the ribbon slide seemed a little too stark. It was a much brighter white than the argyle paper. So I used a waded up tissue with little Stampin' Up Old Olive ink to give it a little more color to match the bit of color in the argyle paper. You just can't really see that detail in this picture.
 ch the twisted easel format, but the argyle design. I immediately thought back to this whole pack of paper I bought at CKC this year. I just LOVE argyle, especially this argyle paper from Fancy Pants called Recess in the All Fall line. I immediately thought of that paper for my card. So while I wasn't up to trying a twisted easel, I did get my inspiration from their project. I made a little square ribbon slide on Sure Cuts a Lot, used my Cri-Kit gel pens to write the sentiment (although it does look a little fuzzier than I would like. Then just matted the paper with some card stock from DCWV and made the card body with kraft paper from The Paper Company. At first the ribbon slide seemed a little too stark. It was a much brighter white than the argyle paper. So I used a waded up tissue with little Stampin' Up Old Olive ink to give it a little more color to match the bit of color in the argyle paper. You just can't really see that detail in this picture.
Then I still had to make a card for my mother-in-law's birthday tomorrow. I had just watched a video on a shutter card on You Tube and decided to give it a try. I turned out okay but I did learn that you need to use STIFF card stock for your base. I chose a textured card stock that wasn't very stiff after all that cutting and folding, so it makes the card a little difficult to close back up. I'm pretty sure this was a very old piece of DCWV because I found it loose in my paper cupboard when I was looking for patterned paper, but I don't know for certain. The [patterned paper was also a loose piece in with some others that I found when looking for a coordinating color for the original paper I had chosen, which I abandoned for this one. I liked the butterfly pattern on the other paper, but I couldn't find a coordinating paper that I liked. This one is a double sided paper and I thought both sides were perfect. I also learned that laying out the pieces with the card open doesn't work. I had them all arranged in a way I liked, glued them down and then closed the card and, eeeekkkkk, it looked terrible. I had all the same papers on the front of the card. So I did a double layer of patterned paper on a box on the front to give it a little mix. So if you try the card, don't glue down the paper until you've seen what it looks like closed too. So then I just stamped my front sentiment from the "Lots of Thoughts" stamp set from Stampin' Up and added my inside sentiment stamped from the Stampin' Up "Congrats" set. 

I'm thinking that if I try this card again, I might try using pictures where all the yellow paper with the soft blue mats are (the ones you can't hardly see in this picture). These are all hidden when the card is closed but would be something that would be really nice to display for a while for the recipient.
Subscribe to:
Posts (Atom)