Showing posts with label Stampin Up. Show all posts

Sunday, July 24, 2011

Mojo Monday Sketch 200!

Last night I was trolling the blogs, catching up on my reading, when I ended up on You Tube to watch a video posted on Creations with Christina's blog. One of the video choices following that one was this "black magic" technique shown here, which then led me to here. The technique looked easy to do and I actually had all the supplies so I gave it a try, going for something simple with this flower stamp. I use one main color of yellow and a slightly darker color in a few places. I added a little bit of white at the tips and a little bit of brown at the base of each petal and drew in the dark lines that give each petal it's distinct shape.
When I was done, I had this yellow flower, which seemed perfect to use on Mojo Monday's sketch this week (it's the 200th sketch - whoo hoo!). All the paper came from my scraps container, so apparently spending all last weekend cleaning, sorting and organizing my craft room paid off because I can actually find my scraps. This time, I actually do know where the paper came from. The solid orangy-yellow is from DCWV. The orange dotted paper is from My Mind's Eye All Twinkle, Twinkle Little Boy stack, the white and black are Georgia Pacific card stock. I used cinnamon Stickles to give the center of the flower a little bling. I have no idea where the flower stamp came from but the word "cherish" is from Stampin' Up's Warm Words collection.


Well, that's it for today. The day just flew by and now I had better get everything put away, finish that last load of laundry and get ready for work tomorrow. It may be a short week for me but that just means I have to pack a normal week's worth of work into a short period of time and will have to work hard the following week to get caught back up. Maybe that's why I never use my vacation time and always am trying to figure out how to use it before I lose it. But it will all be worth it since I'll have a long weekend to crank out some cards. Believe it or not, my stash is already starting to dwindle.

Friday, June 17, 2011

Happy Father's Day

Today this post is going up as we drive to the restaurant to share a meal with both my father and father-in-law. It's wonderful that I still have them both in my life and that they live close enough that we can spend time together all the time (like on Friday night when we called my mom and dad on the spur of the moment to see if they could have dinner with us). I know that I'm very lucky in that regard.


So today I want to share with you the father's day cards I made. I was trolling the blogs on Friday night when I came across a video posted on My Creative Time about using punches on a card. Well, of course, I didn't have the right size of punch, sheer ribbon, a cute little charm or anything like that, but I did have my imagination. I cut the squares, the used my Sure Cuts a Lot program to cut a scalloped mat that I found on the DoodleLicious blog, then cut the charm out of the Fabulous Finds cartridge and stamped it with this stamp from the "It's All Good" set from Stampin' Up. The charm wasn't exactly what I had in mind, but it gets the job done. I used regular ribbon instead of sheer. The best part about it is the whole thing is the paper. I had this little 6x6 Mini Deck from the Cosmo Cricket called Wanted that I won at a Cricut class at Craft Warehouse some time ago. The paper has these little cowboys on it. Since my father-in-law worked on a dairy, I thought it was perfect. The sentiment on the inside says "Happy Father's Day to a true cow-boy."


My dad's card was inspired by a post I found on the Paper Zone blog. It wasn't so much the twisted easel format, but the argyle design. I immediately thought back to this whole pack of paper I bought at CKC this year. I just LOVE argyle, especially this argyle paper from Fancy Pants called Recess in the All Fall line. I immediately thought of that paper for my card. So while I wasn't up to trying a twisted easel, I did get my inspiration from their project. I made a little square ribbon slide on Sure Cuts a Lot, used my Cri-Kit gel pens to write the sentiment (although it does look a little fuzzier than I would like. Then just matted the paper with some card stock from DCWV and made the card body with kraft paper from The Paper Company. At first the ribbon slide seemed a little too stark. It was a much brighter white than the argyle paper. So I used a waded up tissue with little Stampin' Up Old Olive ink to give it a little more color to match the bit of color in the argyle paper. You just can't really see that detail in this picture.


Then I still had to make a card for my mother-in-law's birthday tomorrow. I had just watched a video on a shutter card on You Tube and decided to give it a try. I turned out okay but I did learn that you need to use STIFF card stock for your base. I chose a textured card stock that wasn't very stiff after all that cutting and folding, so it makes the card a little difficult to close back up. I'm pretty sure this was a very old piece of DCWV because I found it loose in my paper cupboard when I was looking for patterned paper, but I don't know for certain. The [patterned paper was also a loose piece in with some others that I found when looking for a coordinating color for the original paper I had chosen, which I abandoned for this one. I liked the butterfly pattern on the other paper, but I couldn't find a coordinating paper that I liked. This one is a double sided paper and I thought both sides were perfect. I also learned that laying out the pieces with the card open doesn't work. I had them all arranged in a way I liked, glued them down and then closed the card and, eeeekkkkk, it looked terrible. I had all the same papers on the front of the card. So I did a double layer of patterned paper on a box on the front to give it a little mix. So if you try the card, don't glue down the paper until you've seen what it looks like closed too. So then I just stamped my front sentiment from the "Lots of Thoughts" stamp set from Stampin' Up and added my inside sentiment stamped from the Stampin' Up "Congrats" set.

I'm thinking that if I try this card again, I might try using pictures where all the yellow paper with the soft blue mats are (the ones you can't hardly see in this picture). These are all hidden when the card is closed but would be something that would be really nice to display for a while for the recipient.

Saturday, June 11, 2011

Thank you cards


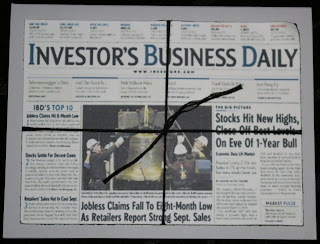
Even though I still have a few cards left in my stash, today I made a few specific thank you cards using some new techniques I either just learned or had never tried. Last night, when I was puttering in my scrapbooking room playing video games, surfing blogs and watching YouTube, I watched Creations with Christina's Stampin' on Friday video and was very inspired by the cute vintage newspaper card she made. Well, of course, I didn't have the newspaper stamp, the twine, the tiny tags die or stamp, but I figured I could still make it work. Hmmm... thinking about it now, that was a pretty strange assumption - I don't have anything she uses in the card except card stock and yet I still thought I could do it. Fortunately, I have Google. So I searched Google images to find a suitable newspaper image. I substituted embroidery thread for the twine. It isn't quite as cute, but it works:

A few months ago, I was shopping at Paper Zone and bought a little spray bottle of Tsukineko Sheer Shimmer Spritz in a shade called Sparkle. I've never really tried spraying on my layouts or cards but I've really liked when I've seen others using it or similar products. So the little spray bottle has languished in the top drawer of tool cart for probably about three months now. But today I decided it was time to give it a try. First I ran my background paper through the Sizzix with an embossing folder and then sprayed the background (I used my garbage can to contain the spray. It was surprisingly simply and dried quickly. I used some of my stash of flowers, some Irock gems and a little Offray ribbon to finish it off. Yeah for using my stash!


So after Christina's video ended, I started watching videos by 2stampis2b.com. I saw this wonderful video using embossing folders that left a void in the embossing so that you can stamp an image without having the texture where your image is. It's really hard to see, but in this picture, the card stock under the bunch of flowers is flat and all the rest has the texture from the embossing plate. It's a really amazing technique. The video demonstrating it is available here. I just had to try it. So I made my stamping void using a recycled part of an old box that held page protectors. It worked perfectly. Although next time I will probably make the void a little bit bigger. I then colored in the flowers with my Stampin' Up pens and sprayed the whole thing with Sheer Shimmer Spritz in Sparkle (and since that little bottle is running out quickly, I'm definitely going to try her spray that she shows how to make here). I then used Inkscape to make the ribbon slide and imported it into SCAL. I added the words "Thanks a bunch" and used my metallic Cri-kits pen to write it then cut it out. Then just layer the pieces and it was done. The picture shows the shimmer mist really well and the light really reflects off the writing much more in the picture. The shimmer mist is really much more subtle in person and the writing is in much starker contrast.


So now I just have to make a sympathy card and I can get back to my layouts. Oh, and I have to actually mail a whole bunch of cards that I'm behind in mailing out too... Oh well, better late than never I guess.

Thursday, May 19, 2011

Another SeaWorld layout and Chewie finally naps


They posted the new Sketchy Thursdays layout. I wasn't really sure what to do with it until I looked at some the Design Team layouts and flipped through my trip photos. It was the round elements matching up with the roundness of an orca jumping that finally bridged the gap between sketch and layout for me.


I wanted to add the orcas jumping around the picture so I found some clip art. I used the same bowl to draw my circle and used my Stampin' Up! paper piercing template to make the holes for the stitching like I did on the SeaWorld Love layout earlier. The cardstock is DCWV from the Pastel and the Christmas stack from several years ago. I used another Creative Imaginations SeaWorld rub-on for the title. Chewie finally napped so I had time to stitch the circle.
But the peace and quiet didn't last long. She's back to wandering in and out of my craft room demanding attention every minute or so. I guess I don't need to have kids to know what it's like not to have a moment to myself. All I need is one small furry (spoiled rotten) princess.