Showing posts with label Irock. Show all posts

Monday, July 22, 2013

Sympathy Card

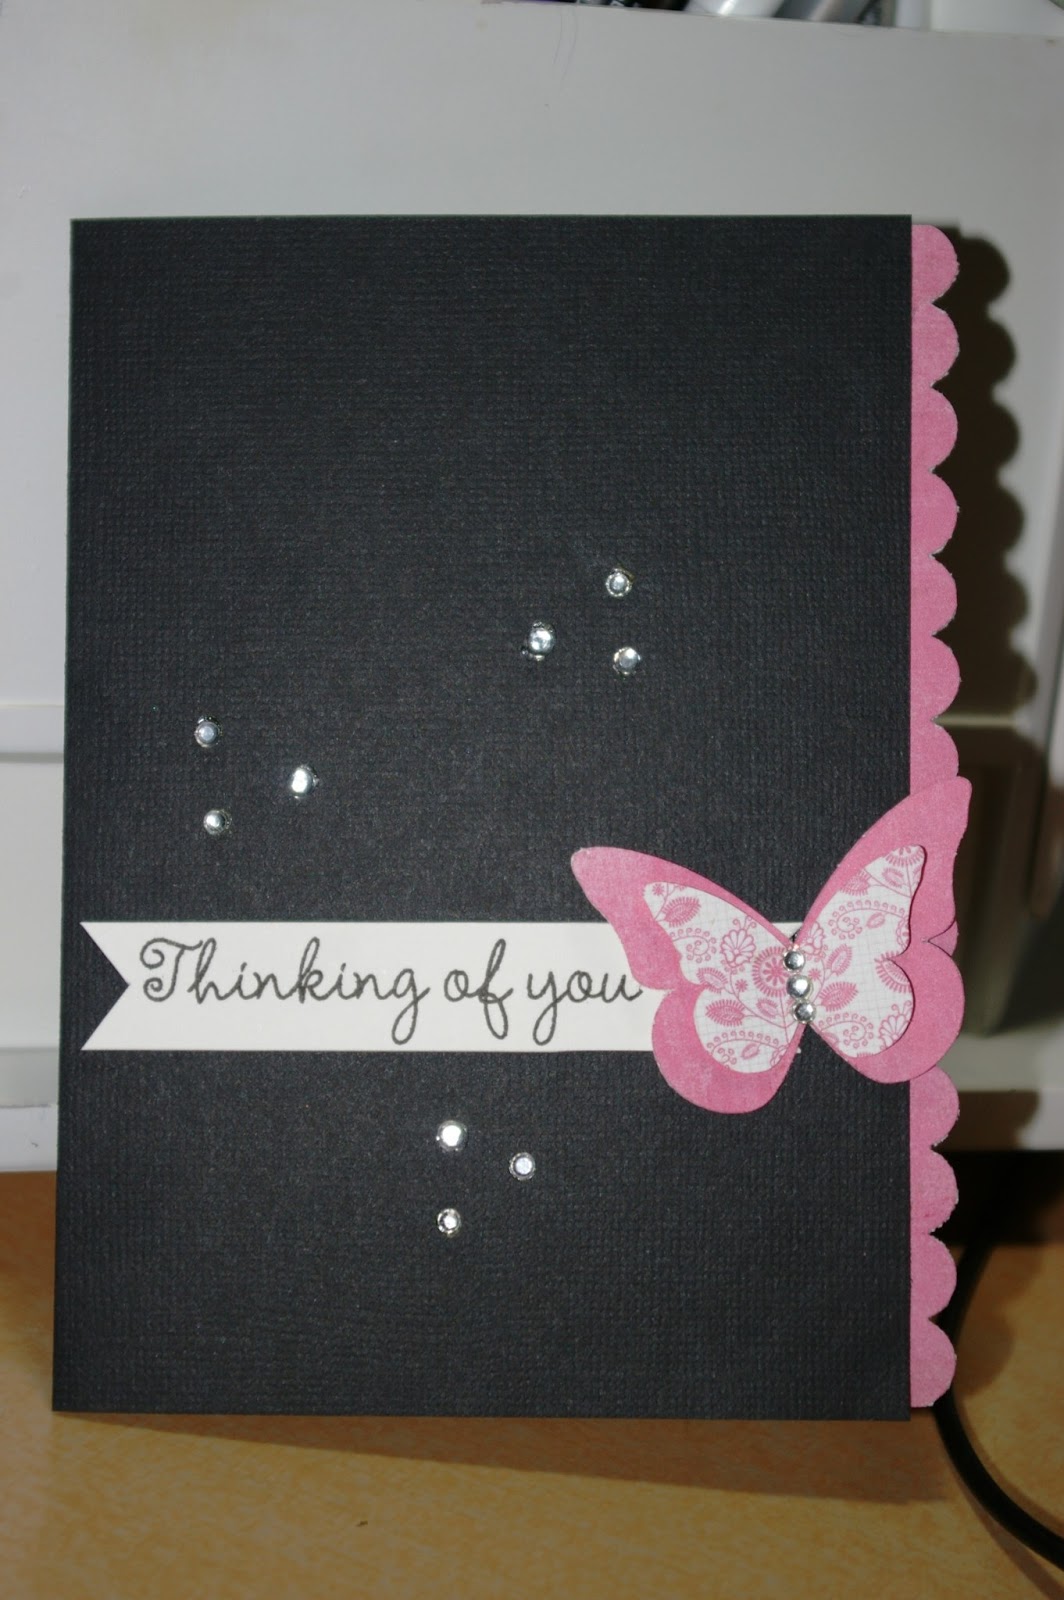
Well, well the day I knew was coming finally arrived.  My colleague passed away.  I know that it's for the best because he was not doing well, but it's never easy.  I needed a card for his family so I went back to my Pinterest board for some inspiration, which, as happens a lot, I found in a card by Rita of Rita's Creations.  This was one posted for challenge #91 on Freshly Made Sketches.  I really do love her style. 

Lately, I've really been drawn to pink.  I don't know why because I'm not really a girly girl and pink has never really been a color I've favored.  But I really like how it looks with the black.  For the sentiment, I pulled out the Sympathy4you set by The Stamps of Life for the sentiment.  I stamped it with some Versafine ink on some white linen card stock, then cut the edges into banner.  I secured it under the butterflies I created on the Silhouette using an Echo Park cut and the pink Authentique paper from the Lively 6x6 pad I used in a card I made a few days ago.  By using the two sides of the paper, I was able to the right look for the card.  I cut the front of the card about .375 of an inch shorter than the back and added a scalloped border punched with my Stampin' Up border punch.  I then finished it off with some scattered rhinestones added with my Irock.

For the inside, I stamped another sentiment from that same set with the Versafine.  I thought it still needed something, so I inked up the butterfly from the Teresa Collins Spring Fling set, but decided to stamp it off one so it wouldn't be so stark on the inside.  With that, I called the card done. 

Monday, September 3, 2012

My first onesie project...

A dear friend's daughter is about to have a baby making my friend a grandmother for the first time.  How weird is that?  My friends are becoming grandmothers.  I guess that really is the signal that I'm too old to become a mom.  Anyhow...I've had this idea about making a onesie for a while and this is the first opportunity to try it out and to try out the heat transfer and rhinestone template materials from Silhouette.  A while back, I bought a great deal on Plum District for Silhouette products.  I ordered heat transfer material, rhinestone template materials and a bunch of rhinestones. It's all sat in the box since the end of July, until now.  I must admit, like anytime I try something new, I was a little intimidated, but then I've been using my Irock for what seems like years and the rhinestones, well aren't they just a bigger form of the Irock? 

So I started with the sweet pea design I had downloaded from Silhouette quite some time back.  I was surprised at how easy the template cut and how easily all the rhinestones were to drop into place.  So now, on to the heat transfer material... well, the video that came in the kit made it look all so easy, but didn't quite explain it very well (well, let's be honest, there were no words spoken on the video and the few printed words in the video didn't answer important questions, such as what setting on the iron?  Neither did the little booklet).  So I cut out my design using the most important piece of information I learned in the video - reversing the text... 

The I ironed... and ironed... and ironed.  Apparently the setting on the iron has to be quite high and I really had to push down firmly on the piece to get the letters to transfer (then had to fix a little boo boo where two of the rhinestones moved).  Once I pulled off the sheeting and pressed the letters one more time (oh and fixed the boo boo where two of the rhinestones moved), I stood back to admire my finished project.  Super cute!
 
And speaking of super cute, how cute was my snoopervisor today when I was shucking the corn to can? 

 
Of course, it wasn't long before he was distracted by the fact that Chewie found the canner box and, well where's there's a box, there's a cat in our household...
 

But with a little patience, and after surviving a little scare when he knocked the box over, he claimed his rightful place.

Sunday, August 5, 2012

Baking and Playing

I spent most of the day playing in the kitchen and my craft room.  A few weeks ago, I found a recipe for English Muffin Bread on Pink Cricut.  We loved it so much, I've made it several times since.  In fact, I used a whole jar of yeast.  I don't think I've ever used a whole jar of yeast before the expiration date before. 

The other day, I made a little change to the recipe.  I added some cinnamon and raisins, which was absolutely divine!  So today I made the whole recipe as raisin bread.
But I wasn't done there.  Yesterday, while playing around on Pinterest, I found a recipe for Jalapeno Cheese Bread from Homemade by Holman.  I decided I just had to try that one too. 
I am soooo happy I did.  It was fabulous (although I only used 1/2 of the jalapenos the recipe called for and used double the red green pepper because I didn't have any green peppers on hand). I'm definitely making this one again.  And my loaf of banana bread is just coming out of the oven.  I used the tried and true Betty Crocker recipe.  We've tried others but it's my favorite by far.

So in my craft room today, I played around with pictures taken from our Friday trip to see the dock that washed ashore following the Japanese tsunami. I used this week's Sketch Inspiration sketch to start and opened a collection pack from Echo Park called Country Drive that I had in my stash.  I just love EP paper!  I decided I needed to copy the flower paper for an embellishment and I just love that I found the cut file in the Silhouette Store.  Yea!  I added a little bling with my Irock, a title, some hidden journaling and a few words and some strips of border from the embellishments in the kit.   

Thursday, July 5, 2012

Inspired by Sarah Hamer Designs

In catching up with the blogs last week, I just loved a birthday card I saw on Sarah Hamar's blog.  I decided to give it a try myself.  I started by making a card featuring the star pattern on hers.  I used some DCWV birthday paper I picked up in an open stock sale at Joann's along with some scraps from my scrap bin including some from the Twinkle Twinkle Little Boy line from My Mind's Eye.  I embossed the background with my Sizzix.  I wrote the sentiment in the Silhouette Design Studio and used the print and cut feature to ensure my sentiment was centered.  I used a star pattern in the software to cut stars including the white star layer.  A few pop dots under the stars gave them a little dimension and I finished them off with Irock studs in a blue to tie the blue together.  Super simple and cute!

But I decided to take it another step by trying it with a different pattern.  I kept the layout the same, but his time I used a floral pattern.  I again used the Silhouette Design Studio to write the sentiment and cut it out.  I used the outline feature to cut the paper to mat it on.  Then I found a cute flower in my library.  But it wasn't quite perfect.  It had lines running down the center of each petal.  So I carefully cut out the lines and manipulated the points to clean up the petal cuts.  Then I finished the centers with Irock gems. 
I still think the star card is cuter.  Maybe because I just like the bright colors better... 

Wednesday, July 4, 2012

Card from a Kit (and a glimpse into my craft room)

Happy Fourth of July!  Today I thought I would show you a little bit of my craft room as part of showing you what I did to a card from a kit I had in my stash.  I've picked up kits from time to time while shopping at the Creating Keepsakes Convention.  Now, if you've ever shopped at one of these like I have, you get home with all this stuff and it takes a bit of time to actually get around to using it.  Plus I signed up for a kit of the month club and the kits didn't come monthly, but rather pretty much all in a big lump.  So I had a stack of kits that I haven't played with.


I keep them stored in Iris containers purchased a Michaels.  (Yes, I'm just a little Dynamo label happy) I just grabbed one at random for this project. 

The kit had a project, a layout and a card.  The card was extremely plain with the card constructed using a printed paper embellished with another strip of striped paper, a circle and a slide mount with a vellum sentiment.  However, the sentiment wasn't one I would likely use.  So after looking at the card for a while, I decided that the somber colors would be perfect for a sympathy card.  I decided to make the card base out of plain cardstock and use the patterened paper as a mat.  I pulled out my vellum scraps from the other day.   My scraps are all kept in a 12 by 12 rolling cart slipped under the table in my craft room and are sorted by color: 

I wasn't sure how well it would stamp, but I decided to give it a try.  I was shocked at how well it did take a stamp (while some stamps are stored in this drawer, I also have two photo boxes with stamps and another drawer in another cart with others). 


I used my Basic Black ink from Stampin' Up  with another sentiment from the Garden Flowers set from Inkadinkado and it's hard to tell that it's not printed.  My ink is stored in a drawer and in a tower that I picked up at the Scrapbook Expo convention last year.  Each distress ink has it's own pad velcro'd to the bottom (I think I picked up that tip from Ermma at My Creative Time).   


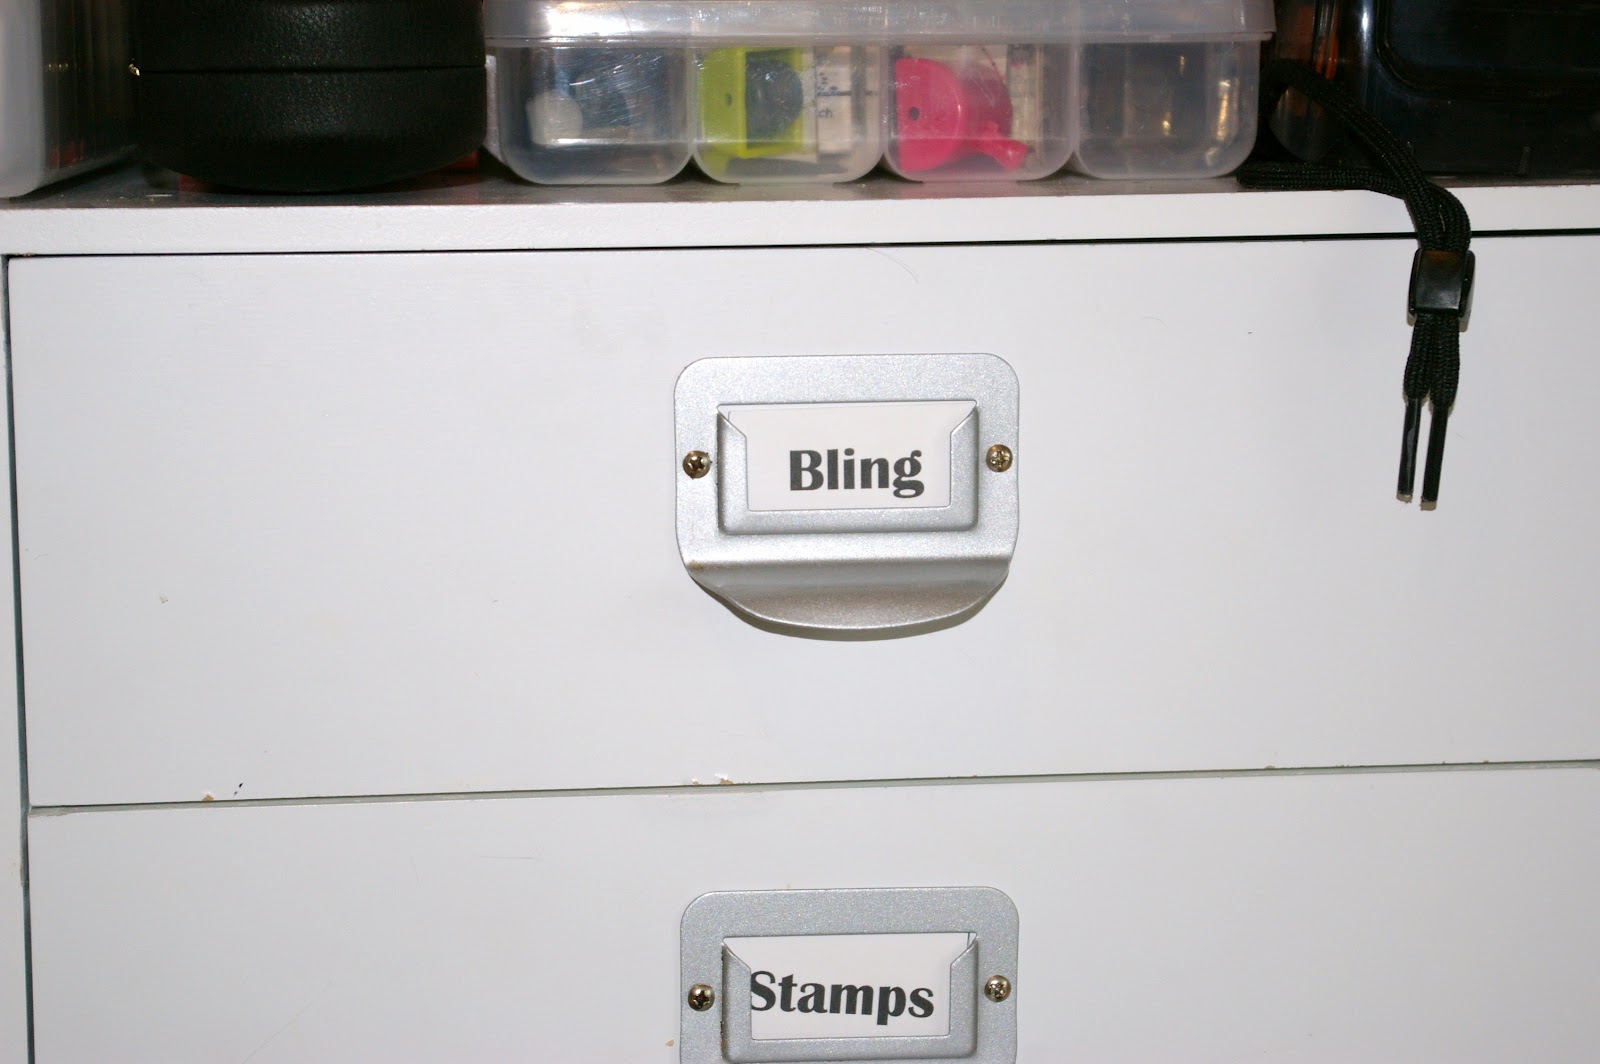
Then I built the card as show in the kit, but added some pearls from scraps in my bling drawer (shown above with my stamps) and a few prima flowers from my big can of flowers. 

I finished off the flowers with a few Irock gems to finish it off.   My Irock is stored with the tools on my work surface and the gems are stored with my embellishments that I have stored in an Iris container meant for photos.


I was actually pretty happy with how the card turned out.  
So that's a glimpse into my craft room.  Yes, everything is always labelled and things all have their own place.  However, my work surface is usually a mess until I finish a project.  Then I usually clean it all back up so I can start the next project with a little order. 

So I wish you all a very happy and safe Fourth of July.  It will be a pretty quiet one here.  The furballs are not fireworks fans, so we usually stay home with them so they have someone to cuddle with when they get scared.  Honestly, that's about the best place to be anyhow.  We can see the big fireworks display from the picture window in our bedroom, so we have the best of all worlds. 

Tuesday, June 26, 2012

Thinking of You

Tonight's card was one I struggled with.  A co-worker asked for a day off to take a friend and her son to the doctor.  The son has cancer throughout his whole body and now just getting out to visit the doctor is difficult.  But just as I approved the time off, she e-mailed me to tell me that she didn't need the day off after all because he had taken a turn for the worse and was in the hospital.  She immediately jumped at my offer to make a card for her to give her friend. 

So this card had to be really special.  I spent a lot of time going through my idea file, my books and trolling the blogs.  I finally found my inspiration in the splitcoaststampers.com gallery.  So thank you to Beckyluvs2stamp for inspiring me tonight.  I used a sheet from the 6x6 Stella and Rose pad by My Mind's Eye (love, love, love that one - can you tell?), some We R Memory Keeper's ribbon, my Stampin' Up border punch and plain card stock to build the card.  The sentiment is stamped in Chocolate Chip ink from Stampin' Up using the All Year Greetings from Fiskars.  The leaves were a design I downloaded in Silhouette then ungrouped to pull the stem from the leaves so that the leaves were solid instead of outlines.  Then I cut off all but the last three sets of leaves because those are the only ones I needed.  I then cut off a piece of the stem that I pulled off  what I cut away and welded it what I saved so that the leaves would end in stem to end in the flower.  The flower is that design by Lori Whitlock that I love so much from the Silhouette Design Studio.  Didn't recognize it?  That's because I dropped out the bottom layer of petals and the top layer.  Then I took the middle petal, made a copy and welded them together exactly opposite one another.  That gave me the four petal flower to match the one in the paper.  Two Irock gems finished off the flower. 

Friday, June 22, 2012

Such Inspiration

Lately, I've found so much inspiration on the blogs.  For instance, last Friday night when I was simply trolling the blogs for inspiration, I found the cutest card on Jamie Lane's Bits of Paper blog.  I knew I just had to make a card of my own.  Last Friday I picked up this cute little 6x6 paper pad called Vanity Fair from My Mind's Eye at Craft Warehouse.  It's perfect for making cards and I knew it would be perfect for this one.  I had a pale yellow card base all ready so really it was just cutting a few flowers from the Silhouette Design Studio and finished them off with pale yellow gems from Darice using my Irock tool.  Then I added a sentiment stamped using a Fiskars set I had on hand along with a little crochet thread and grosgrain ribbon.

Thursday, June 21, 2012

Another Recycled Sketch

For some reason I find myself going back to the same sketches from time to time.  I made this card in a tan and light greenish color and really liked it.  So I thought I would switch it up.  I also find myself reaching for the same 6x6 pad of Stella and Rose from My Mind's Eye.  I really do love that one.  Little did I know when I picked it up during last year's Craft Warehouse "sidewalk" sale that it would become one of my favorites.  It's funny too how papers that I'm just not completely in love with when I pull them out of the pad, I just completely adore when the project is completed.  So here's a fabulous remake of a card I love with a little printing from my Word processor (Vivaldi font) and a stamp from the Paperwork Greetings set from Inkadinkado along with Red Riding Hood ink from Stampin' Up.  The flower is one of my favorites I've downloaded from the Silhouette Design Studio with a little yellow gem from Imaginesce using my Irock and a some random crochet thread.

Wednesday, June 20, 2012

Inspired by a Winner

I was trolling my favorite blogs for inspiration and found it!  Paper Players was showing their winners and one of them just spoke to my creative heart.  They featured this amazing pinwheel card by Karen Day and I just knew I had to try it out myself.  Now, I could have downloaded clouds, the pinwheel and grass from the Silhouette Design Studio.  They had them, but I elected to make the pinwheel and the clouds myself.  It was fun to have to think through how to do it and I have to admit that I'm enjoying learning how to the use the program to create my own designs.  The only regret I have is that I did not make the pinwheel a little bit bigger on this card.  The blue, brown and green papers are card stock from DCWV.  The pinwheel itself was cut from a scrap from the Stella and Rose 6x6 pad from My Mind's Eye and finished off with a pearl from Imaginesce using my Irock.  The sentiment is one of my absolute favorites for birthdays.  Its from the Garden Flowers set from Inkadinkado.  The clouds were filled with Fun Flock from Stampendous!

Saturday, June 16, 2012

Freshly Made Sketches #39

I just wasn't sure about this week's Freshly Made Sketches' sketch.  The samples were all very wonderful, but I just couldn't envision a finished product of my own.  But once I found this cute damask paper in the Stella and Rose 6x6 pad from My Mind's Eye, the whole card just started to fall into place.  I used the cute little sentiment from Fiskar's All Year Greetings stamped in Mocha Mama, a fabulous chalk ink from Quick Quotes.  I forget how wonderful their ink works for stamping sentiments.  The flower is my favorite one from the Silhouette Design Studio, but this time I made a little change to it.  While it's my favorite flower, it's really a pain in the rear to put together in a small size.  So I took a little time this time to copy, paste and weld the smaller petals together so I could put it together in much fewer steps.  It worked perfectly, but, of course, this time I was using a larger flower, so I'll have to give it a try on a smaller flower down the road to see just how much easier it really is.  I added a little Old Paper Distress Ink to give the flower and leaves a little more depth.  An Irock gem from Imaginesce finished it off.  I truly think it's one of my favorites.  It may be very simple, but that's the way I like it. 

Tuesday, May 15, 2012

Another sympathy card

I found out tonight that Matt's Aunt Lorraine passed away this morning.  She was a very nice lady and I enjoyed spending time with her and her husband, Marvin, before he passed.  So tonight I found myself in my craft room with the unbelievably difficult task of creating another sympathy card.  Fortunately, I found a pattern for this card in the Best of Card Creations by PaperCrafts.  I love this book.  I picked it up at CKC several years ago and I find myself pulling it out from time to time when I need a little inspiration.  Tonight was no exception and this particular card just jumped out at me. As usual, the hardest part was finding the right paper.  I had the polka dot paper sitting on my table top from a card I made the other night.  It comes from the Bella Armoire stack by DCWV.  I absolutely love that stack.  The grey paper comes from the Stella and Rose paper pad from My Mind's Eye.  I picked the 6x6 pad when it was on sale at Craft Warehouse and I find it's perfect for card making.  The white, grey and black papers just come from my stash of scraps, but I particularly liked how this wreath turned out.  It was downloaded from the Silhouette store and the simplicity of the wreath was perfect in comparison to some of the more complex ones I found in the store.  With just a few black metal Irock findings and a little sheer ribbon, the card was complete. 

Sunday, March 4, 2012

It's been a long time...

...Since I did a full layout. I guess I've been in card mode a lot lately. Plus I really haven't much creative mojo or energy lately. It seems like all I do is go to work and sleep. But this weekend, although it went way too fast, I had just had a great time and felt more like myself. We went to an afternoon hockey game yesterday with my parents and had a great time. Today we went to my niece's 11th birthday party. Then a little grocery shopping, some laundry, a little yard work, a new recipe for dinner (Cheesy Potato Soup - so easy and quite delicious) and I even found some time to play in my craft room tonight where I was inspired to do a layout of this great picture of my parents after a long exhausting day at SeaWorld in 2009. I used a PageMaps layout (aren't they fabulous?) for inspiration. I used a piece of Colorbok paper from a pad I found at TJ Maxx (love the great deal on paper there) and a lot of designs from the Silhouette design studio (the banners are new ones this week).

Monday, January 2, 2012

Thank You #2

I received a number of new Sizzix folders for Christmas and decided to try out some of them for my next thank you card, however, I found that I was pulling out old ones I've had for a while and found to be tried and true. This fun thank you card was built with Coordinations Black Magic cardstock using the Thanks folder. I then added a flower built from the Vine, Swirly die (the only new one used in this project) along with both a large and small flower from the Asterisks dies from Provo Craft. I colored the larger flower with Coffee Shop Tattered Angels Glimmer Mist and topped the whole thing off with a Darice stud using my IRock tool. It was quick and easy, but looks pretty cute in person.


Saturday, October 15, 2011

7 years

A couple of weeks ago, hubby and I celebrated our seventh anniversary and my parents celebrated their 48th just a few days earlier. So as an anniversary gift for both of us, the four of us went to a hockey game on the Saturday night between their anniversary and ours, back to the scene of the crime as one might say. Well, not really because this game was in the Rose Garden, not Veteran's Memorial Coliseum, but it was as close as we could get.


I surprised both my parents and my husband with having anniversary wishes posted on the big screen (a big thank you to the Hawks for comping me the posting cost since we were the ones who got married on the ice). Hubby was actually surprised. He said he had thought about doing it but didn't know who to contact. (I do!) It was a fun addition to an otherwise wonderful game.


So on our actual anniversary, I gave him his card and he asked me to make a scrapbook page for it and he asked that I include one of the roses he gave me. So last weekend I tried my hand at drying a rose. I was really surprised how well it turned out and how easy it was to do. Just cover the flower with the drying powder and wait.


I also found the perfect shadow box, but the page design was a little elusive. I have a very clean and graphic style and I just didn't want to do the same thing all over again. I wanted to try some new things. I had this idea about making my own background paper using some Co'ordinations Black Magic paper I bought a while ago. So last night, I played around in SCAL and created a whole page of the number 7 (the number of years we've been married) in Old English Text for the font. I printed a test page using a sharpie and my Chomas Sharpie holder for the Cricut. When I had what I wanted, I switched out for the embossing tip and held my breath. It turned out perfectly. A bit of sanding later and a little use of a stylus to make some of the sevens stand out more than others and I was thrilled with my personalized background paper. It was so not my usual style but I love, love, love it.


But then I couldn't make the rest of the layout come together. I fussed with it until nearly 1 in the morning last night, gave up and went upstairs to watch the last two stories on Five that I DVR'd off Lifetime earlier in the week, hoping that creativity would come to me in the night. Well, that didn't happen, so I flipped through some sketch books (Page Maps and Page Maps 2, plus the Best of Becky Higgins Sketches) this morning but finally drew some inspiration from a sketch from Page Maps from July 2009. (I have just got to add that the best thing I ever did to inspire myself was to buy a plain old notebook and some page protectors and print pages of sketches that I like and put them in the notebook. I have all this inspiration in one convenient place. Wonderful! Although I need to get a bigger notebook now).


What really inspired me was the off kilter nature of the pictures, which I switch to landscape instead of portrait. Plus I didn't want to cover too much of my background so I ditched a lot of the background of the layout to leave more open space. In retrospect, it really looks nothing like the sketch that inspired me, but that's the point. I don't need to recreate something someone else has done, but simply take inspiration from them. But once I had all the pictures in place, it was really still missing something. I put it in the shadowbox and I just wasn't happy. It needed bling. Hubby looked at it and was suggesting things he thought would work to make it all come together. But I really knew it just needed some bling. But the swirly bling I had on hand was black or pearl. Neither would work. But then I remember that I bought the templates for the I-Rock bling. Perfect! I was going to get to do something else I haven't done before as I bought these but had never used them. I was a little hesitant, but once I got started it was so easy to use and it turned out that was exactly what it needed. I'm sure everything is going to have I-rock bling now that I know how easy the templates are to use.


Unfortunately, the glass of the shadowbox reflects too much that I had to take the picture with the door open, but you get the idea.

Saturday, June 11, 2011

Thank you cards


Even though I still have a few cards left in my stash, today I made a few specific thank you cards using some new techniques I either just learned or had never tried. Last night, when I was puttering in my scrapbooking room playing video games, surfing blogs and watching YouTube, I watched Creations with Christina's Stampin' on Friday video and was very inspired by the cute vintage newspaper card she made. Well, of course, I didn't have the newspaper stamp, the twine, the tiny tags die or stamp, but I figured I could still make it work. Hmmm... thinking about it now, that was a pretty strange assumption - I don't have anything she uses in the card except card stock and yet I still thought I could do it. Fortunately, I have Google. So I searched Google images to find a suitable newspaper image. I substituted embroidery thread for the twine. It isn't quite as cute, but it works:

A few months ago, I was shopping at Paper Zone and bought a little spray bottle of Tsukineko Sheer Shimmer Spritz in a shade called Sparkle. I've never really tried spraying on my layouts or cards but I've really liked when I've seen others using it or similar products. So the little spray bottle has languished in the top drawer of tool cart for probably about three months now. But today I decided it was time to give it a try. First I ran my background paper through the Sizzix with an embossing folder and then sprayed the background (I used my garbage can to contain the spray. It was surprisingly simply and dried quickly. I used some of my stash of flowers, some Irock gems and a little Offray ribbon to finish it off. Yeah for using my stash!


So after Christina's video ended, I started watching videos by 2stampis2b.com. I saw this wonderful video using embossing folders that left a void in the embossing so that you can stamp an image without having the texture where your image is. It's really hard to see, but in this picture, the card stock under the bunch of flowers is flat and all the rest has the texture from the embossing plate. It's a really amazing technique. The video demonstrating it is available here. I just had to try it. So I made my stamping void using a recycled part of an old box that held page protectors. It worked perfectly. Although next time I will probably make the void a little bit bigger. I then colored in the flowers with my Stampin' Up pens and sprayed the whole thing with Sheer Shimmer Spritz in Sparkle (and since that little bottle is running out quickly, I'm definitely going to try her spray that she shows how to make here). I then used Inkscape to make the ribbon slide and imported it into SCAL. I added the words "Thanks a bunch" and used my metallic Cri-kits pen to write it then cut it out. Then just layer the pieces and it was done. The picture shows the shimmer mist really well and the light really reflects off the writing much more in the picture. The shimmer mist is really much more subtle in person and the writing is in much starker contrast.


So now I just have to make a sympathy card and I can get back to my layouts. Oh, and I have to actually mail a whole bunch of cards that I'm behind in mailing out too... Oh well, better late than never I guess.

A little scrapbook therapy

Work finally came around and turned out okay by week's end, but it was a rough, rough week. I think my bosses are afraid I'm going to look for another job. I think about it some times, but I really do love where I am even if sometimes I question the sanity of that.

My father-in-law is still in the hospital from his chest pains. We'll be heading down there shortly. But in the meantime, my friend's dad died this morning. He was in the hospital the week before last with kidney failure and fluid in his lungs. They thought he was on the mend and he went home to finish his recovery, but things took a turn for the worse and this morning, she and her daughter were called over there to find the police and fire truck. Her dad was gone. So I guess, all in all, my horrible week isn't so bad in comparison.


So last night I played in my scrapbook room for a little while. Mostly I watched You Tube videos on techniques and played Dr. Mario, but I did a little moving of paper too. But hubby was tired so I knocked off early to watch a movie with him (Duplicity - it was okay, a little slow but I liked the story). Then this morning I couldn't sleep so I got up and played some more in between loads of laundry and Chewie demanding attention. I finally finished this page based upon the Sketchy Thursday's sketch from last week.

It's funny how sometimes a page just all falls together quickly. Then there are others that seem such a struggle to put together and somehow never still look right. Lately, I'm having a lot of the latter.


But I did have fun with the flowers on this one. It's actually an EK Success border punch but I did a little snipping of my own to make separate flowers. In fact, there wasn't a lot to this one, considering how long it took to make. The background is Karen Foster Design paper called Zoo Life Collage. The polka dotted paper and orange papers are some I had left over other projects. I'm guessing it's probably DCWV, but am not sure. The little strip of green shimmer paper (left over from last year's Christmas card project) was distressed with some Tea Dye Distress Ink. The blue card stock I'm pretty sure is from Paperbilities and it's been hit with some Color Box white ink. I actually just realized that it's missing the border strip I made with the scalloped EK Success border punch that goes along the right side of the picture. There are some Irock gems for the center of the flowers and a Darice gem to dot the i in the title.

Monday, May 23, 2011

Tickled Pink?


I'm still working on some of the challenges from Craft Warehouse's blog party this weekend. Tonight I finished a sketch challenge (you can still play along until Midnight on Tuesday) in which we had to interpret a sketch in our own way. I loved the sketch but for this layout it was going to work better rotated for what I had in mind.


The original sketch has the title running vertically along the right side of the page. I used cardstock from DCWV's Brights stack for the base, layering strips of paper from DCWV's Nana's Kids stack and a small piece of cardstock from a DCWV Pastel stack for my journalling tag. The journalling tag was cut out with the Plantin Schoolbook cartridge, then layered with a fabric flower and small button. The title and two edge strips were cut from a page of white glitter paper from Creative Imaginations. I used two EK Success edge punches to make the half-flower and bracket glittered strips. The flamingo brads are from the Eyelet Outlet (love them) and the fabric flowers are from the Bazzill Collection from Imaginisce. I finished the title off with small Irock gems.