Showing posts with label Cricut. Show all posts

Saturday, January 7, 2012

One of Those Projects

So often I make things as gifts for others that I can't share on the blog because, well, they would find out before I'm ready. One of "those" gifts last year was for my hubby for our anniversary. We are blessed that both our parents are still with us, but it's been a long, long time since we had good pictures taken of either set. I know better than to ask my mother because she would far rather be behind the camera than in front of it, but I thought I might be successful with his parents, and I was. I lucked out with a great Groupon for photos and sent my in-laws, with the caveat that I get the photos and they had to keep a surprise until our anniversary. Armed with great photos of them together, I tried to set up time to work on the book, but things seemed to conspire against me. A whole day of crafting to myself during a camping trip turned into a hot mess. The time had planned for myself during another crafting trip was interrupted too. Every time I tried to work on it my craft room, dear hubby seemed to wander in and I had to scramble to make sure everything was hidden. But, despite the interruptions and changes to my plans, I still managed to get it finished and it remained a surprise until our anniversary. But I still couldn't share it because my in-laws wanted to use the pictures at Christmas. But now, all the surprises are over and I wanted to share some of my favorites. The album is one that fits inside it's own box. I bought the whole thing (including all the paper and stuff inside) for only $6 at the CKC Convention a couple of years ago. It's been sitting on the shelf waiting for the right project to come along, but the outside is pretty plain. I pulled out all my love, wedding and family stamps for this project and found that my favorite was a Heidi Swapp stamp of the word "love" that I picked up on clearance at Target in Minneapolis, MN several years ago on a work trip. I scanned the stamp for a page that I'll show you later and then decided to see if could cut it out of vinyl. I enlarged the image in SCAL and, sure enough, it cut pretty darn well with the Cricut. This shot is not my absolute favorite, but it's definitely close to it. They just look so happy together. I love the vellum on this one. I punched out the heart strip with my EK Success punch. Then I laid the punched strip over the vellum and traced the edges. I love the way the cut-outs show through the vellum on the final page. This next picture is probably one of the better shots of my father-in-law smiling.


The only thing different on the page was the hearts on the picture. I needed something in that corner to balance the picture and I just thought I would use a little white Staz-On ink, but that just didn't look right when it was done so I colored it in with red ink. It turned out perfect. It's unfortunate that this next picture turned out so dark because I really did love it, but unfortunately there wasn't much I could do to lighten it given the restrictions on the CD that the pictures came on. (After the fact I realized that I should have printed it, scanned it and then tried lightening the scanned version, but I didn't think of that at the time). But what I did love was the effect of the stitching and the chipboard flower. The stitching was a piece of cake to do using my Stampin' Up paper piercer. I had nice straight, perfectly placed holes to run my DMC floss through. The chipboard flower was easy to cut from a cereal box using SCAL. I love getting to recycle packaging in my scrapbooking. This next one is certainly not my favorite picture. But I love the "love" embellishment. I scanned the Heidi Swapp Love stamp, turned it into a SVG and using SCAL and my Cricut, I cut it out just a bit larger for a shadow effect. It's a fun technique.


Last but not least is this page, which is probably my favorite of all of them. First, I just love this picture. I think it's probably my favorite of all of them. But also because I love the background paper. I've read about this technique many times, but I had never tried it myself until this page. It's the technique where you stamp your own background, which I did using the Heidi Swapp Love stamp in Versamark then embossed with a clear embossing powder. It's quite subtle but very beautiful. A few Perfect Pearls in the shape of heart on the mat along with more clear embossing to finish it off.

Monday, December 19, 2011

My second cut...


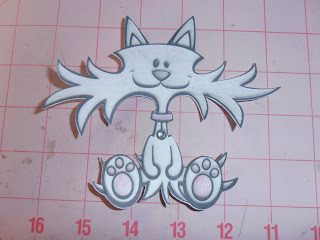
Also did not go so well due to human error, but boy was I excited with what I learned. I knew I was not going to be happy with just cutting out what Silhouette has available in their library. Sure they have a lot of fun looking designs and I know I'll enjoy using those, but since I have had Sure Cuts a Lot with my Cricut for a long time now, I've gotten used to being able to cut out whatever I can dream of (as long as it wasn't a perfect circle - Cricut just could not cut that). Lately, that's mostly been cutting out around stamps of the stamp sets I have so I don't have to fussy cut anymore. I have almost all of them scanned into my computer, which is nice for organization and knowing what I have, but also meant that they were handy to play with. I opened up my favorite stamp set (Meow Meow from Recollections) and found my favorite stamp: the one that looks like Chewie. I erased all the other stamps, traced the outline of Chewie, then printed it and cut it with the Cameo. Only problem: I somehow ended up with a stray cut line that decapitated the paper Chewie. Oops... You can see the extra cut just above the collar where I taped it together: On my second try, it came out much better. I colored it a little with my colored pencils and added a little rhinestone and now it's perfect for... well for something. I'll figure out what later, but boy am I loving this new machine.
Saturday, October 15, 2011

7 years

A couple of weeks ago, hubby and I celebrated our seventh anniversary and my parents celebrated their 48th just a few days earlier. So as an anniversary gift for both of us, the four of us went to a hockey game on the Saturday night between their anniversary and ours, back to the scene of the crime as one might say. Well, not really because this game was in the Rose Garden, not Veteran's Memorial Coliseum, but it was as close as we could get.


I surprised both my parents and my husband with having anniversary wishes posted on the big screen (a big thank you to the Hawks for comping me the posting cost since we were the ones who got married on the ice). Hubby was actually surprised. He said he had thought about doing it but didn't know who to contact. (I do!) It was a fun addition to an otherwise wonderful game.


So on our actual anniversary, I gave him his card and he asked me to make a scrapbook page for it and he asked that I include one of the roses he gave me. So last weekend I tried my hand at drying a rose. I was really surprised how well it turned out and how easy it was to do. Just cover the flower with the drying powder and wait.


I also found the perfect shadow box, but the page design was a little elusive. I have a very clean and graphic style and I just didn't want to do the same thing all over again. I wanted to try some new things. I had this idea about making my own background paper using some Co'ordinations Black Magic paper I bought a while ago. So last night, I played around in SCAL and created a whole page of the number 7 (the number of years we've been married) in Old English Text for the font. I printed a test page using a sharpie and my Chomas Sharpie holder for the Cricut. When I had what I wanted, I switched out for the embossing tip and held my breath. It turned out perfectly. A bit of sanding later and a little use of a stylus to make some of the sevens stand out more than others and I was thrilled with my personalized background paper. It was so not my usual style but I love, love, love it.


But then I couldn't make the rest of the layout come together. I fussed with it until nearly 1 in the morning last night, gave up and went upstairs to watch the last two stories on Five that I DVR'd off Lifetime earlier in the week, hoping that creativity would come to me in the night. Well, that didn't happen, so I flipped through some sketch books (Page Maps and Page Maps 2, plus the Best of Becky Higgins Sketches) this morning but finally drew some inspiration from a sketch from Page Maps from July 2009. (I have just got to add that the best thing I ever did to inspire myself was to buy a plain old notebook and some page protectors and print pages of sketches that I like and put them in the notebook. I have all this inspiration in one convenient place. Wonderful! Although I need to get a bigger notebook now).


What really inspired me was the off kilter nature of the pictures, which I switch to landscape instead of portrait. Plus I didn't want to cover too much of my background so I ditched a lot of the background of the layout to leave more open space. In retrospect, it really looks nothing like the sketch that inspired me, but that's the point. I don't need to recreate something someone else has done, but simply take inspiration from them. But once I had all the pictures in place, it was really still missing something. I put it in the shadowbox and I just wasn't happy. It needed bling. Hubby looked at it and was suggesting things he thought would work to make it all come together. But I really knew it just needed some bling. But the swirly bling I had on hand was black or pearl. Neither would work. But then I remember that I bought the templates for the I-Rock bling. Perfect! I was going to get to do something else I haven't done before as I bought these but had never used them. I was a little hesitant, but once I got started it was so easy to use and it turned out that was exactly what it needed. I'm sure everything is going to have I-rock bling now that I know how easy the templates are to use.


Unfortunately, the glass of the shadowbox reflects too much that I had to take the picture with the door open, but you get the idea.

Saturday, September 24, 2011

Scrapbook Expo


I was so excited to go to Scrapbook Expo today. I had such a great time last year with my hubby's cousin Christie and her friends. Although this was a solo trip, I was so looking forward to shopping 'til I dropped. I look forward to this and the CKC each year to see new products, find some great buys and inspire me. So I excitedly printed my coupons and set off on my little adventure this morning. But it was sooooo small. There were hardly any vendors there. Honestly, I had shopped the whole vendor floor (twice) in an hour and a half, and that was not hurrying at all. But that didn't stop me from spending some money.


I found the usual: stamps, paper, embellishments, etc., but my favorite purchases this time were storage items. I stopped by Die Cut Dan's booth to buy some great storage for my Cricut cartridges. I had run out of room the shelf and was either looking at having to find a new location or some other solution. We gave my Mom some little boxes with inserts that hold cartridges for Christmas last year and I was thinking about going that route. But then I saw a different holder on the Internet that looked like the same style that the Cricut tools come in, but couldn't find it any store here to see if I would like it. But these little plastic cases were the perfect answer to my storage solution. Two of them held all my cartridges in less than half the space the boxes took up: Plus I think I can get another two cases on that shelf!


Then I found this stamp pad holder. I've been storing my stamp pads in a drawer and I find that I forget what I have and have to dig through the drawer to find the right one. This holder holds Stampin' Up pads perfectly and now I see my colors at a glance. It's perfect. Now I just have to figure out where I'm going to put it.


Oh, and one last thing. That little green box to the right of the stamp pad holder I also picked up at Dan's booth. It holds my Stickles perfectly, although I really should have bought two of them. I didn't realize how many bottles of Stickles I had. Anyhow, while I was a little disappointed at how few vendors were there, that won't stop me from still going to check it out if they come back this way. After all, the smallest vendor floor is still better than no vendor floor. There's plenty to be happy about with my storage finds and I still have one more day to play in my craft room before I have to go back to work, I found out today that Tony Stewart won last weekend when we had no satellite to watch the race (stupid tree blocking the satellite), Hubby took me to dinner and a movie (Contagion - wait for the DVD - the big screen isn't necessary and it's not worth the big screen ticket price) and the Hawks won tonight and are undefeated so far! So, all in all, it was a pretty good day.

Thursday, August 18, 2011

Fun card and crafting haul

I needed a thank you card for a co-worker who took care of straightening out my registration problems at my conference last week. Well, I was sitting in my conference doodling when I found inspiration in the panels on wall behind the speaker. They were very symmetrical and interesting to look at. That doodling inspired this card. I found a couple of images of lilies on the web. I replicated the one several times and then cut them out. I left a little of the white photo paper as a border and then mounted them all on a piece of black card stock, leaving just a little space for a ribbon. The sentiment on the inside says "Thank you to someone who is one of a kind." A very simple card to make, but it was lots of fun. I also want to share with you some pictures of my haul from shopping with my Mom and sister on Sunday. I picked up all these stacks of paper at TJ Maxx where were looking for clear acrylic cups (found two purple ones!)

The next two pictures have a mixture of Jo-Ann's and Michaels items. But I really have to point out that everything on this next picture is sitting on top of my new trimmer. Yes, I had to buy a new trimmer because my beloved Making Memories trimmer finally gave up the ghost after nearly five years. It probably would still be humming along but I managed to bend the blade trying to cut something I never should have been trying to cut in the first place. Needless to say, the replacement blades aren't available (sold out), so I bought a new one. I got a great deal because Michaels hadn't taken down the sale tag from last week so they honored the sale price and let me use my 25% off my purchase coupon too. Whoo-hoo and a big thanks to my mom for asking them if they would honor the tag. By the way, they also honored the tag that showed that the Cricut cartridges were on sale too so I bought my Campin' Critters cartridge too.


Sunday, July 31, 2011

No camping, but big fun anyhow

So camping didn't happen after all. Despite leaving early for the weekend, it apparently wasn't early enough and every single camping spot in the 'non-reserved, first-come, first-served" portions of all three parks we went to were full. Well after getting over my disappointment (and unpacking the RV and truck), we "camped" at home. Now we've had wine, frozen lemonade, margaritas, more wine, smores and truckload of camping snacks, ate dinner out with the family on Friday night, watched 8 hours of Real Housewives, two hours of Intervention, four hours of Hell's Kitchen, two hours of Master Chef and three hours of Glee, shopped at Michael's, Craft Warehouse and Jo-Ann's, picked up gorgeous flower baskets at the nursery, saw Cowboys and Aliens, oh, and made a new cork board for my sister (something we couldn't have done camping since the one thing I didn't pack was my Cricut). It turned out so adorable that I just had to post photos even though she's concerned that someone will copy it so it won't be one of kind. Personally, I know it will be one of kind because even if someone else tries to make it, they won't pick the same paper, cut it at exactly the same dimensions or place the houses in exactly the same way. So we found an image on Google image that she liked, traced it in SCAL, then moved the window to a place that she liked better, then cut them out of two colors of glitter card stock, then found a font she liked and welded the words and cut them in SCAL on the Cricut. So then it was just a process of taking out the backing and glass from the frame, inserting the cork board and putting the backing back on the frame, then gluing down the cuts we made. So here's a shot of it all put together (we left the corner protectors on so that it will transport safely back to her house): She bought the paper at Craft Warehouse. She carefully picked out cute glitter paper and found some coordinating card stock for the words. What she didn't know was the card stock she carefully picked out for the bluish gray color on the back was Black Magic card stock by Coordinations. So when she pulled it out today, I explained to her what she had bought and that changed the title all around. Instead of being the solid blueish gray, we ran it through the Sizzix with Script Texture embossing folder then sanded over the raised texture to bring out the blue text. You can see some of that dimension in this close-up:

So I had forgotten to turn off the layer with the house in it when I cut the words and ended up with this extra house. We used it as a test for the texture. The house turned out so cute that I had to use it somewhere, so I made this simple little card using some scraps from my scrap bin of Orbit paper from the Cosmic paper line I got from the Paper Loft. I have no idea what the striped paper is called, but I'm pretty sure it's from the same line at the Paper Loft. I just used some plain paper I bought in a ream at Paper Zone called Nekoosa Linen to make the card base and also to cut with my Sizzix Bigz Top Note die. I used a little bit of Offray gros grain ribbon and some pop dots to finish it off. A simple little card, but it was loads of fun to make.


Anyhow, now I'm going to finish watching this last episode of Glee with her. She had never seen it before and now I have her totally hooked on it with just the first episode. I knew she would love it. I'll make a Gleek out of her yet.

Sunday, July 3, 2011

Cup art...


I made my mom a Mickey Mouse cup but forgot to take a picture of it. I was looking for a Grumpy SVG but couldn't find one so I broke down and borrowed my Mom's Happily Ever After Cricut cartridge to make this one for my dad so they have nice cups to take on their trip. I almost didn't get a picture of this one, but I quickly snapped a picture on my phone before I handed it over at dinner tonight.

Friday, June 17, 2011

Happy Father's Day

Today this post is going up as we drive to the restaurant to share a meal with both my father and father-in-law. It's wonderful that I still have them both in my life and that they live close enough that we can spend time together all the time (like on Friday night when we called my mom and dad on the spur of the moment to see if they could have dinner with us). I know that I'm very lucky in that regard.


So today I want to share with you the father's day cards I made. I was trolling the blogs on Friday night when I came across a video posted on My Creative Time about using punches on a card. Well, of course, I didn't have the right size of punch, sheer ribbon, a cute little charm or anything like that, but I did have my imagination. I cut the squares, the used my Sure Cuts a Lot program to cut a scalloped mat that I found on the DoodleLicious blog, then cut the charm out of the Fabulous Finds cartridge and stamped it with this stamp from the "It's All Good" set from Stampin' Up. The charm wasn't exactly what I had in mind, but it gets the job done. I used regular ribbon instead of sheer. The best part about it is the whole thing is the paper. I had this little 6x6 Mini Deck from the Cosmo Cricket called Wanted that I won at a Cricut class at Craft Warehouse some time ago. The paper has these little cowboys on it. Since my father-in-law worked on a dairy, I thought it was perfect. The sentiment on the inside says "Happy Father's Day to a true cow-boy."


My dad's card was inspired by a post I found on the Paper Zone blog. It wasn't so much the twisted easel format, but the argyle design. I immediately thought back to this whole pack of paper I bought at CKC this year. I just LOVE argyle, especially this argyle paper from Fancy Pants called Recess in the All Fall line. I immediately thought of that paper for my card. So while I wasn't up to trying a twisted easel, I did get my inspiration from their project. I made a little square ribbon slide on Sure Cuts a Lot, used my Cri-Kit gel pens to write the sentiment (although it does look a little fuzzier than I would like. Then just matted the paper with some card stock from DCWV and made the card body with kraft paper from The Paper Company. At first the ribbon slide seemed a little too stark. It was a much brighter white than the argyle paper. So I used a waded up tissue with little Stampin' Up Old Olive ink to give it a little more color to match the bit of color in the argyle paper. You just can't really see that detail in this picture.


Then I still had to make a card for my mother-in-law's birthday tomorrow. I had just watched a video on a shutter card on You Tube and decided to give it a try. I turned out okay but I did learn that you need to use STIFF card stock for your base. I chose a textured card stock that wasn't very stiff after all that cutting and folding, so it makes the card a little difficult to close back up. I'm pretty sure this was a very old piece of DCWV because I found it loose in my paper cupboard when I was looking for patterned paper, but I don't know for certain. The [patterned paper was also a loose piece in with some others that I found when looking for a coordinating color for the original paper I had chosen, which I abandoned for this one. I liked the butterfly pattern on the other paper, but I couldn't find a coordinating paper that I liked. This one is a double sided paper and I thought both sides were perfect. I also learned that laying out the pieces with the card open doesn't work. I had them all arranged in a way I liked, glued them down and then closed the card and, eeeekkkkk, it looked terrible. I had all the same papers on the front of the card. So I did a double layer of patterned paper on a box on the front to give it a little mix. So if you try the card, don't glue down the paper until you've seen what it looks like closed too. So then I just stamped my front sentiment from the "Lots of Thoughts" stamp set from Stampin' Up and added my inside sentiment stamped from the Stampin' Up "Congrats" set.

I'm thinking that if I try this card again, I might try using pictures where all the yellow paper with the soft blue mats are (the ones you can't hardly see in this picture). These are all hidden when the card is closed but would be something that would be really nice to display for a while for the recipient.

Monday, May 23, 2011

Tickled Pink?


I'm still working on some of the challenges from Craft Warehouse's blog party this weekend. Tonight I finished a sketch challenge (you can still play along until Midnight on Tuesday) in which we had to interpret a sketch in our own way. I loved the sketch but for this layout it was going to work better rotated for what I had in mind.


The original sketch has the title running vertically along the right side of the page. I used cardstock from DCWV's Brights stack for the base, layering strips of paper from DCWV's Nana's Kids stack and a small piece of cardstock from a DCWV Pastel stack for my journalling tag. The journalling tag was cut out with the Plantin Schoolbook cartridge, then layered with a fabric flower and small button. The title and two edge strips were cut from a page of white glitter paper from Creative Imaginations. I used two EK Success edge punches to make the half-flower and bracket glittered strips. The flamingo brads are from the Eyelet Outlet (love them) and the fabric flowers are from the Bazzill Collection from Imaginisce. I finished the title off with small Irock gems.

Sunday, March 13, 2011

Looking for a new cutting machine...

Provo Craft (PC), the makers of Cricut, is shooting itself in the foot by suing the makers of Make the Cut (MTC) and Sure Cuts a Lot (SCAL) to force the companies to make their software not compatible with Cricut. If I remember correctly, it's about the same thing that happened between Apple and IBM. Apple limited the development of compatible products by competitors and IBM did not with their personal computer format. As a result, IBM's format became the more widely accepted format because there was more available for it.

PC should well remember that its target market is people who are crafters. These are people who are artistic and creative in our own way. Many of us don't want to be limited to what PC decides we should have available to us. Just look at some of the blogs out there. There are so many ways that they take products meant to do one thing, and use them to create something entirely new. These crafters will always find a way to stretch the limits of their imagination and that's what products like MTC and SCAL allowed them to do with the Cricut.

I attend a monthly Cricut class at a local crafting store. At every class, the instructor makes a project using a cartridge or two, shows off the new cartridges (or new machine) and answers audience questions. A lot of those are about basic use of the machine. There is a wide variety of users at those classes from those who haven't even taken the machine out of the box to a super-user or two and every level in between. No matter that I've had my machine for years and have used it extensively, it seems like I always walk away from the class with a new tip, trick or inspiration, so it's well worth a couple hours of my time.

But now thinking back about that class, it really demonstrates the wide variety of Cricut users. There are people at that class who will never be interested in doing anything other than making what the cartridges allow you to make with no peripheral device. They will never hook their Cricut up to a computer or use a Gypsy. But they will buy every cartridge that appeals to their taste and use it exactly as the booklet shows. They need the instructions and what they see is enough for them. They don't want anything more complicated than what the machine was originally made to do. That's one of the things that makes Cricut so attractive. It's easy to use: set a few dials, push a couple of buttons and sit back.

Then there are those who might take it to the next level and manipulate the cartridge using the Gypsy or Cricut Design Studio (CDS) software . That is, if they can figure out how to use CDS. I was so excited when I bought the CDS software years ago. But once I had it loaded, I was thoroughly disappointed. It was the most non-user friendly software I had seen and, trust me, I use some of the most non-user friendly programs one could imagine. Most of the time I can figure them out without a lot of help or instruction. But this one was truly awful. I finally figured it out with a lot of trial and error because there wasn't a lot of help in any of the materials. I looked at it and thought, my mother, who is pretty good with computers, would still have difficulty with the software because it's not intuitive and they don't provide any real support to get to learn to use the program. For many, it would never work at all. For a company that created a machine that was simple enough that most people could easily use it, how could they create such a poor program to go with it? Because of that, I've never looked at the Gypsy. I'm not one to create on the go and because CDS was so awful, I wasn't willing to spend my money on Gypsy.

But, ultimately, with perseverance, one can learn to use the CDS software and take their machine and cartridge capacity to another level. But, ultimately, one is still limited to what is available on the cartridges the person owns. The problem there is that the cartridges don't always speak to the creativity in us. We all have different tastes. I like clean, graphic styles. Others might see the pages as boring. But that's what's so great about life. We all do have different styles and tastes and get to express them. Unfortunately the cartridges mean that we are at the mercy of the Cricut designers for the tools available to use. While that's great for the straight-forward user, it places limits on the creativity of those of us who have a different vision but not the tools to achieve it due to the limits of the cartridges and the CDS software.

That's where SCAL and MTC came in for Cricut users who wanted to break free of the limitations of the CDS software and the designs on the cartridges. I have SCAL and have loved it from the time I installed it about a year ago. It's let me take my Cricut creating to the next level. I've made word books, found designs that weren't available on any cartridge and created my own. For instance, last weekend when making the card for my co-worker, I wanted a buckle for the front. I pulled out my Fabulous Finds cartridge and flipped through the booklet. I didn't see what I had in mind. There were things that I suppose would have worked, but they weren't what I wanted. So I designed my own in Inkscape, brought it into SCAL and cut it on my Cricut. I was free to follow my inspiration wherever it wanted to go.

PC truly had the best of both worlds, they had a machine for people who needed something simple to use and needed inspiration for their creativity and that same machine could be pushed to the limits of our imagination using outside programs like Inkscape combined with SCAL.

But now PC wants to stop that. Instead of creating their own competing software to allow us to do what others have done, they are simply seeking to stop the others. They have already settled with the makers of MTC to ensure that the future versions of the software will not be Cricut compatible and they have filed suit against the makers of SCAL, likely to seek the same remedy. If PC makes it so that I can only use the Cricut with their cartridges and their CDS software, well, all I can say is that I'll vote with my dollars. Cricut is not the only machine out there and the makers of many of the others aren't as short-sighted as PC. If PC cannot respect my creative drive, I guess I'll go find a company that can.

So if you have use a cutting machine other than a Cricut, let me know what you think about it. I guess I'm evaluating my options.

Tuesday, October 26, 2010

Marine word book

Here's a word book I designed in Inkscape this weekend and cut with my Cricut for a friend. She's off to visit her daughter, the Marine, over the Christmas holidays so I thought she needed place to put the picutres she'll take.

Sunday, February 17, 2008

New projects

Friday is the furballs' 1st birthday and Cha-ching will celebrate his 1st on Monday the 25th, but this Tuesday is Hallie's (the niece) seventh birthday. So yesterday they had her bowling party. Daddy's shoulder is bothering him so he didn't bowl but Mommy had fun with her pitiful bowling.

While Mommy was helping get ready for Hallie's party, Rayna (the other niece) brought Mommy a picture of Rayna with Santa from this past Christmas. Mom was so excited that she came right home after the party and used her new Cricut cartridge, Christmas Cheer, to create a scrapbook page.

She also finally found the picture she was looking for for the Mickey page she created using her Mommy's cartridges, Mickey and Friends and Mickey Fonts.Mom has been spending a lot of time lately playing with her new machine. We don't mind too much because that means that we can lay on our quilt and watch her. She occassionally sprays the quilt with our catnip hydrosol. DaisyMae Maus' mom sent McKenzie and Zoey the hydrosol in their Christmas gifts a year ago and we love it! Mom just recently had to order new bottles from Prairieland Herbs. Here's Gandalf cuddling with the bottle:

Good thing it's very reasonably priced because then she doesn't have to save it for "special" occasions.