Showing posts with label Creations with Christina. Show all posts

Tuesday, July 24, 2012

Mojo Monday #251

I have several cards to make, but I couldn't really get into it tonight.  So I only finished one.  This one I'm sending to the Maddy and Melanie card drive that I read about on Creations with Christina and is hosted by Simon Says Stamp.   The card map comes from this week's Mojo Monday challenge.  I loved the color blocking and decided to swap out the circle for some cute butterflies cut in white with vellum overlays.  I just love this little butterfly from the Silhouette Design Studio store.  The whole card was made from scraps in my bin.  I know that the flowered paper was from Echo Park and the blue and yellow papers are scraps from DCWV.  I cannot remember the stack for the blue paper, but the yellow paper is from the Lemon Flower stack.  The stamp was from an Inkadinakado set, but I've long ago lost the name. 
I also wanted to show a box I received today from Studio Calico.  Even Zoey had to check out the box.

They ran a special on Plumdistrict.com a bit ago that I picked up for song.  I finally order the kits the other day and was so excited to see them arrive today.

Can you believe this is the first time I've owed washi tape????  I'm really excited to break out the kits and put them to good use, but I must finish my cards first. 

Saturday, June 9, 2012

Birthday Card Inspired by Creations with Christina

I'm so tired tonight.  I got the crazy idea last night to clean my craft room today.  Why I thought it was a good idea to do that on the day the technician was here to change our satellite provider, I'll never know.  But I'm now sitting in a clean and organized craft room (shocking I know).  I can even open the closet doors without needing sword and shield to fight off the things that are ready to pop out at me.  My tools and papers are organized, labeled and put away.  So now I'm ready to start a few projects, but that will have to wait until tomorrow because I am just too tired to do anything more tonight.

But I am going to share this card I made for my Mom's boss.  I was completely inspired by Christina's Stampin' on Friday video yesterday.  It was so simple and yet so beautiful.  So I made my own version in no time flat since she had laid it out so beautifully and I very quickly found this cute paper from My Mind's Eye's Stella Rose 6x6 pad that was just perfect.  I did swap out the stamped hearts for a Silhouette cut of flowers, but that was it.

Short and sweet, but I'm really pleased with the outcome, but again not so pleased with my photography skills.  I really need to learn how to take better pictures of my projects.

Friday, September 9, 2011

A different type of card...


I've never really branched out into different shapes of cards, but when I saw this video about a diamond-fold card on Creations with Christina, I thought I would give it try for a masculine birthday card for a co-worker. The nice thing was the "hidden" spaces were perfect for all of us to sign the card (plus it reminded me of those old folded doodads that we made in grade school - come on, you remember the ones where you had to pick a number and then pick a color and such and then it would reveal your fortune... Do kids even make those anymore...) Anyway, the card went together in a flash and is very simple. I didn't really add much bling or embellishment since it was my first try at this card, but I know it's not my last. Again, I used my scraps from my scrap bin of My Mind's Eye Twinkle, Twinkle, Little Boy paper. I'm not letting a single part of that paper go to waste.

Sunday, September 4, 2011

Sympathy Card Using Cut Files Made For My Acrylic Stamps


A co-worker's father died this past week. While I have a stash of sympathy cards, I had bookmarked one on Michelle's I Stamped That blog a short while ago so I decided to scraplift it for a new card. I also used the card as an opportunity to try using my cricut to cut shapes to match my stamps. This is what I got:

While I'm not overly enamored with this card, I'm so excited about the flowers on it because I cut the shapes to outline a stamp set I own using my cricut (I only wish I was better at centering a stamp on a cut image). It was quite a challenge to come up with the cut pattern to match my stamps. If you try it, I would really recommend using a stamp with clean lines for your first try. The distressed stamp set I used was really challenging. After several attempts to figure out how to do it with this distressed flower stamp set, I finally found that scanning the carrier sheet for my pattern worked better than trying to stamp the image then scan it or trying to draw around the outline to make up for the distressed nature. Then I followed Creations with Christina's steps in Photoshop from this video, but found I had to do a little extra clean up due to the distressed nature of the stamps. But even then, the cutting lines were still a bit too jagged when I tried to import it into SCAL. So this evening I found that I could solve that problem by saving the Photoshop image as a bitmap then importing that into Inkscape. There I traced the bitmap to smooth the cutting lines as if I was trying to make a piecing file from an image. Once the bitmap was traced, then I could save the file and open the svg in SCAL. It took me several hours of trial and error, but eventually I had a SCAL file with cut files for all eleven flowers in my stamp set. Now that I've done what's likely to be the most challenging sets, I'm excited about the possibilities that this opens up.

Monday, August 22, 2011

Mojo Monday #205

We got some sad news today that one of Matt's cooks isn't doing well. He's been battling cancer for a while and had another surgery earlier this month. He had been home recovering but it turns out he took a turn for the worse at the end of the week. He's back in the hospital in an induced coma for a couple of days. So dear hubby asked me to make a card that people at the office could sign to let him and his family know we are thinking of him. But, I have a ton of things I need to do to get ready for our second try at a girls' camping trip this weekend. I saw this great heart card on Creations With Christina and designed a version on my Sure Cuts A Lot, but then it seemed way to girly. So I took my inspiration from Mojo Monday's sketch thinking I could whip out a card in no time flat and get on with my packing. Wrong! I couldn't find the right items, but finally settled on paper from Twinkle, Twinkle, Little Boy from My Mind's Eye and resorted to dying my own crochet thread with a combination of Perfect Pearls in Green Patina and some Stampin' Up Wild Wasabi ink to get just the right color. Then I had to play with my EK Success punches until I had the right combination. Anyhow, I ended up spending the whole evening playing in my craft room. I am so going to have to double time packing and shopping tomorrow to make it all work. But it will all be worth it when I'm sipping my wine, watching my TV and crafting to my heart's content.

Sunday, July 24, 2011

Mojo Monday Sketch 200!

Last night I was trolling the blogs, catching up on my reading, when I ended up on You Tube to watch a video posted on Creations with Christina's blog. One of the video choices following that one was this "black magic" technique shown here, which then led me to here. The technique looked easy to do and I actually had all the supplies so I gave it a try, going for something simple with this flower stamp. I use one main color of yellow and a slightly darker color in a few places. I added a little bit of white at the tips and a little bit of brown at the base of each petal and drew in the dark lines that give each petal it's distinct shape.
When I was done, I had this yellow flower, which seemed perfect to use on Mojo Monday's sketch this week (it's the 200th sketch - whoo hoo!). All the paper came from my scraps container, so apparently spending all last weekend cleaning, sorting and organizing my craft room paid off because I can actually find my scraps. This time, I actually do know where the paper came from. The solid orangy-yellow is from DCWV. The orange dotted paper is from My Mind's Eye All Twinkle, Twinkle Little Boy stack, the white and black are Georgia Pacific card stock. I used cinnamon Stickles to give the center of the flower a little bling. I have no idea where the flower stamp came from but the word "cherish" is from Stampin' Up's Warm Words collection.


Well, that's it for today. The day just flew by and now I had better get everything put away, finish that last load of laundry and get ready for work tomorrow. It may be a short week for me but that just means I have to pack a normal week's worth of work into a short period of time and will have to work hard the following week to get caught back up. Maybe that's why I never use my vacation time and always am trying to figure out how to use it before I lose it. But it will all be worth it since I'll have a long weekend to crank out some cards. Believe it or not, my stash is already starting to dwindle.

Friday, June 24, 2011

The one tool every papercrafter needs...

It's starting to become quite a tradition to make a card on Friday night. I'm becoming addicted to watching Creations with Christina's Stampin' on Friday videos. The cards are always so cute and inspirational. Now usually I don't have the products she shows and today was no exception. I don't have the cute little ticket die or the stamps, so I made a ticket using Sure Cuts a Lot. Once I had the basic outline made, I copied it, shrunk, put the new image on it's own layer, and used the program to center the smaller one in the middle of the bigger one. I then drew the smaller outline using my Cri-kits pens and then cut the larger outline to get my "ticket." I chose the word from the "Warm Words" collection from Stampin' Up because I need a thank you card to send to a woman who provided us a lot of help in a recent project at work. I used the paper scraps from the birthday card for my mother-in-law last weekend, and some plain grosgrain ribbon I picked up at Dollar Tree. So, unlike how nice Christina's looked, mine still looked a little plain to me, which is odd because normally I really like a plain style. But this time, it needed something. So I added a mat with DCWV card stock, a little pierced line using my Stampin' Up paper piercer and added some Cotton Candy Stickles to the centers of the big flowers.
Now it looked better, but something just wasn't right, which brings me to the one tool every paper crafter needs: the Cricut Spatula. Now you may be thinking, really? I don't even have a Cricut. Or maybe, I have a Cricut but I rarely use the spatula. How can it be that important?


Well let me ask you this: Have you ever taped down a piece of paper on your project and realized it's not straight at all or you don't really like it there only to discover that the paper has adhered enough that you can't really move it? Okay so you all may be perfect, but it happens to me all the time. Like tonight on this card where I realized that what was wrong was the ribbon knot was too messy looking. Of course that meant I have to take up the paper. So I slipped the thin blade of the spatula under the paper and used the blade to separate the mat from the patterned paper. The tape sticks to the spatula and can easily be rubbed off the metal surface (you can still see a little on my spatula in the picture since I hadn't really cleaned it yet). It worked like a charm and I've done it probably hundreds of time now. Once they were apart, I tied the ribbon again to get a neater knot and then re-taped the paper with my ATG gun.

So that's it. Now I'm happy with it.

Saturday, June 11, 2011

Thank you cards


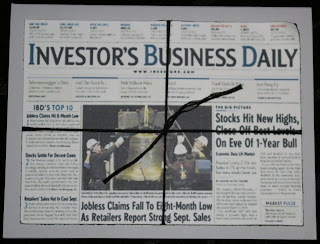
Even though I still have a few cards left in my stash, today I made a few specific thank you cards using some new techniques I either just learned or had never tried. Last night, when I was puttering in my scrapbooking room playing video games, surfing blogs and watching YouTube, I watched Creations with Christina's Stampin' on Friday video and was very inspired by the cute vintage newspaper card she made. Well, of course, I didn't have the newspaper stamp, the twine, the tiny tags die or stamp, but I figured I could still make it work. Hmmm... thinking about it now, that was a pretty strange assumption - I don't have anything she uses in the card except card stock and yet I still thought I could do it. Fortunately, I have Google. So I searched Google images to find a suitable newspaper image. I substituted embroidery thread for the twine. It isn't quite as cute, but it works:

A few months ago, I was shopping at Paper Zone and bought a little spray bottle of Tsukineko Sheer Shimmer Spritz in a shade called Sparkle. I've never really tried spraying on my layouts or cards but I've really liked when I've seen others using it or similar products. So the little spray bottle has languished in the top drawer of tool cart for probably about three months now. But today I decided it was time to give it a try. First I ran my background paper through the Sizzix with an embossing folder and then sprayed the background (I used my garbage can to contain the spray. It was surprisingly simply and dried quickly. I used some of my stash of flowers, some Irock gems and a little Offray ribbon to finish it off. Yeah for using my stash!


So after Christina's video ended, I started watching videos by 2stampis2b.com. I saw this wonderful video using embossing folders that left a void in the embossing so that you can stamp an image without having the texture where your image is. It's really hard to see, but in this picture, the card stock under the bunch of flowers is flat and all the rest has the texture from the embossing plate. It's a really amazing technique. The video demonstrating it is available here. I just had to try it. So I made my stamping void using a recycled part of an old box that held page protectors. It worked perfectly. Although next time I will probably make the void a little bit bigger. I then colored in the flowers with my Stampin' Up pens and sprayed the whole thing with Sheer Shimmer Spritz in Sparkle (and since that little bottle is running out quickly, I'm definitely going to try her spray that she shows how to make here). I then used Inkscape to make the ribbon slide and imported it into SCAL. I added the words "Thanks a bunch" and used my metallic Cri-kits pen to write it then cut it out. Then just layer the pieces and it was done. The picture shows the shimmer mist really well and the light really reflects off the writing much more in the picture. The shimmer mist is really much more subtle in person and the writing is in much starker contrast.


So now I just have to make a sympathy card and I can get back to my layouts. Oh, and I have to actually mail a whole bunch of cards that I'm behind in mailing out too... Oh well, better late than never I guess.