I've been home the last two days and yet really haven't had the mojo to get some serious crafting done. Yesterday, I chalked it up to being tired from the whirlwind trip to Seattle. I did some playing, but not a whole lot. I expected today to be a marathon day in the craft room and, yet, I didn't really get much done. I finished up a card and then decided I needed to clean my craft room a bit. Hubby was home today so I mentioned a shelf I would like built for my craft room and we talked through a bit of a move around. Well that, of course, meant a trip to Lowe's. While there, I got the call that my intern died over the weekend. I was shocked. He had the flu last week and I sent him home to rest (and keep the rest of us from being exposed). We emailed every day but it didn't seem like it was anything out of the usual for a flu and now he's just gone. It seems a bit unreal.
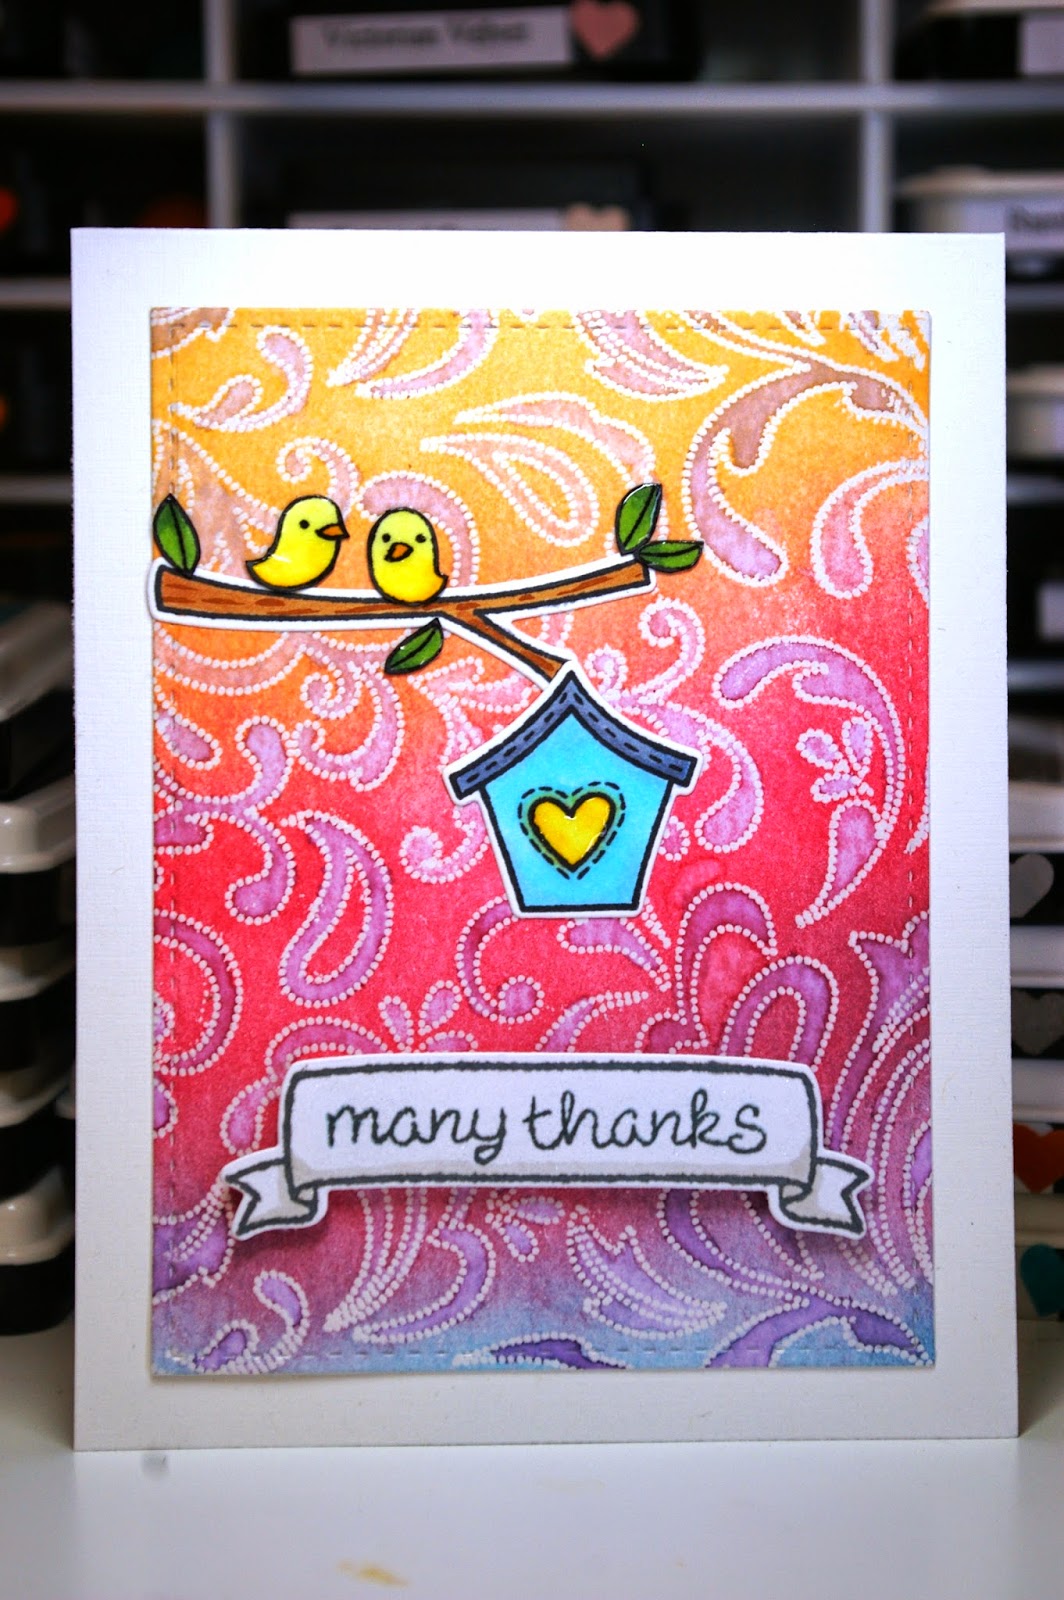
So needless to say, I'm not feeling very crafty right now. I've finished cleaning my craft room and I think that's all that's going to get done today. But at least I have this card I finished up to share with you. I posted the background I was working on it back on Instagram on Sunday. It's a background stamp I bought at Impress while I was there for Sandy's copic class. I stamped it with Versamark ink and heat embossed it with some clear embossing powder. I sponged on three colors of Distress Ink in overlapping stripes (I just love those new mini round applicators - I get much nicer results). Then I added some watered down Distress Ink over the flourishes but then toweled it off after a minute or so.
I cut the completed panel down with the smallest frame from Mama Elephant's Femme Frames. I practiced my copic coloring on images from Lawn Fawn's Home Sweet Home set then cut them out (fussy cutting for the birds and leaves and dies for the branch, banner and house). I stamped the banner in Smoke ink from Simon Says Stamp, but the rest were the standard Memento Tuxedo Black ink. Once it was all cut out, it was just a manner of gluing them in place and adding some pop dots on the sentiment. Then because I'm obsessed with Wink of Stella and Glossy Accents lately, I added Wink of Stella to the banner and Glossy Accents to the bird, the leaves and the heart on the bird house.
Showing posts with label Copic. Show all posts
Monday, August 25, 2014
Wednesday, July 9, 2014
Thank You Inspired by Jennifer McGuire
I was completely enthralled watching Jennifer McGuire use Distress Inks with embossing folders. You can see her beautiful work and check out her video here. I immediately knew I had to give it a try.
For this background, I spread several colors of Distress Ink on the QuicKutz Zig Zag embossing folder, spritzed it with water and then ran it through my Big Kick. While it dried, I stamped the banner from Lawn Fawn's Bannerific with some Simon Says Stamp Soft Navy ink then cut it out with the matching die. I stamped the two cute little birdies from the set with some Grey Flannel Memento ink and colored them with my copic markers. I had to fussy cut those but they are so cute on the card as if they are holding the banner. I love how they look with some pop dots behind them. I added a little Wink of Stella to the banner and some simple coloring to shade the banner. I finished it off with some clear sequins because lately it seems like everything needs sequins.
Wednesday, June 11, 2014
I Love You to the Stars and Back
I've had this idea percolating in my head since Sunday and I finally had some time to get my fingers inky. I used two Lawn Fawn stamps sets: Happy Trails and Lucky Stars. I inked the sentiment and stars using Versamark and heat embossed them with clear power. Then it was time for some inky fingers. I used Scattered Straw, Seedless Preserves, a little bit of Dusty Concord and a whole lot of Chipped Sapphire Distress Ink to make my night sky. I really need to get those round blending tools, but I made the rectangle ones and some Tsukineko dabbers work. After stamping out my trees, car and trailer in Momento ink, I colored them pretty simply with my copic markers. Then I cut them out with the matching dies. I decided they needed some grass, so I cut out some green card stock with my Lawn Fawn grassy border die and added a little Mowed Lawn Distress Ink to the edges. Then it was just a matter of building the background with some tape and pop dots.
Friday, May 23, 2014
Dream - Still Inspired by Watercolor for Card Makers
Even though the onlinecardclasses.com Watercolor for Card Makers class is officially over today with new content having ended last weekend and the galleries closing tonight, I'm still working through all the fun backgrounds I created and the inspiration just keeps coming. When Lawn Fawn released their new products at Winter CHA back in January, I just had to have most of them. There were a couple of sets where I wasn't sure I would get as much use. One of them was the Dream set. I could see it really being useful for art journaling or perhaps graduation cards, but since I don't do the first and I don't know many people still in school (and I have at least one graduation set already) I thought I would give it a pass. But I've seen a couple of cute cards with it lately so it's been rattling around in the back of my mind. Last week, I took a rare lunch break to walk downtown, oh, not because I really had the time to take a lunch break, but because my legs itched something fierce from this stupid rash that developed after a pedicure and I desperately needed hydro cortisone, so, of course, I had to do a little craft shopping too at Runaway Arts and Crafts since I was already in the area. I found the Dream set and matching dies and decided that was my call to snap them up.
I have this background I made on the first night of class using the Impression Obsession Circle Fusion background stamp, some Versamark Ink, some clear embossing powder and then some watercolor over the stamped image. I played around a lot with what to put over it and realized I really didn't want to cover it too much. I had a Lawn Fawn banner from the Winter Gifts set sitting on desk and I realized it was about the right size for what I wanted. So I stamped it up, then added some Old Paper Distress Ink to give it a little wear. For the feathers, I colored them a little with Copics (B95 mostly) and then cut them out. I added pop dots and some sequins to finish it off.
Wednesday, March 26, 2014
Another Newton's Nook Image
Today I have yet another card made with the Newton's Nook set called Newton's Birthday Bash. I used a design very similar to the one in yesterday's card. The images were stamped onto Neenah white cardstock using Tuxedo Black Momento Ink so I could color with my markers. For the card on the left, I used some markers from Stampin' Up (I wasn't really very happy with the outcome). For the card on the right, I used my new Copic markers. I liked the Copic markers much better for this process. I cut the finished images out using that same Lawn Fawn Stitched Journaling Card die. For the paper, I used two more sheets from the Crate Paper 6x6 Party Day pad cut down to an A2 side and wrapped with baker's twine. For the banners, I again couldn't find the right paper. This time I used a couple of Distress Ink ink pads and my blending tool to color them to go with the rest of the card. Then, I used that Lawn Fawn Bannerific stamp and die combined with the sentiment from Sophie's Sentiments.
Monday, March 24, 2014
Playing with Newton's Nook
I recently received my order for stamps from Newton's Nook. They have some of the cutest stamps and how could I not support a company named after a cat? When I unpacked them, Smoke, of course, had to come in to inspect them.
After they received the "Smoke Seal of Approval," I broke open the package for Wagon of Wishes and got inky since I had been waiting for these to make a very special thank you card. The stamps inked up and stamped just beautifully and I used my brand new Copic markers (thanks Mom!) to color this cutie. Then I stamped the sentiment using a combination of stamps from the set and from a Lawn Fawn "thanks!" stamp I had on my craft desk on a banner stamped and cut from the Bannerific set and dies from Lawn Fawn. I used some left over paper from the Basic Grey Carte Postale 6x6 pad that came with a past Citrus Twist Project Life monthly kit. Even the twine is some that I saved from the packaging of a monthly kit.
Subscribe to:
Posts (Atom)